Mugen & King Nostalgia Displays for Dyno Day 2013

It was time for my annual pilgrimage from Oregon to Wisconsin for the 2013 Dyno Day. I arrived about a day early to help with preparations. This year, Scott had a special project for me: convert the 3 glass showcases in the King showroom into a mini-display of Mugen and King nostalgia items that might be interesting to Dyno Day attendees. "No problem," I thought. How hard could that be?

Turns out it was quite a challenge! This is King Motorsports, and this was Scott. King has worked with Mugen for over 30+ years -- so the amount of items Scott had on hand was overwhelming. The challenge became one of editing -- the hardest decisions were choosing what to leave out!

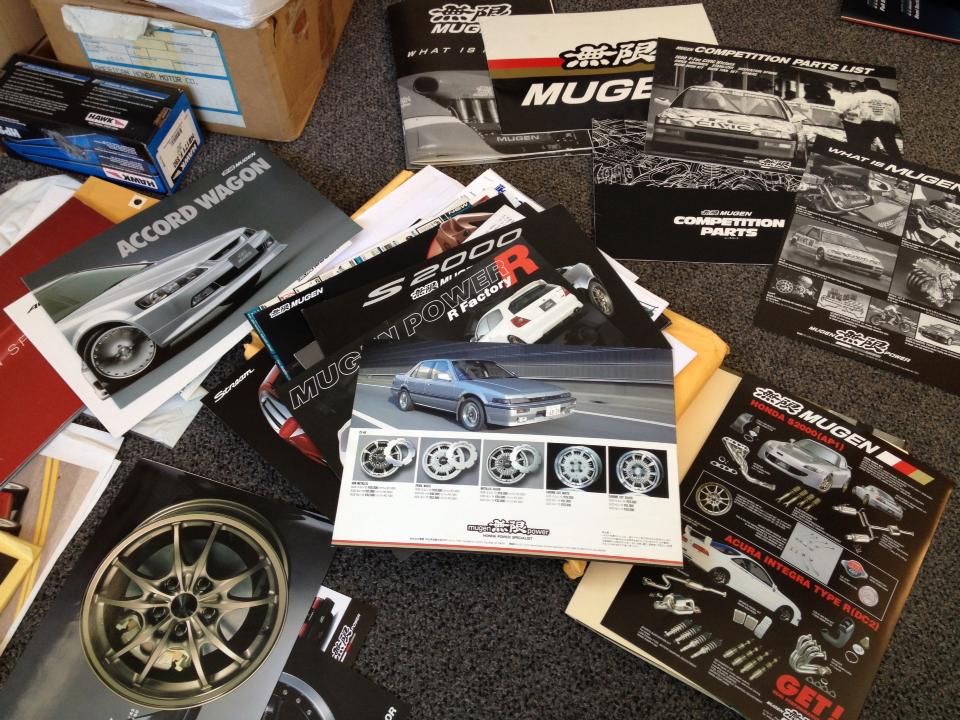
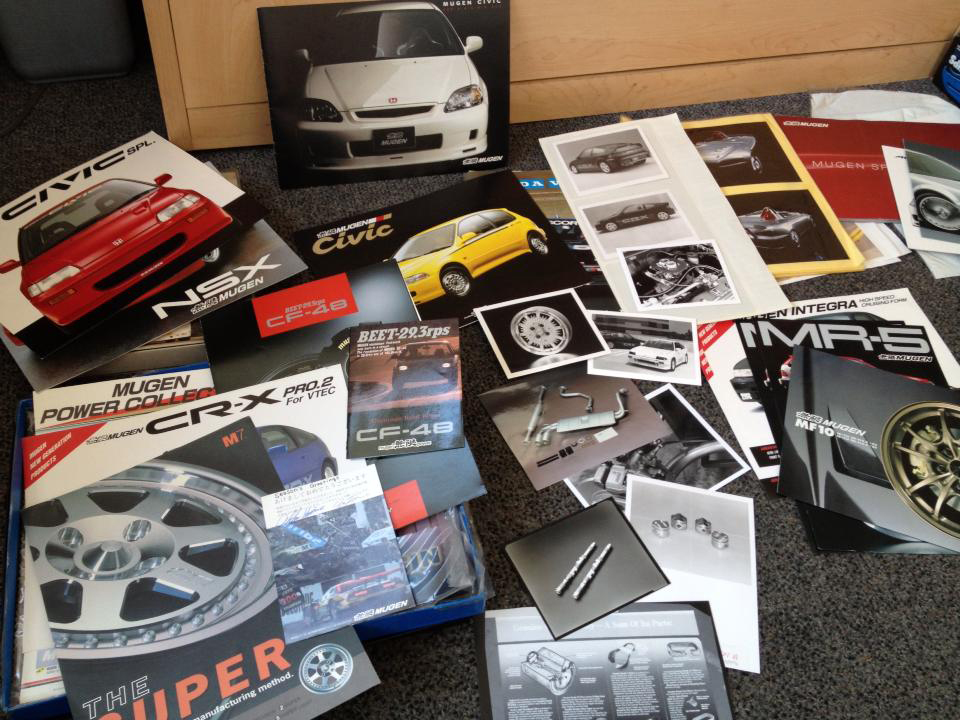
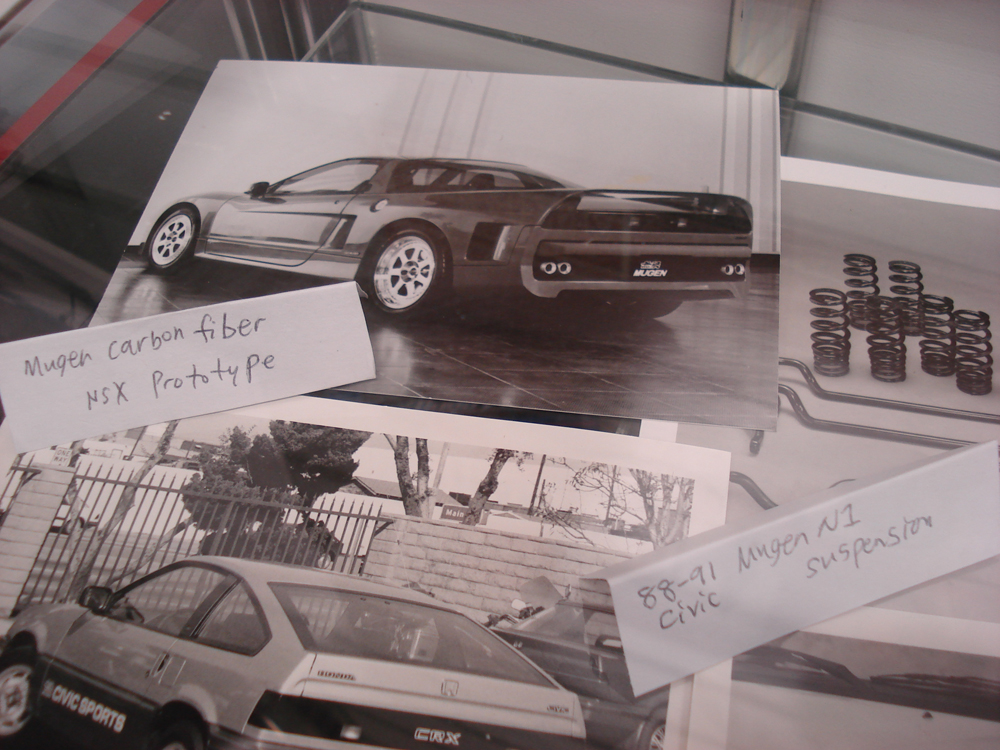
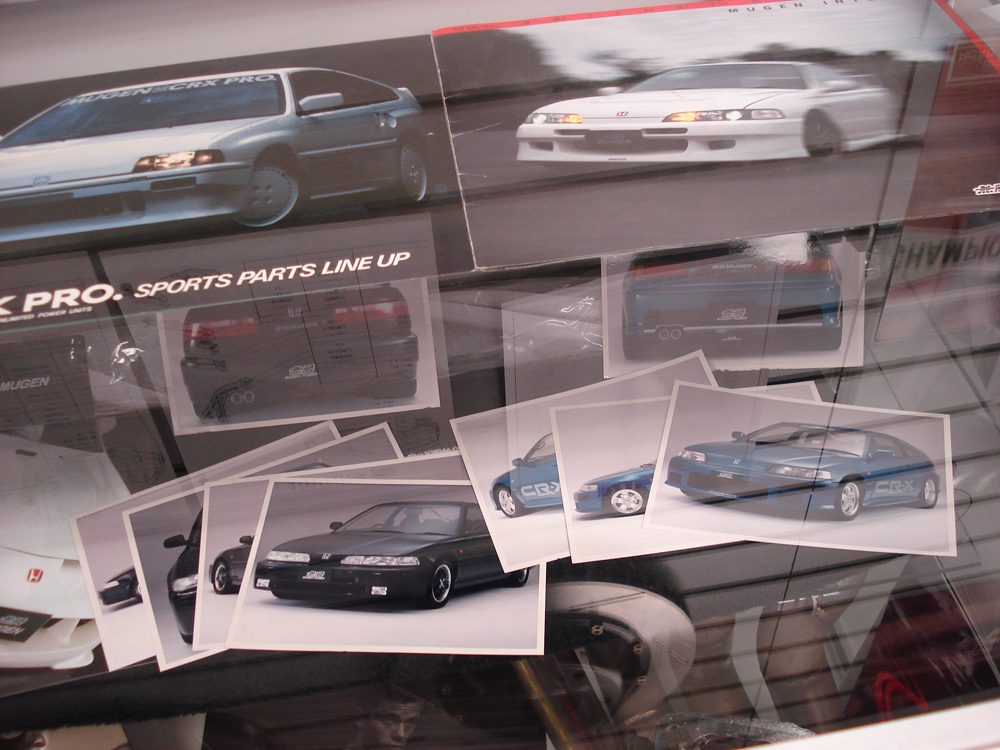
First up, Scott showed me a stack of 80s and 90s Mugen brochures in his office. Mixed in were original product and vehicle photographs from catalog mockups. I laid out a fraction of the brochures in that first stack, taking it all in:


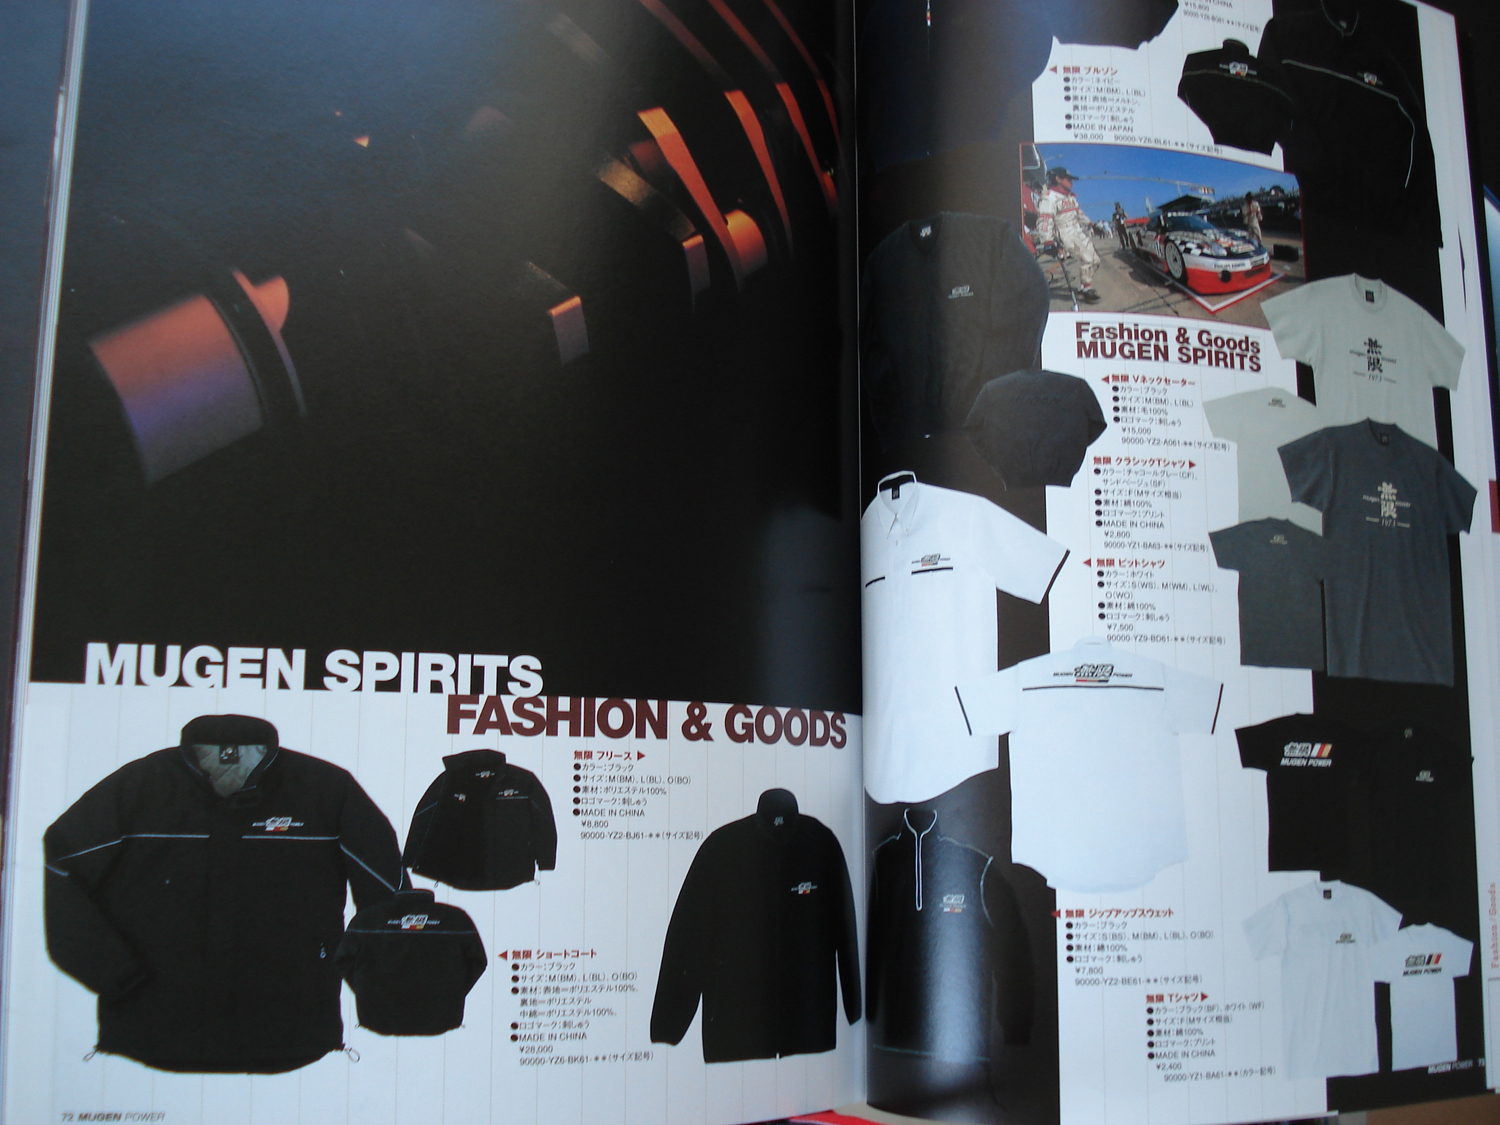
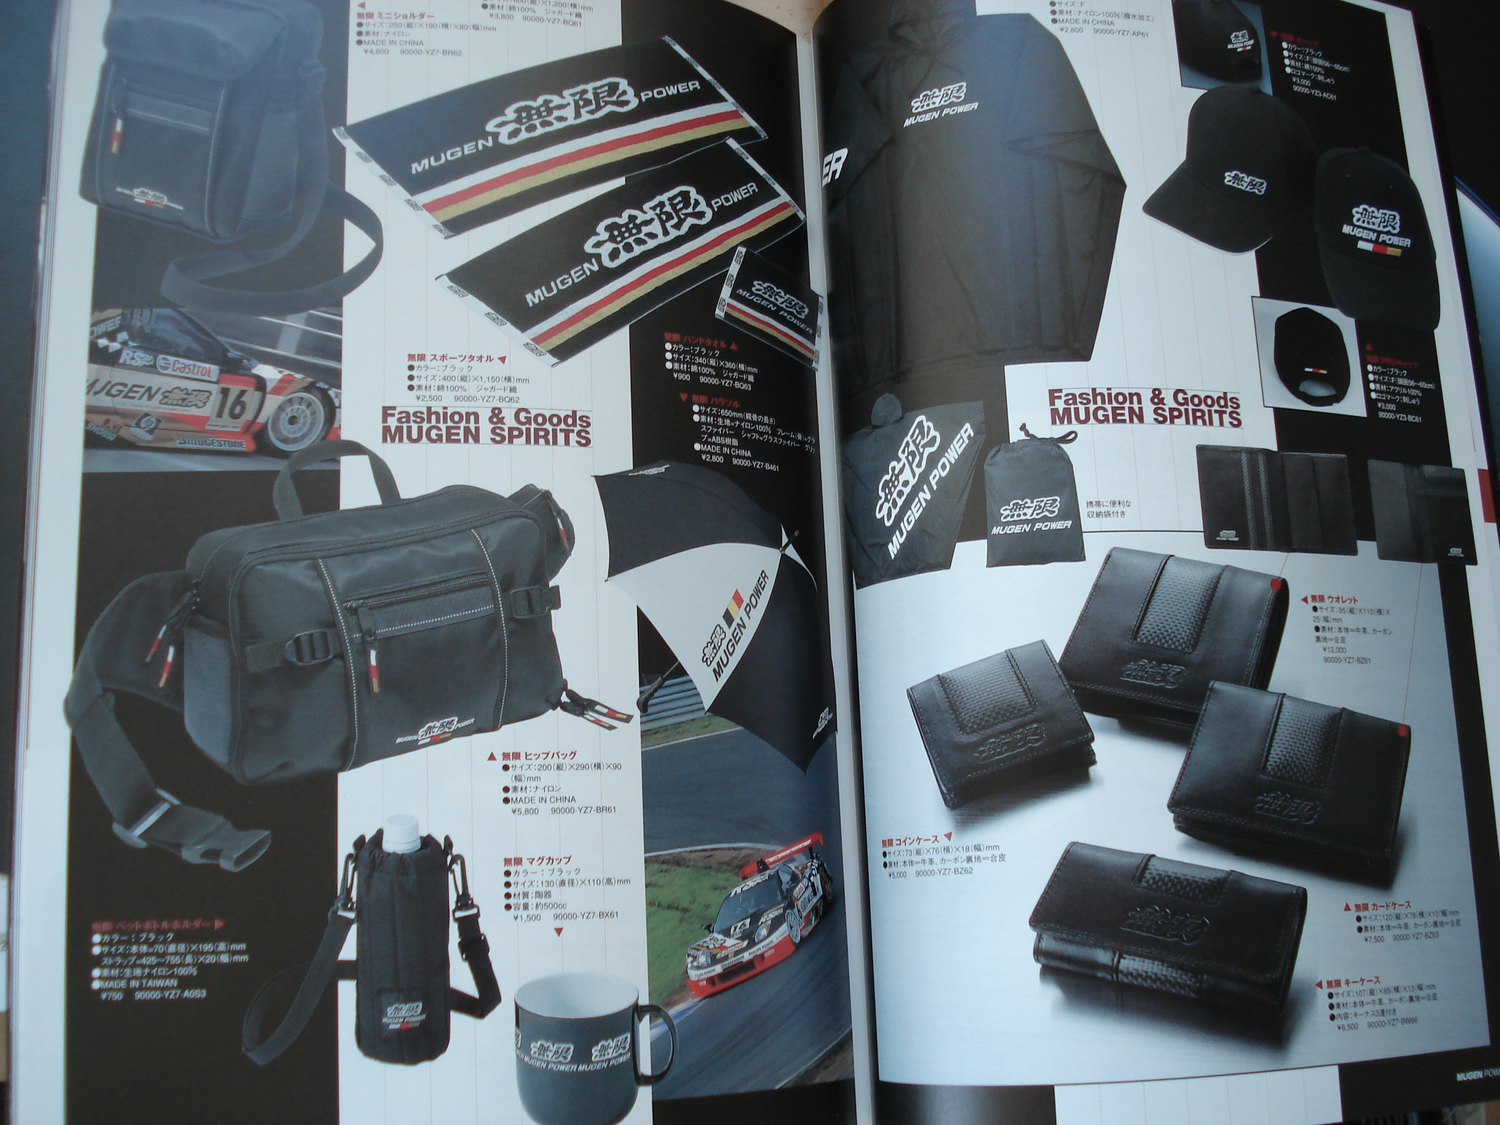
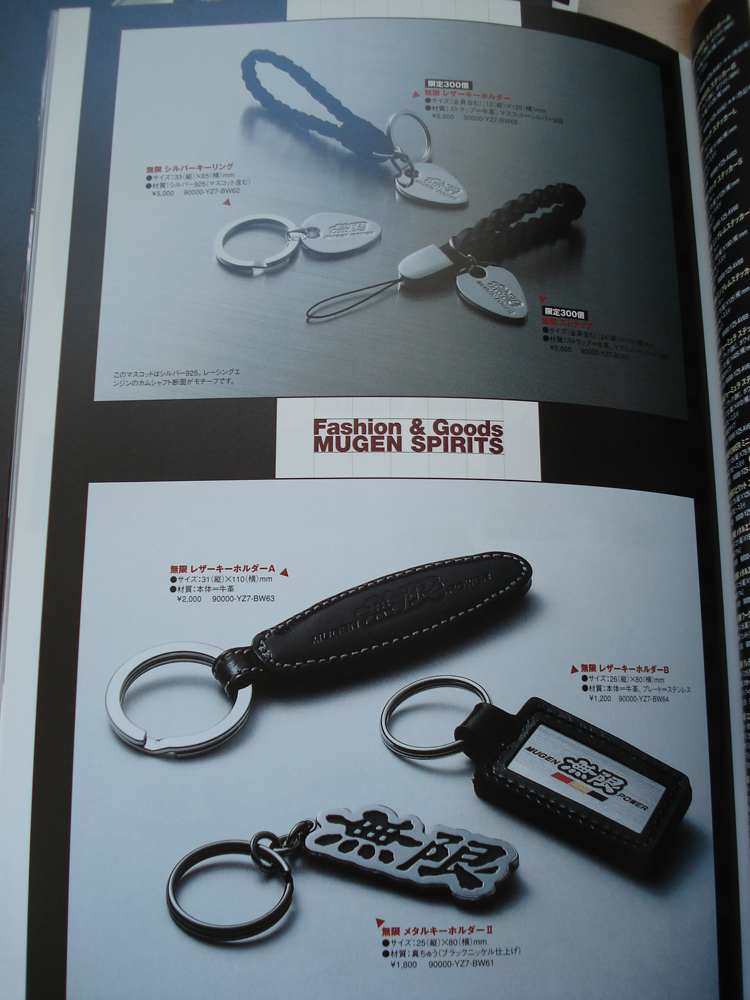
Honestly I wanted to scan every single page of every brochure and catalog. But my guess is that would have taken about a month for an intern to complete if they worked full time. I was able to snap a few quick pics of a few apparel/accessory pages with items I had never seen before. These pages are from one of the book-thick annual Mugen catalogs:


He had several other drawers full of original Mugen brochures for wheels, brakes, seats, steering wheels, suspension, EG/EK/EF Civics, Integras, S2000, Accord and NSX. Even some product brochures for JDM-only cars. Basically this was the mother load of materials for Mugen brochure enthusiasts.

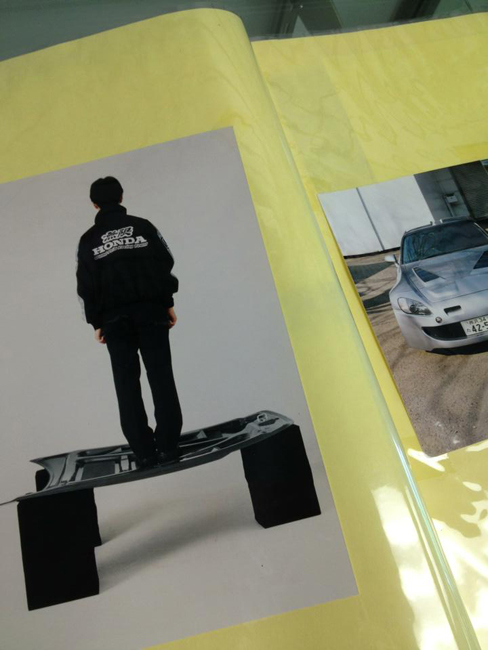
I found a hand-assembled photo book of the aero parts installed on the prototype Mugen S2000. I had seen a few of these pics before in the Mugen S2000 blog post, but really liked this unique pic demonstrating the strength of Mugen's hood:


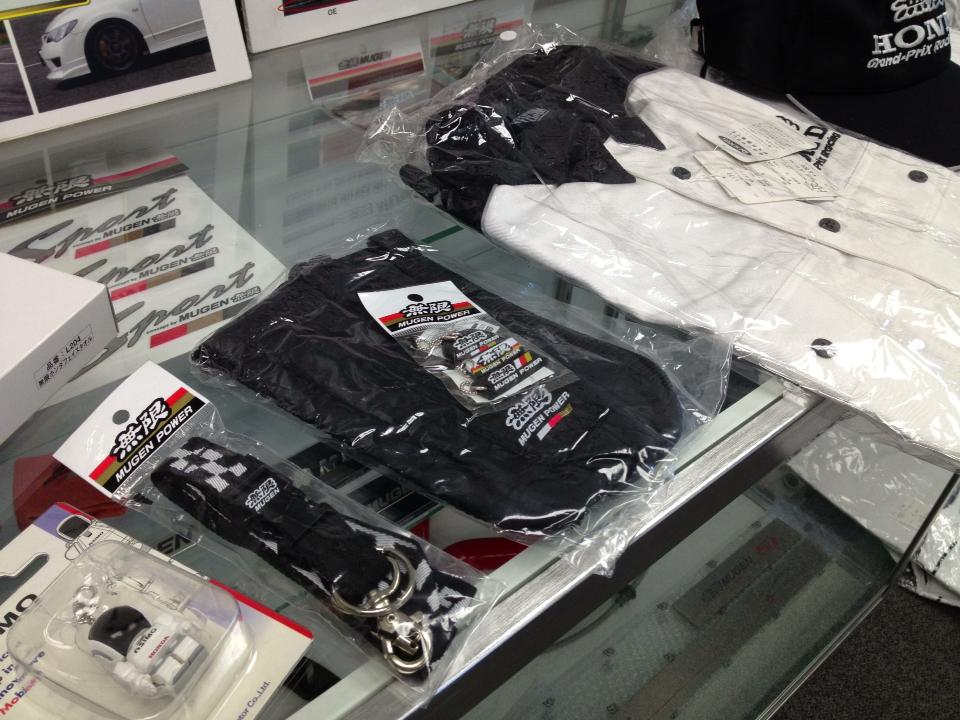
As if that wasn't enough, Scott also had a few bins of other treasures in storage to show me. He had shirts, shoes, lanyard, key holder and a necktie from the Mugen Honda F1 Collection.


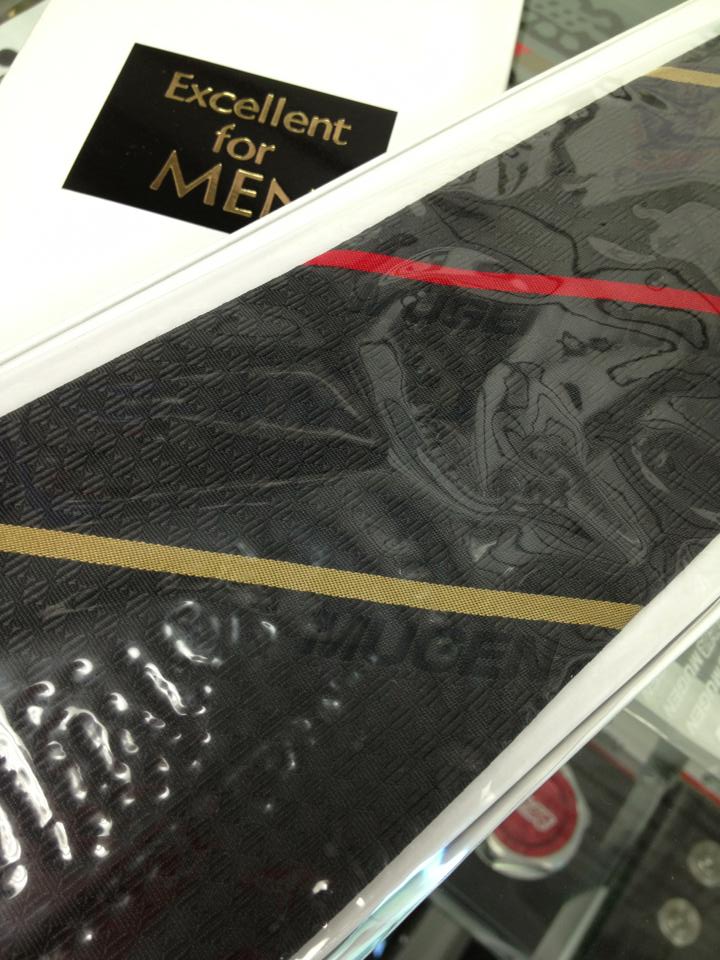
"Excellent for MEN": Look closely at the necktie to see the black-on-black MUGEN logos.


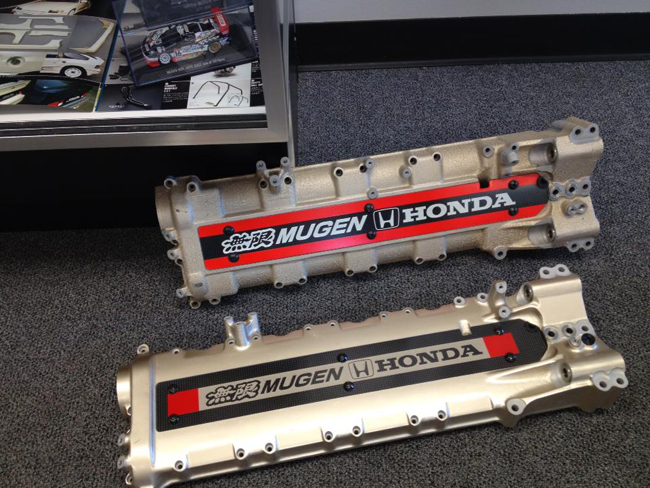
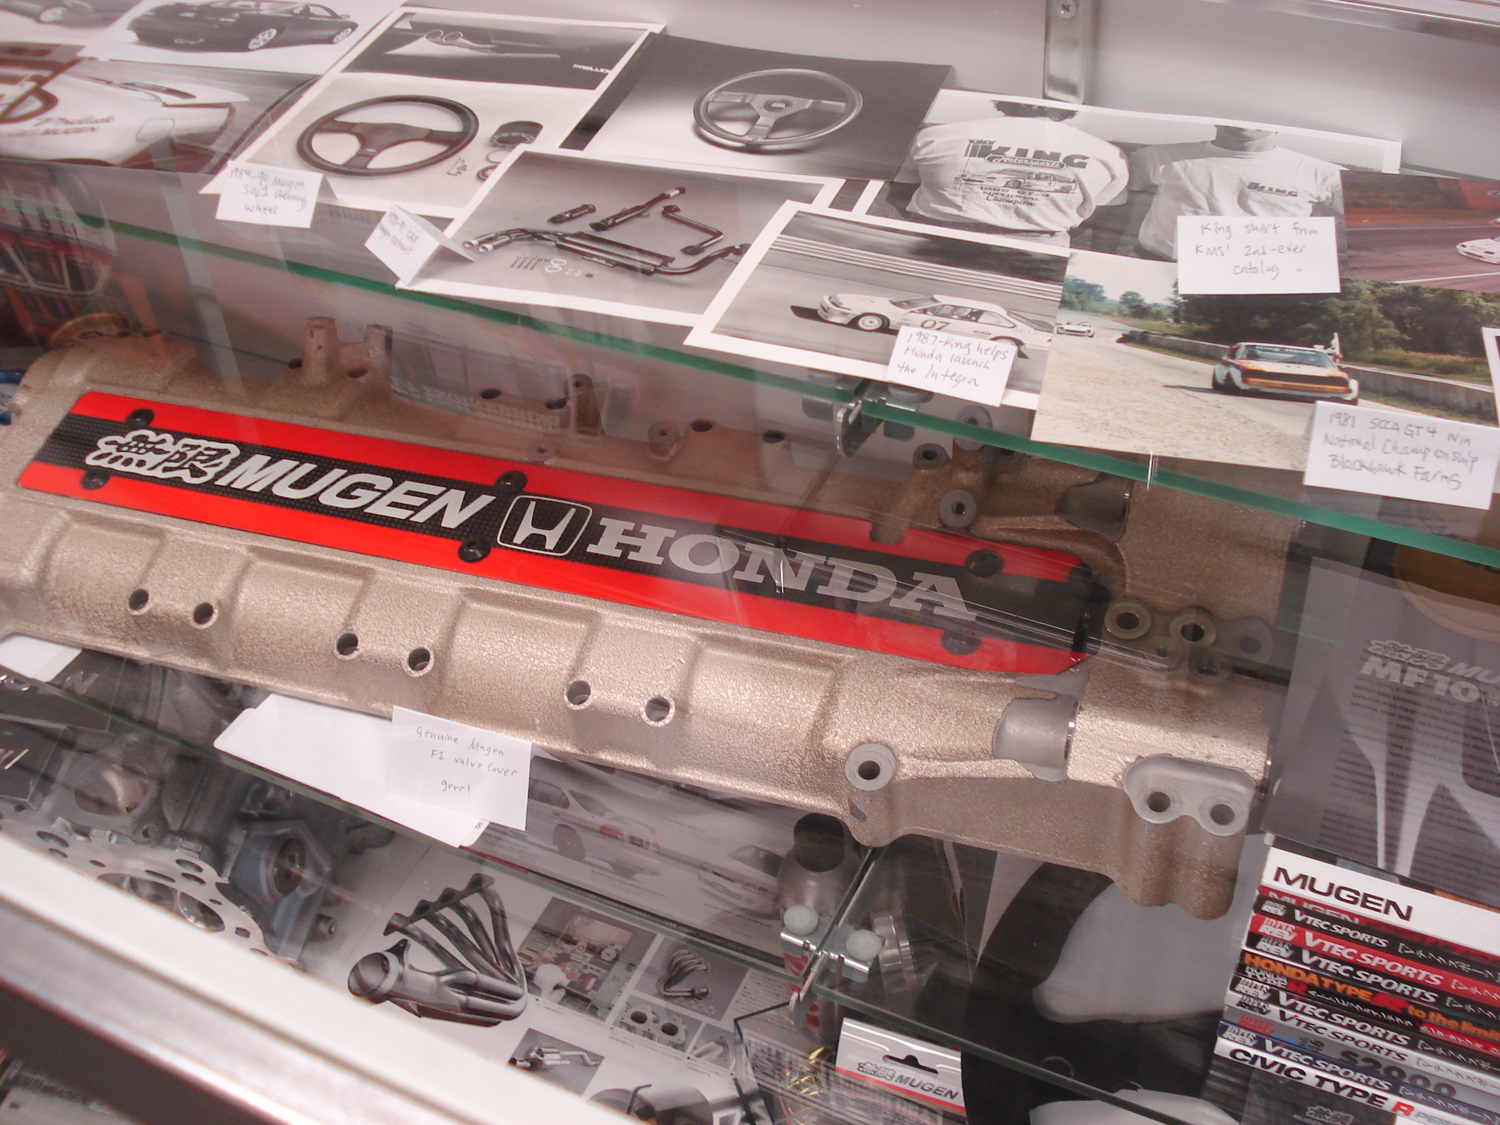
A super-special addition to the display were these amazing F1 valve covers sent to Scott by Mugen Japan -- these two priceless valve covers were still in the bubble wrap. It was the first time that Scott had opened up these V10 beauties! In the picture below, the upper cover is from the 1997 MF-301HB; beneath is a cover from the 1996 MF-301HA (you can see more of these valve covers and their specs in the "Mugen Cover Art" blog post).


After a few hours, I had the glass showcases cleared out and had started filling them with Mugen and King nostalgia. Originally I thought about a nice, orderly display with items laid out with plenty of breathing room (ala The Smithsonian) -- but quickly realized that would not work. There was just too much good stuff to fit in there. So I took the visual-overload approach!


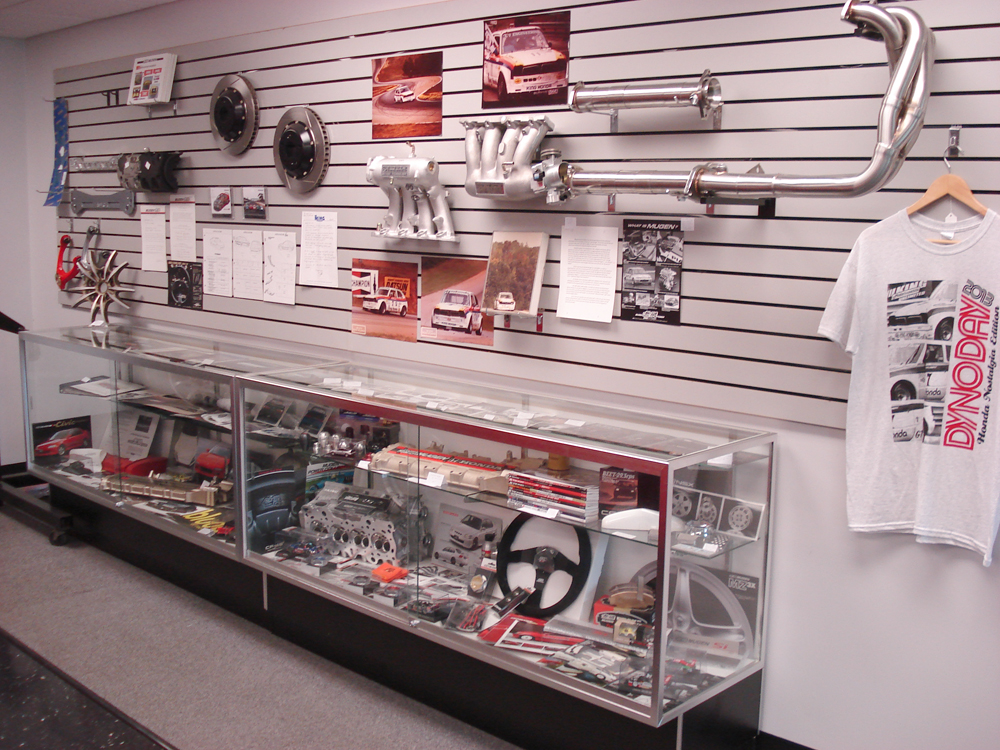
By day's end the displays were pretty much filled to the brim. Here are the showcases in their final form - ready for the Dyno Day attendees!


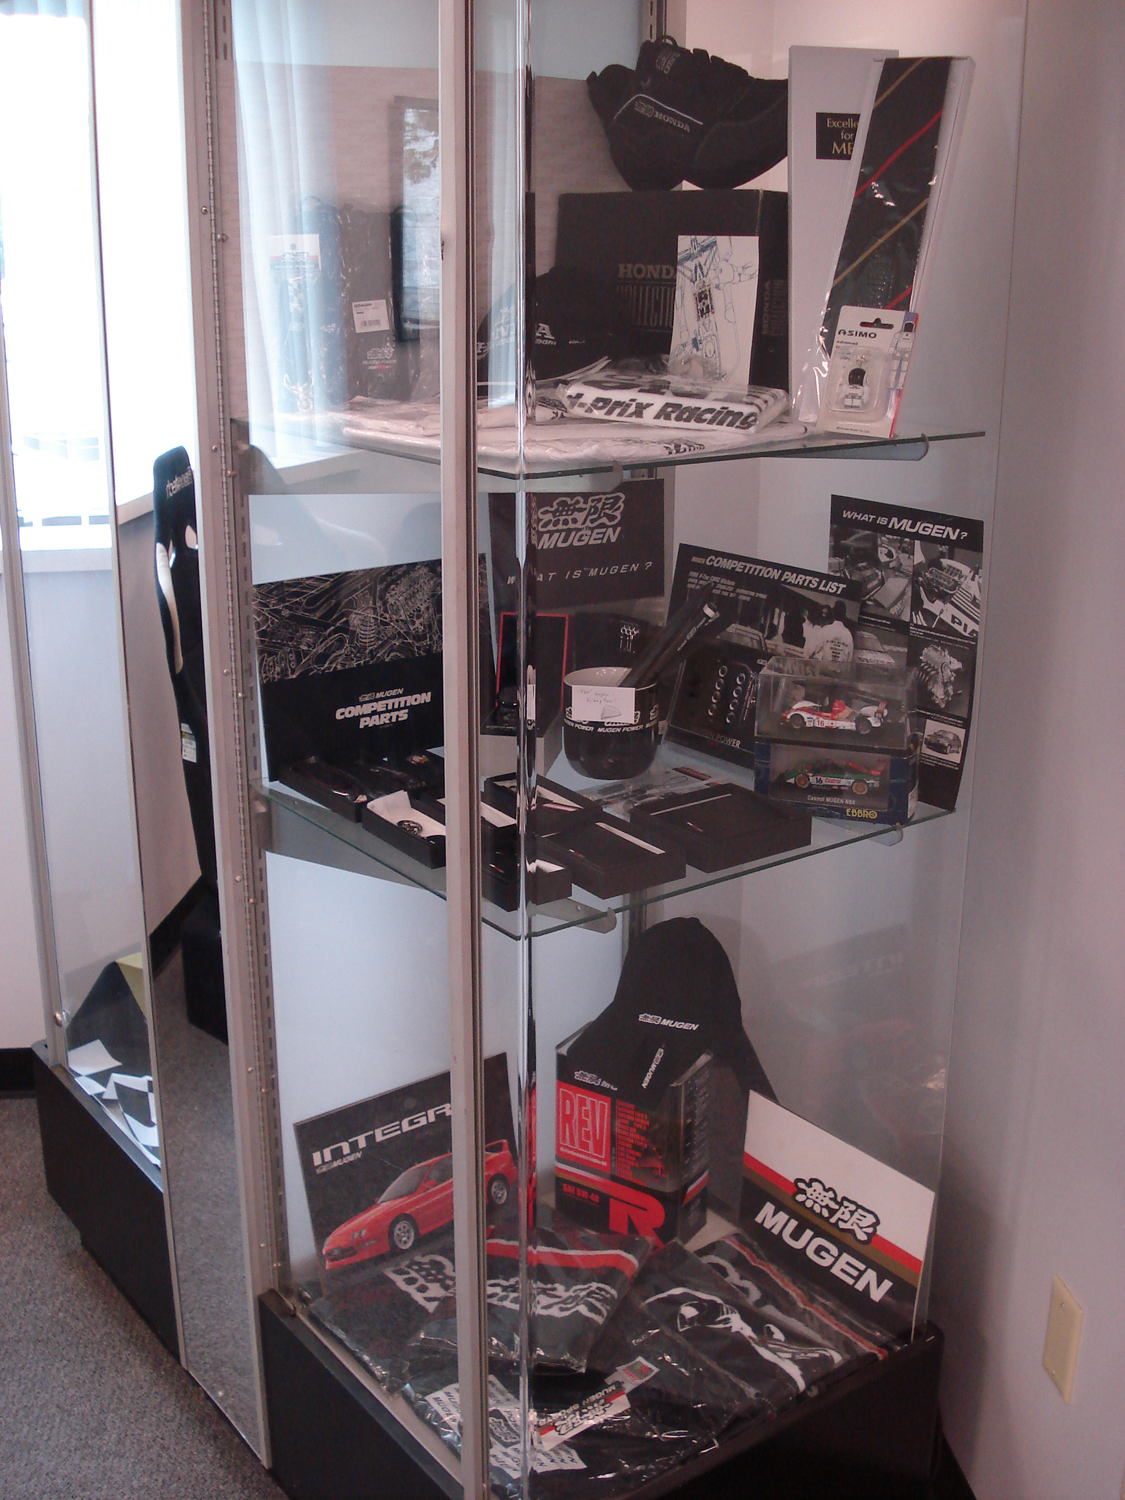
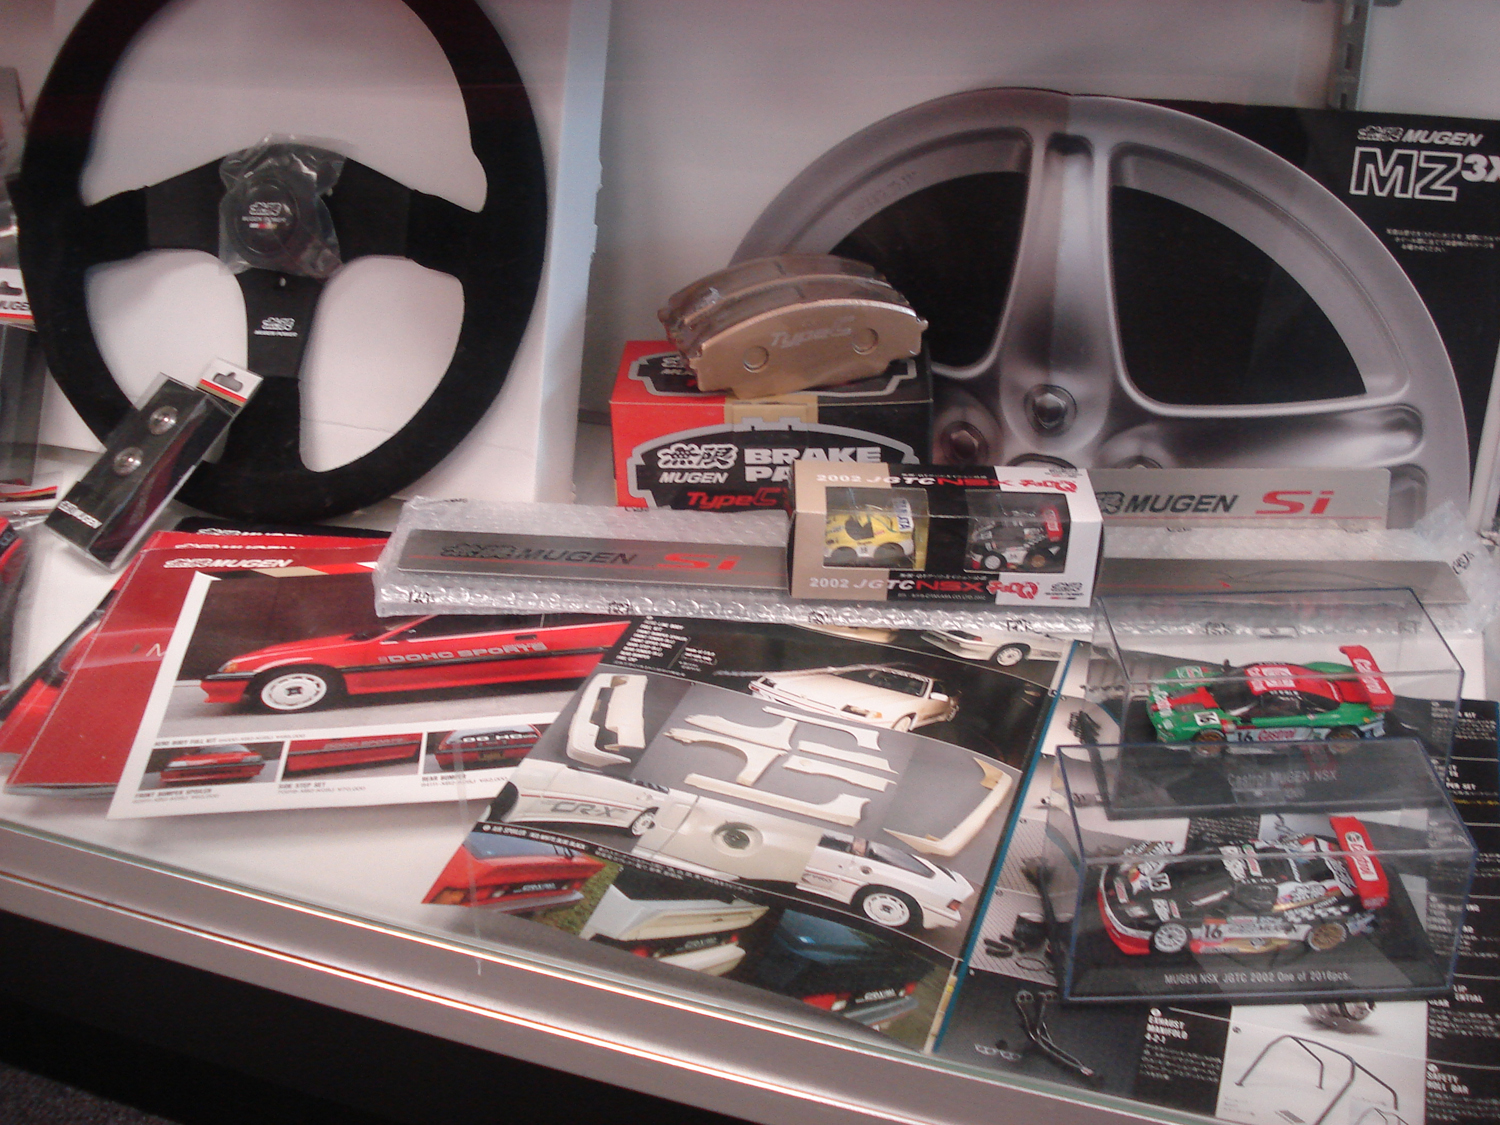
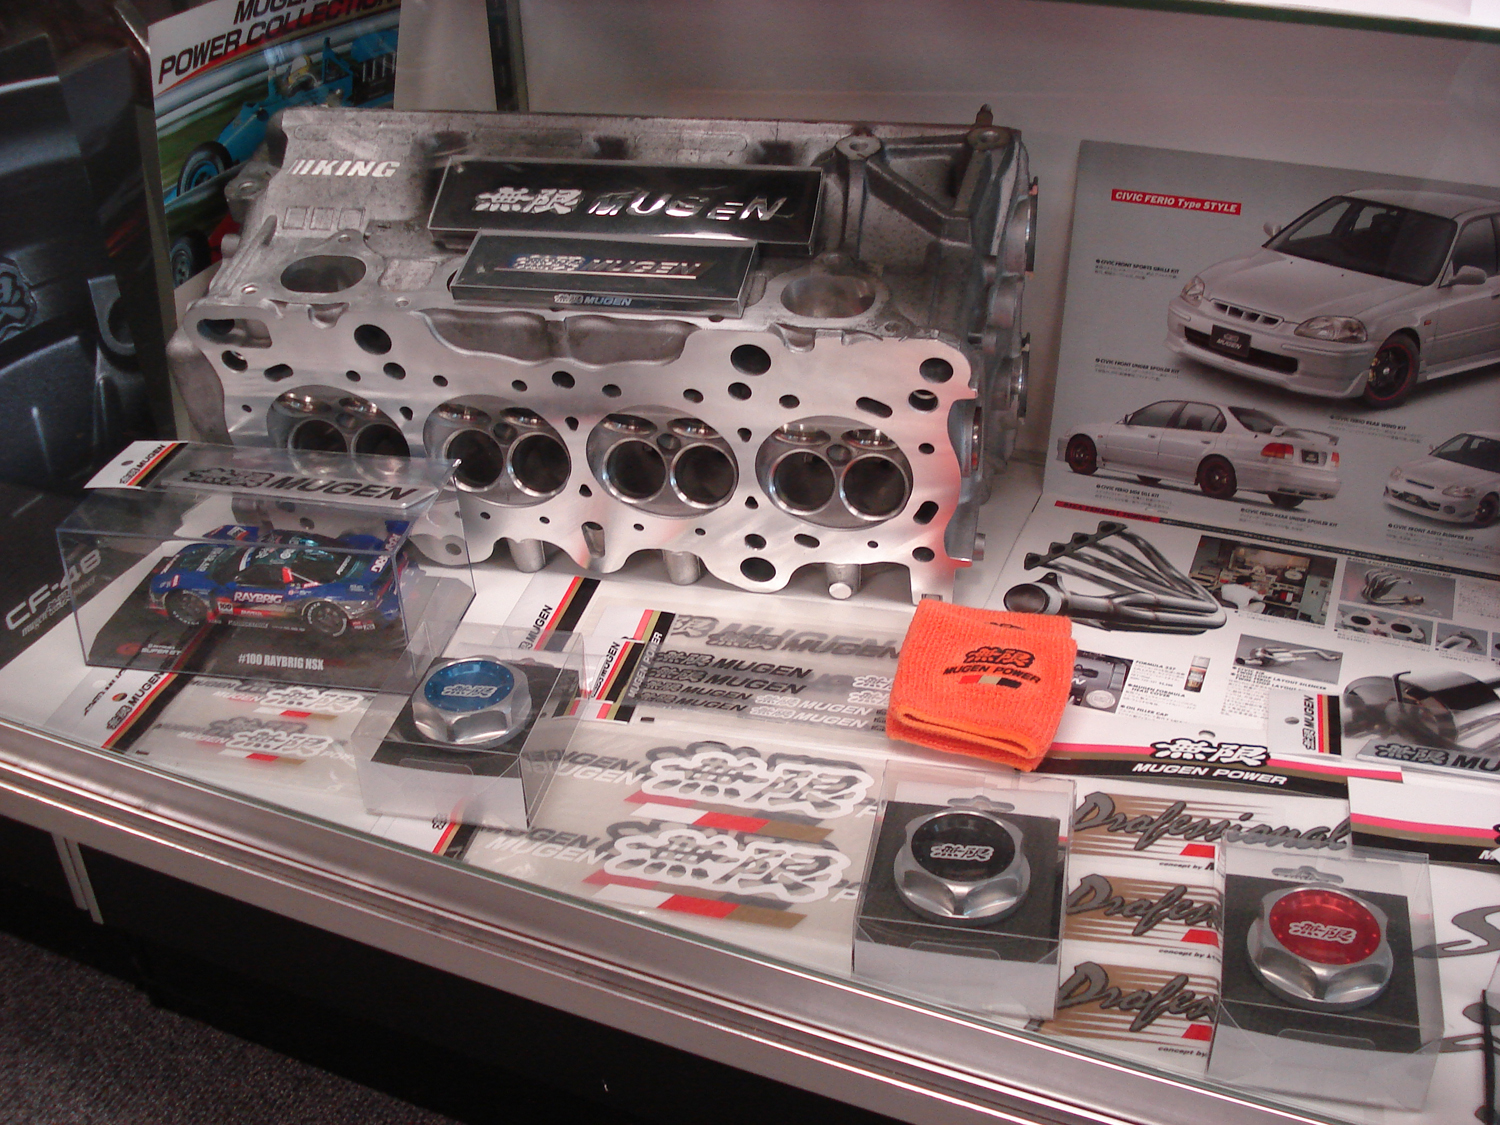
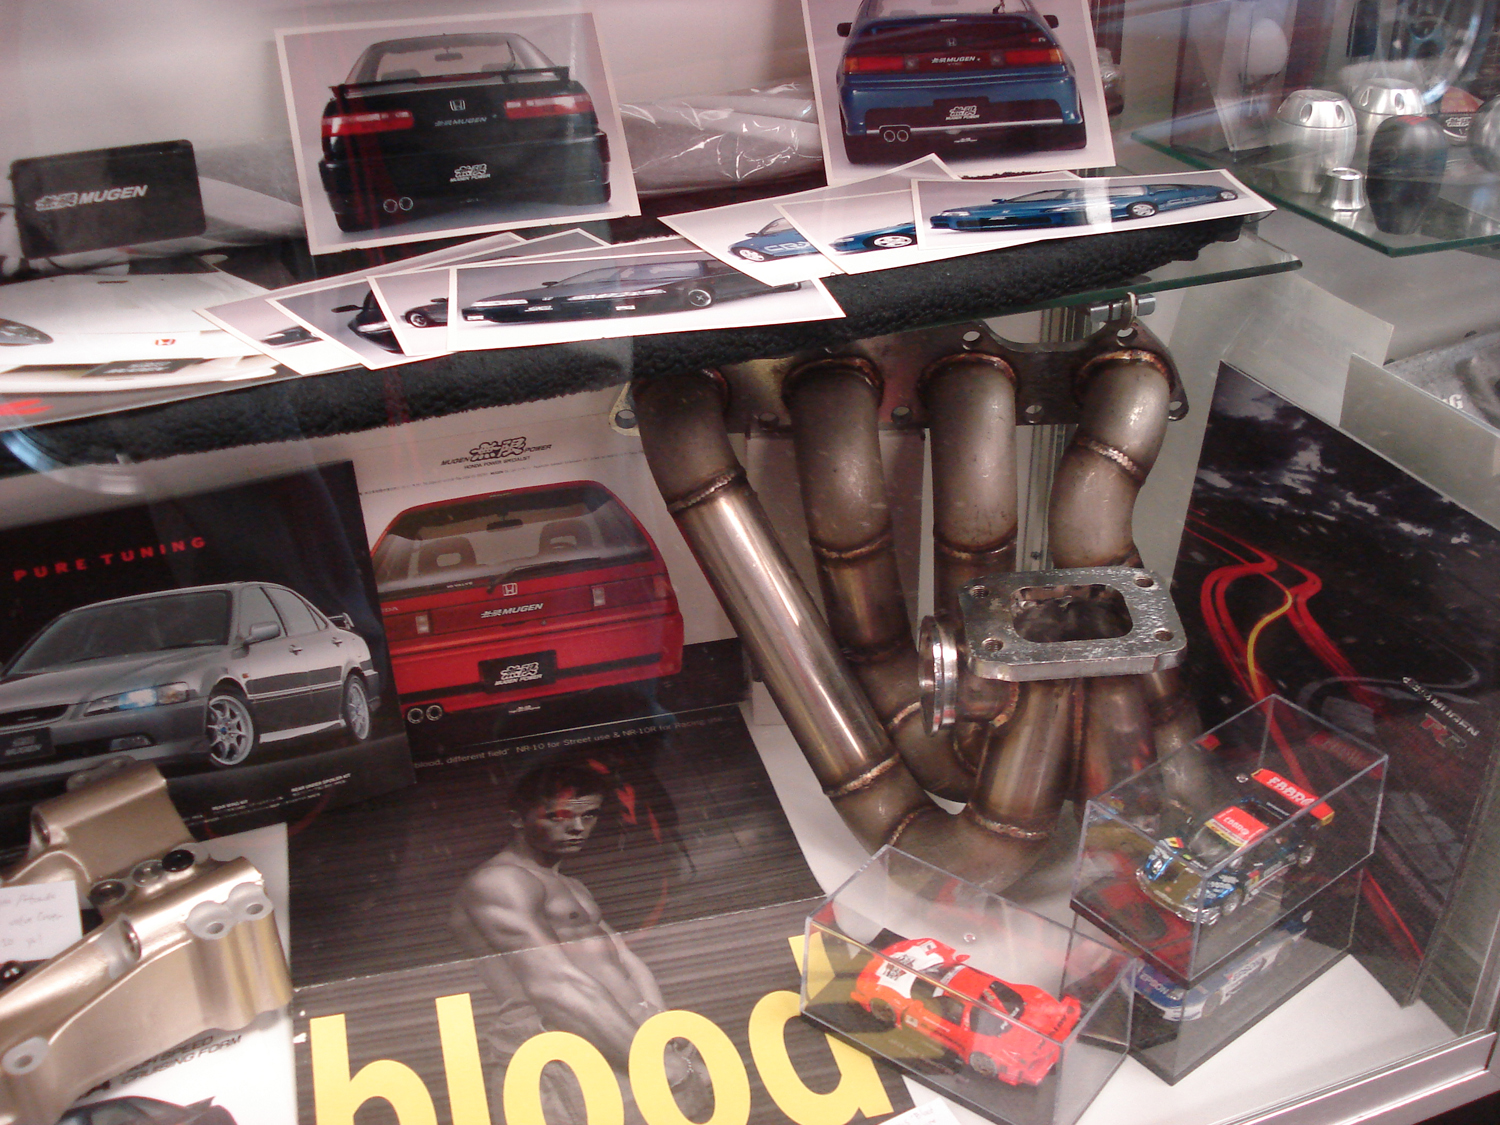
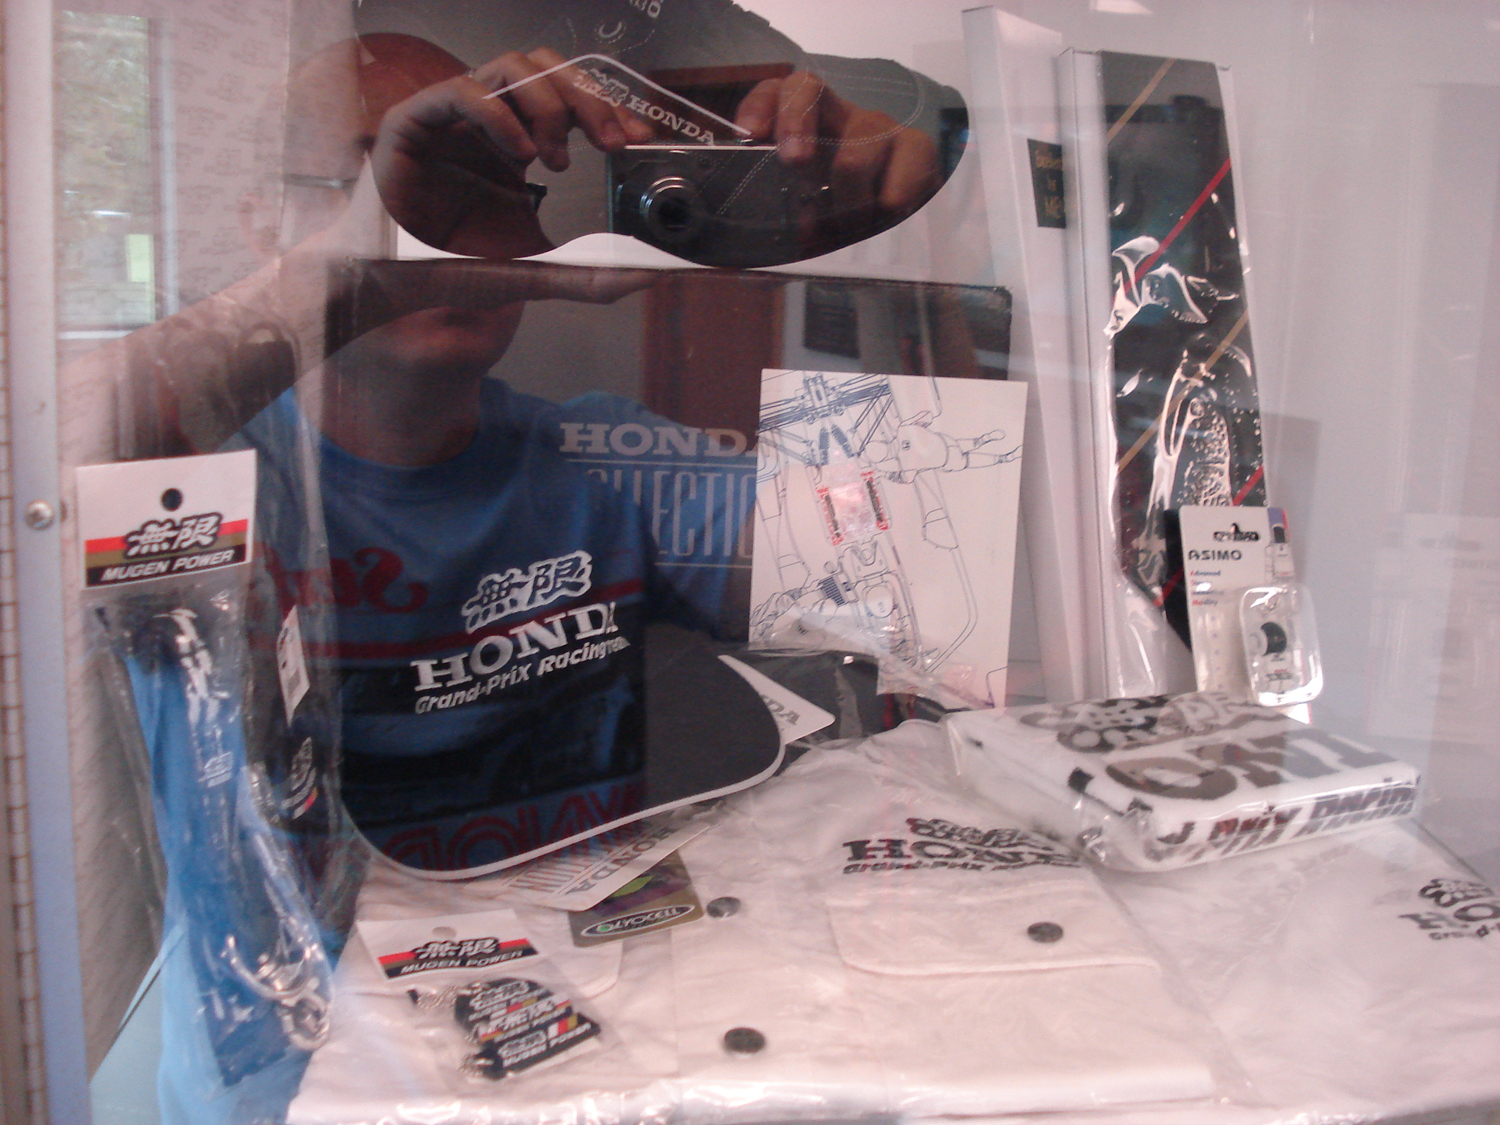
Here's a closer look at Showcase #1!


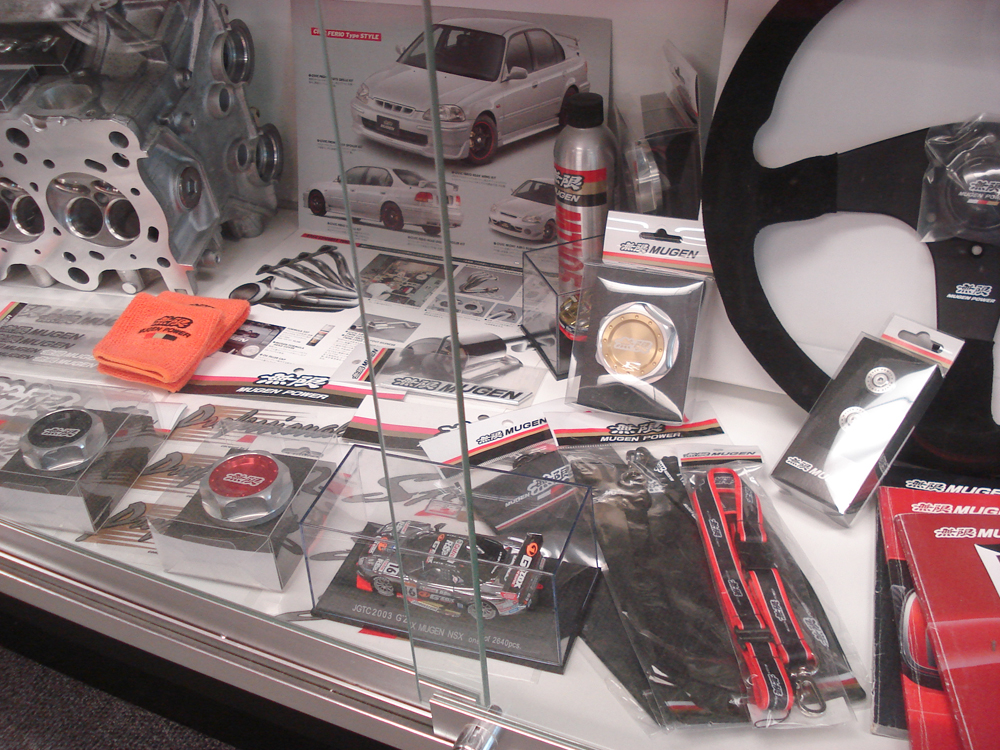
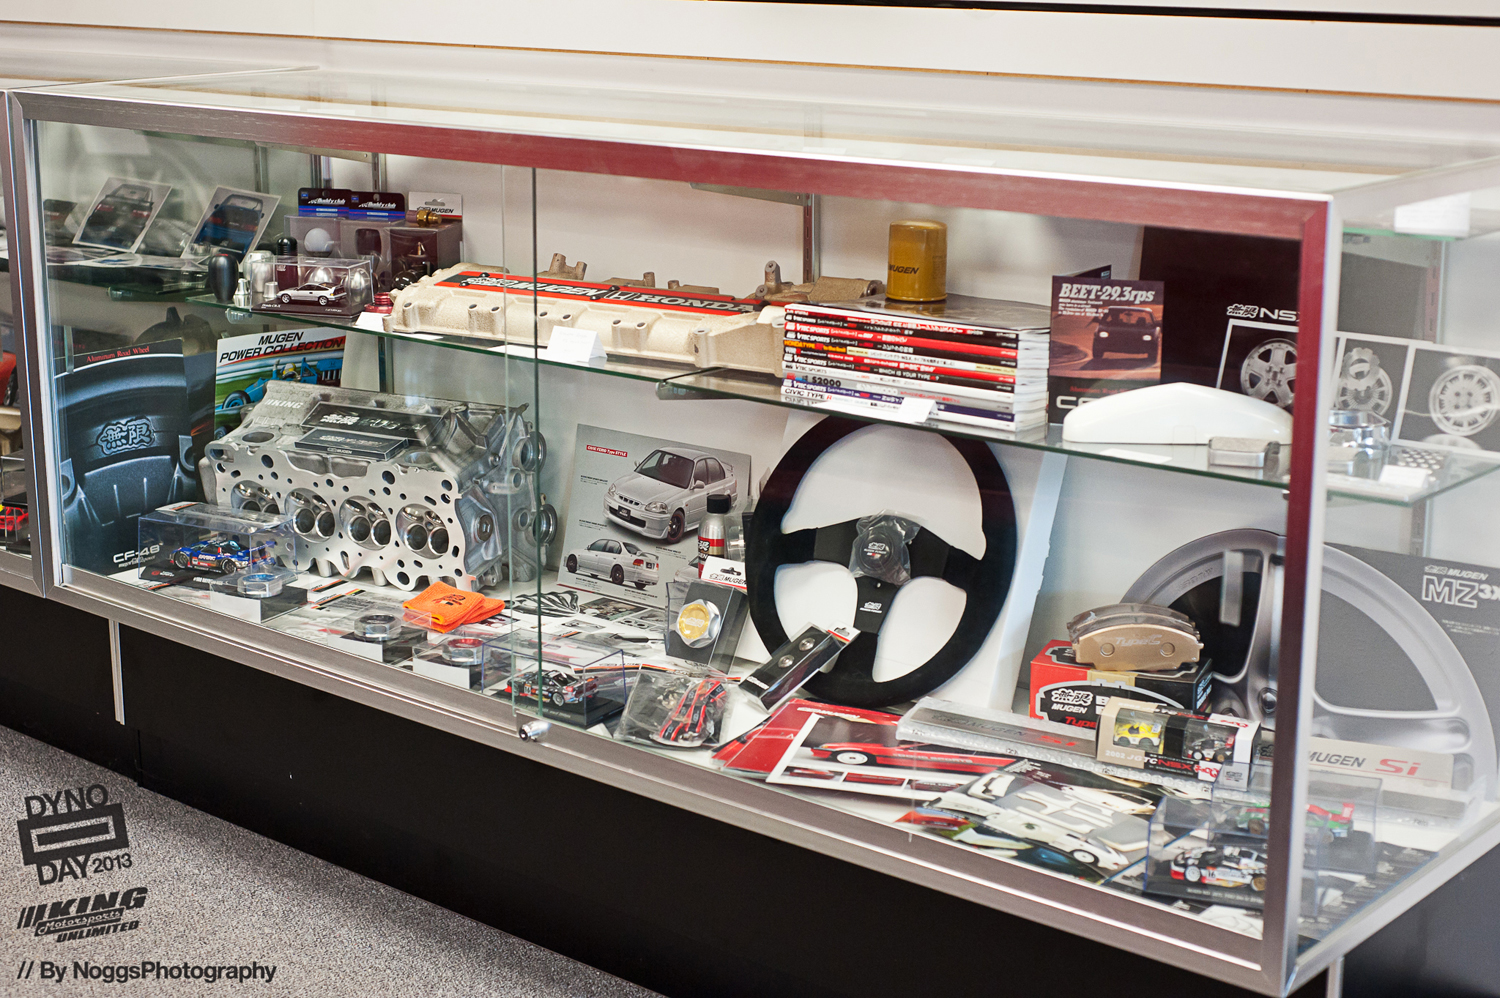
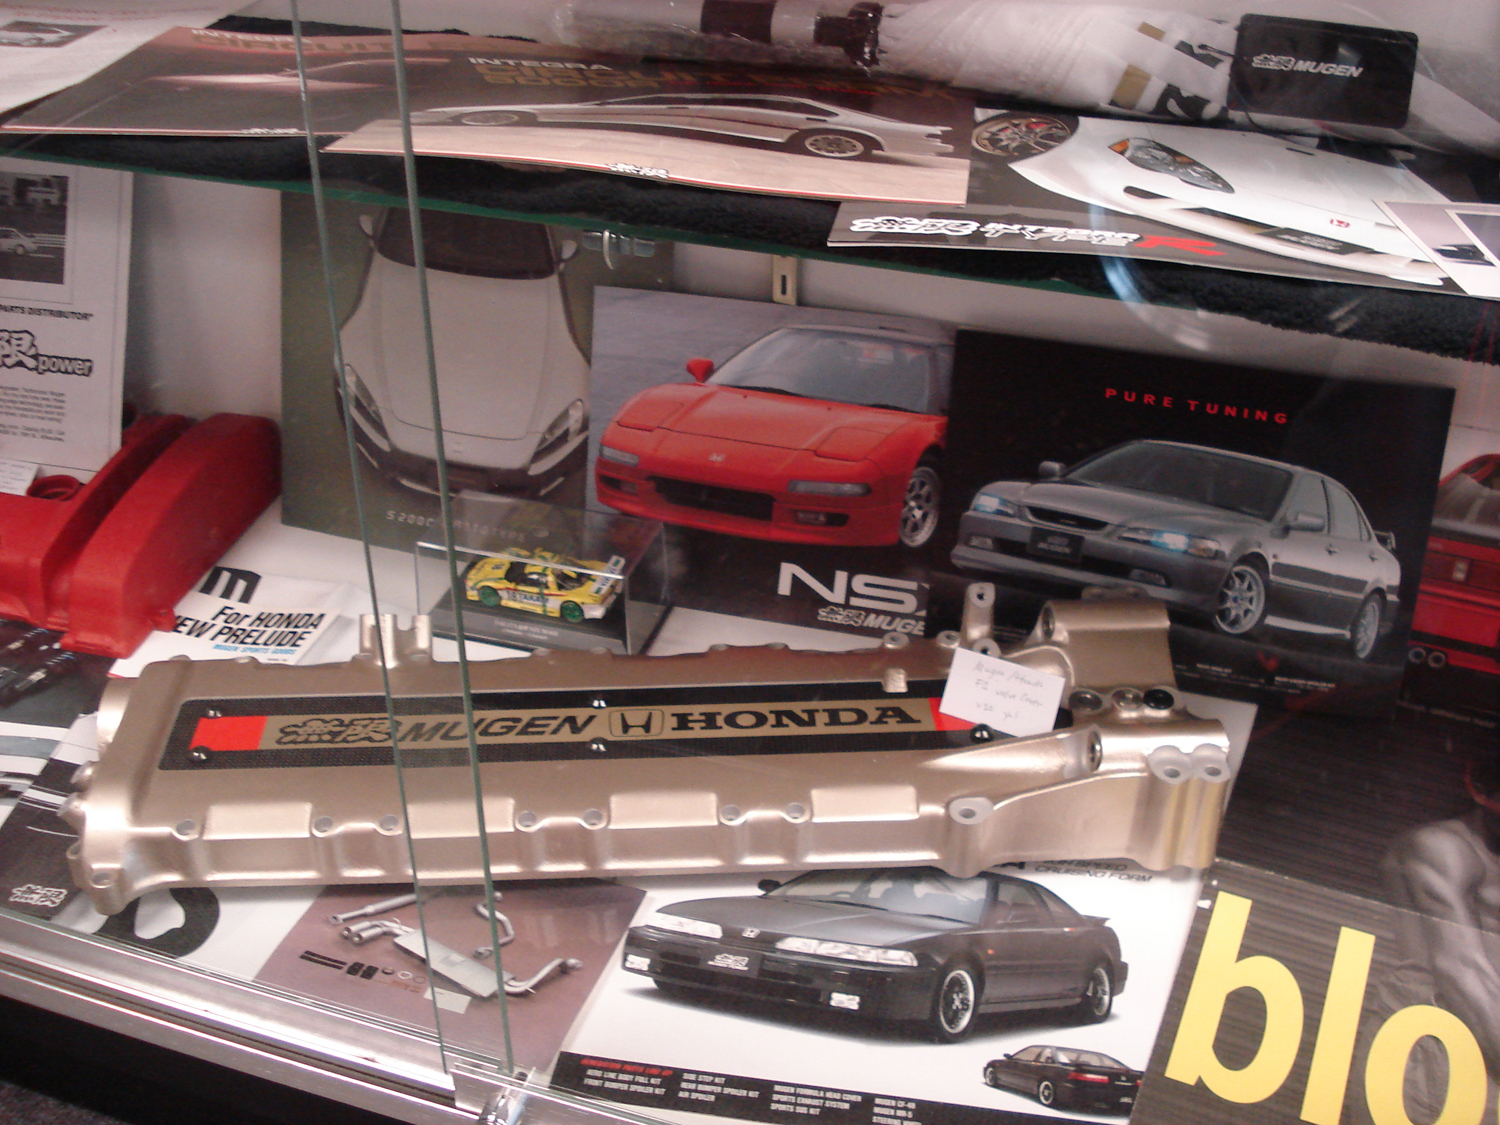
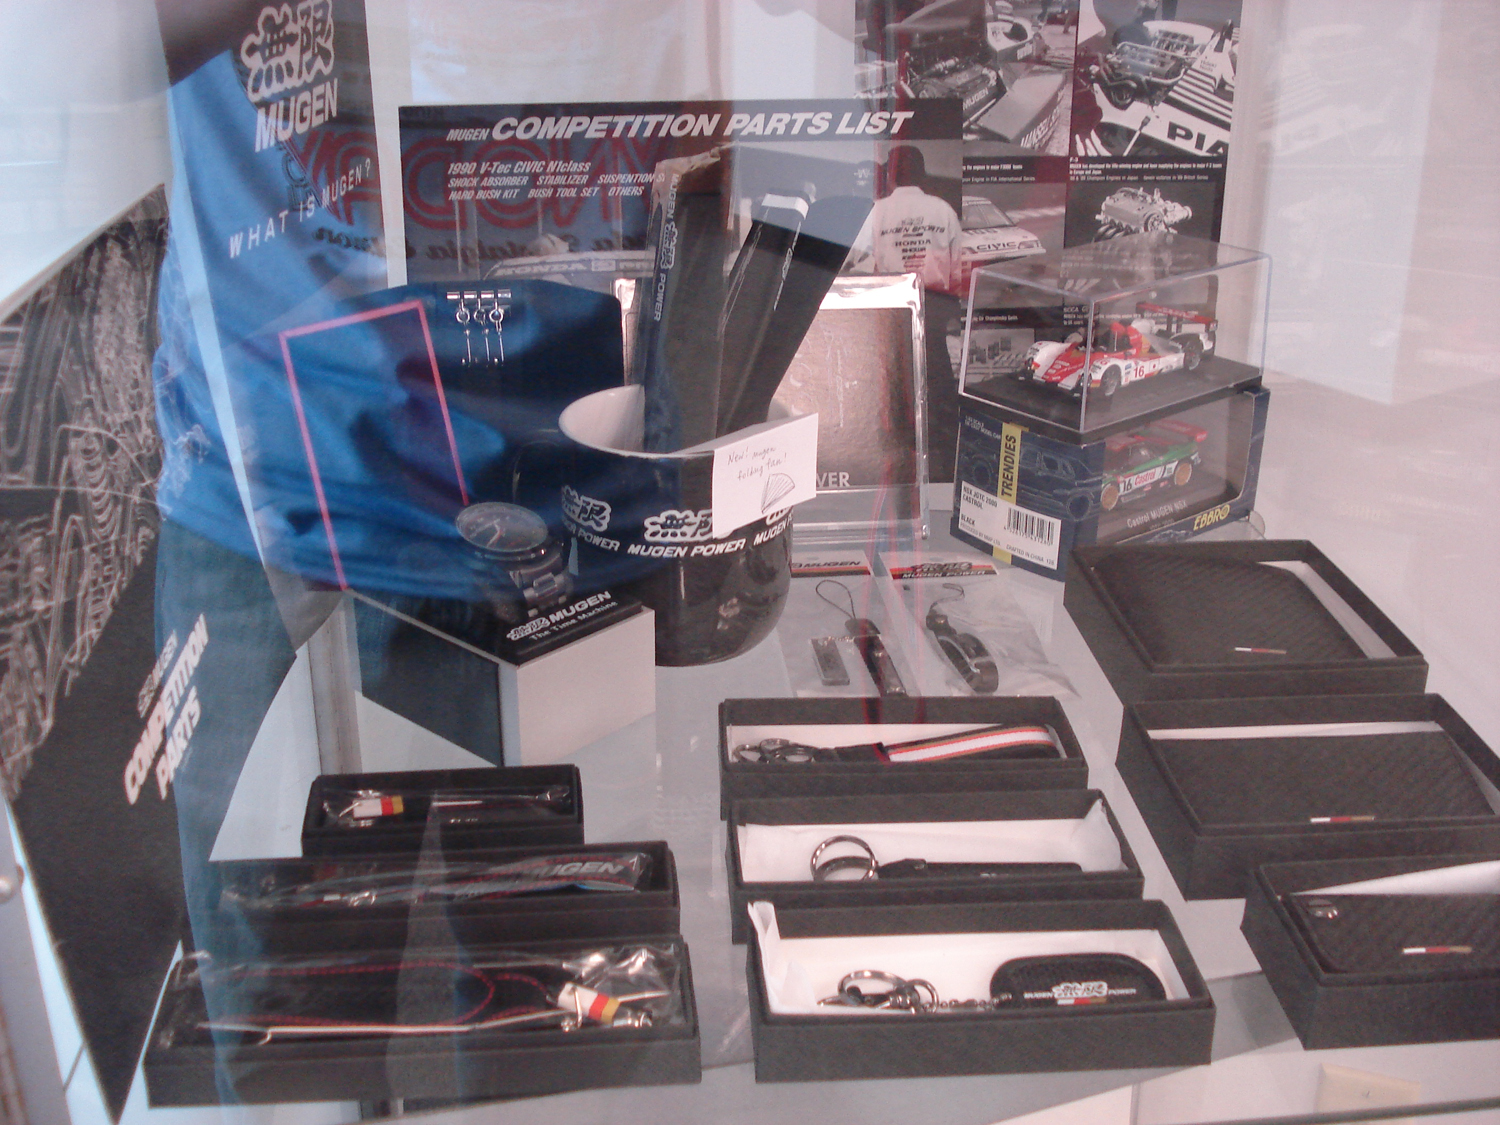
Here's a closer look at Showcase #2!


Check out that newspaper-sized Mugen brochure that says BLOOD OF RACING on it -- it's actually for the NR-10 and NR-10R racing wheels. This promo was a major departure from any print designs Mugen had done up to that point (or since), featuring brooding fashion models posed next to Mugen wheels. The end result was a brochure that was more Abercrombie & Fitch then the Mugen we know today. Inside, the copy is equally inappropriate-- stating that the wheels are great for "street racing". You'll never see a Mugen promo like this one again (we hope)!


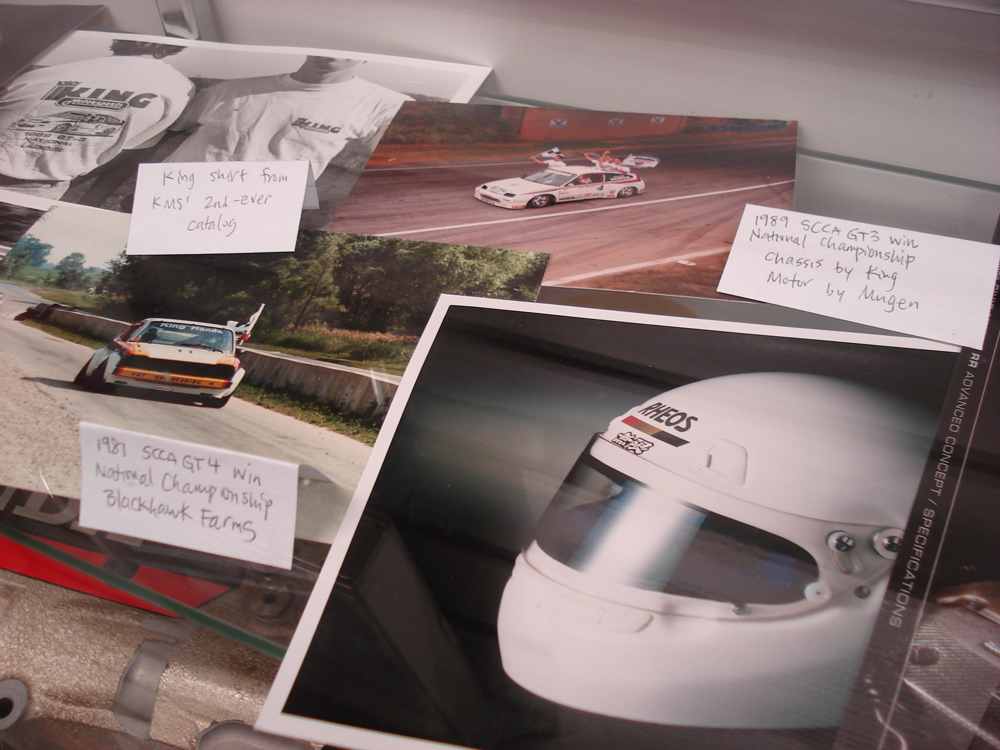
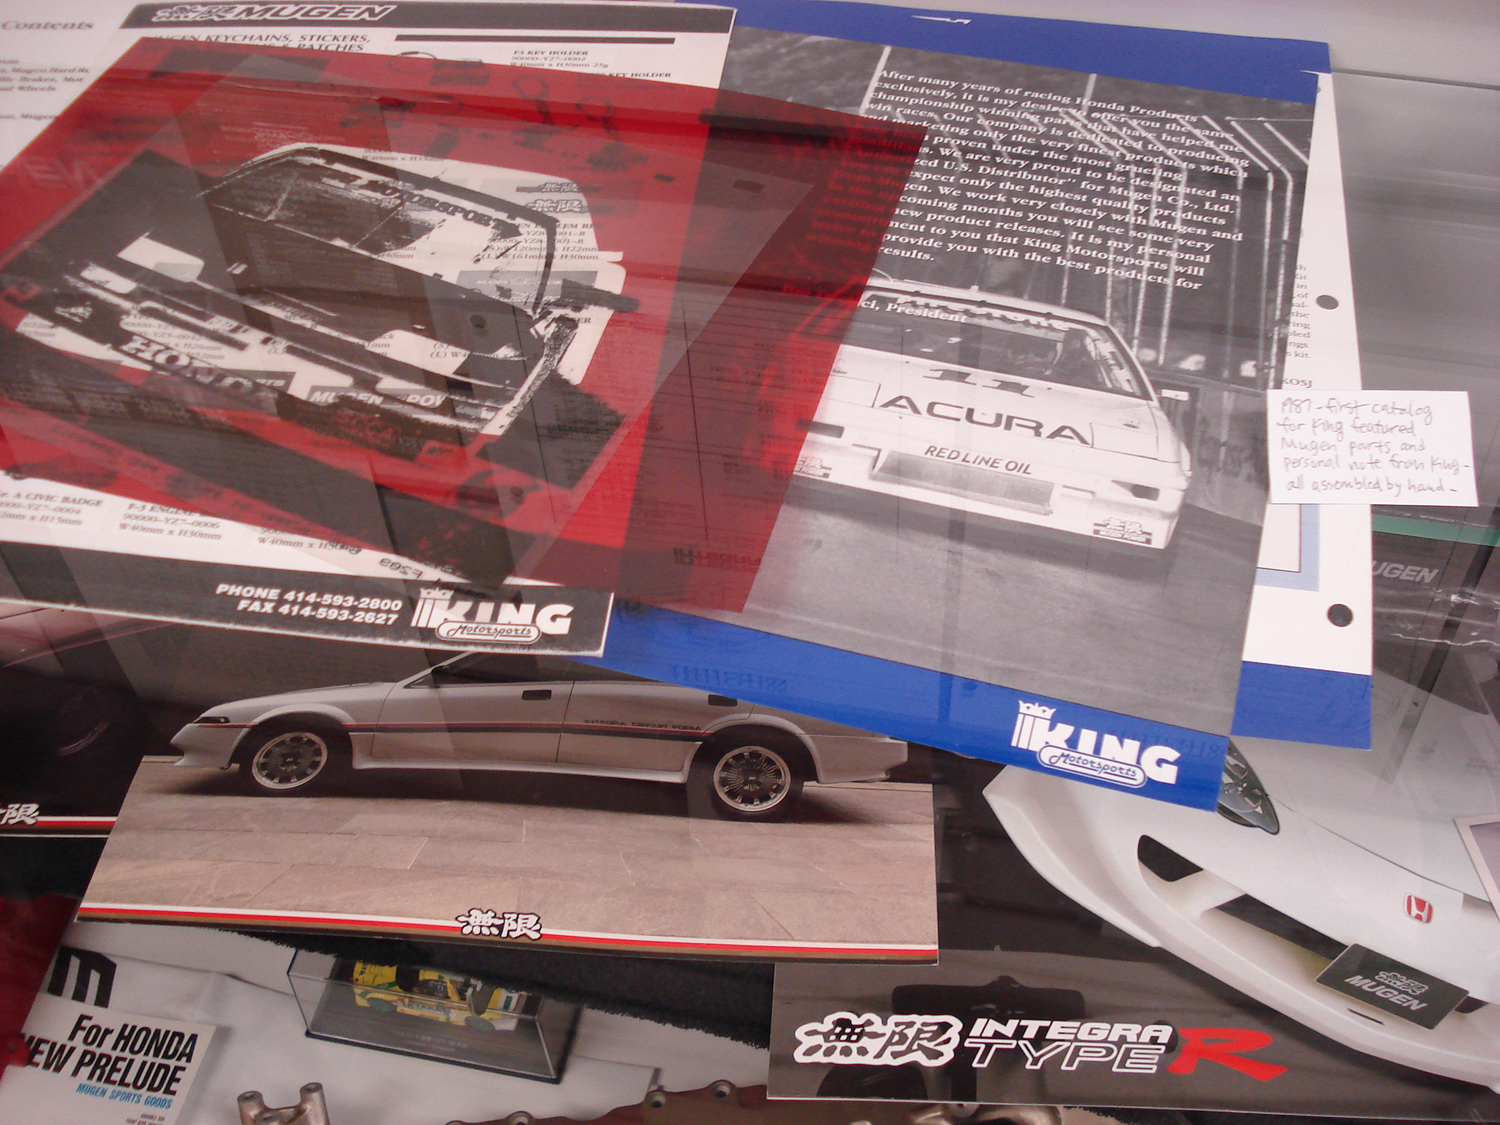
These are print elements for King Motorsports very first parts catalog, featuring Mugen parts. The catalog was assembled before the days of Photoshop, Indesign or even QuarkXpress. These were assembled by hand with prints, film, scissors and glue!


Can you spot the Mugen umbrella in this pic below? How about the brochure for the Mugen S2000 prototype?


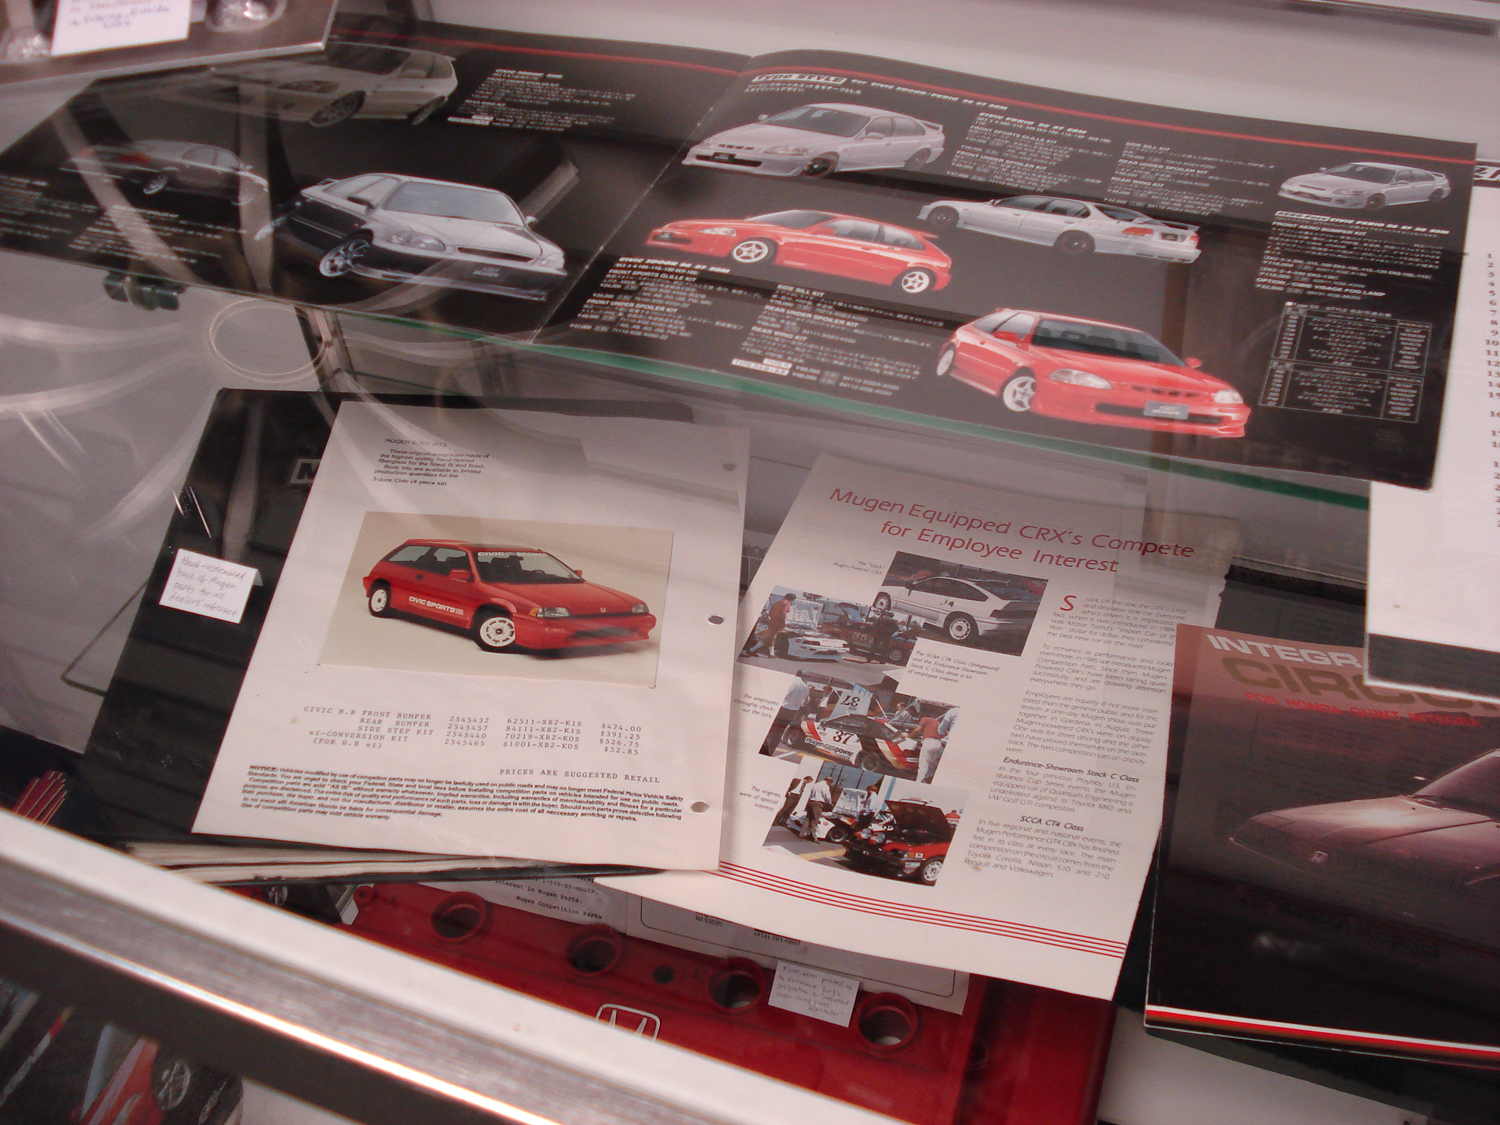
In the pic below (lower left) is a handmade binder provided by Mugen to its dealers. Within it are photos and specs of their parts lineup with suggested retail prices. No surprise that some of the parts are still selling for the same price (or more) 30 years later. Next to it is a page from a corporate Honda employee magazine describing an event where the Mugen-tuned CRX and race cars were brought out for employees to enjoy!


In the lower right is the Mugen parts brochure for the first-gen Integra 3-door and 5-door!


A major milestone for King Motorsports was when it became Mugen's authorized parts distributor for North America. In the picture below is a letter from Mugen explaining that all future orders within North America should go through King Motorsports. Next to it is King's first flyer announcing their new status. Scott said he remembered going to races and slipping these flyers under the wipers of every Honda he could find!


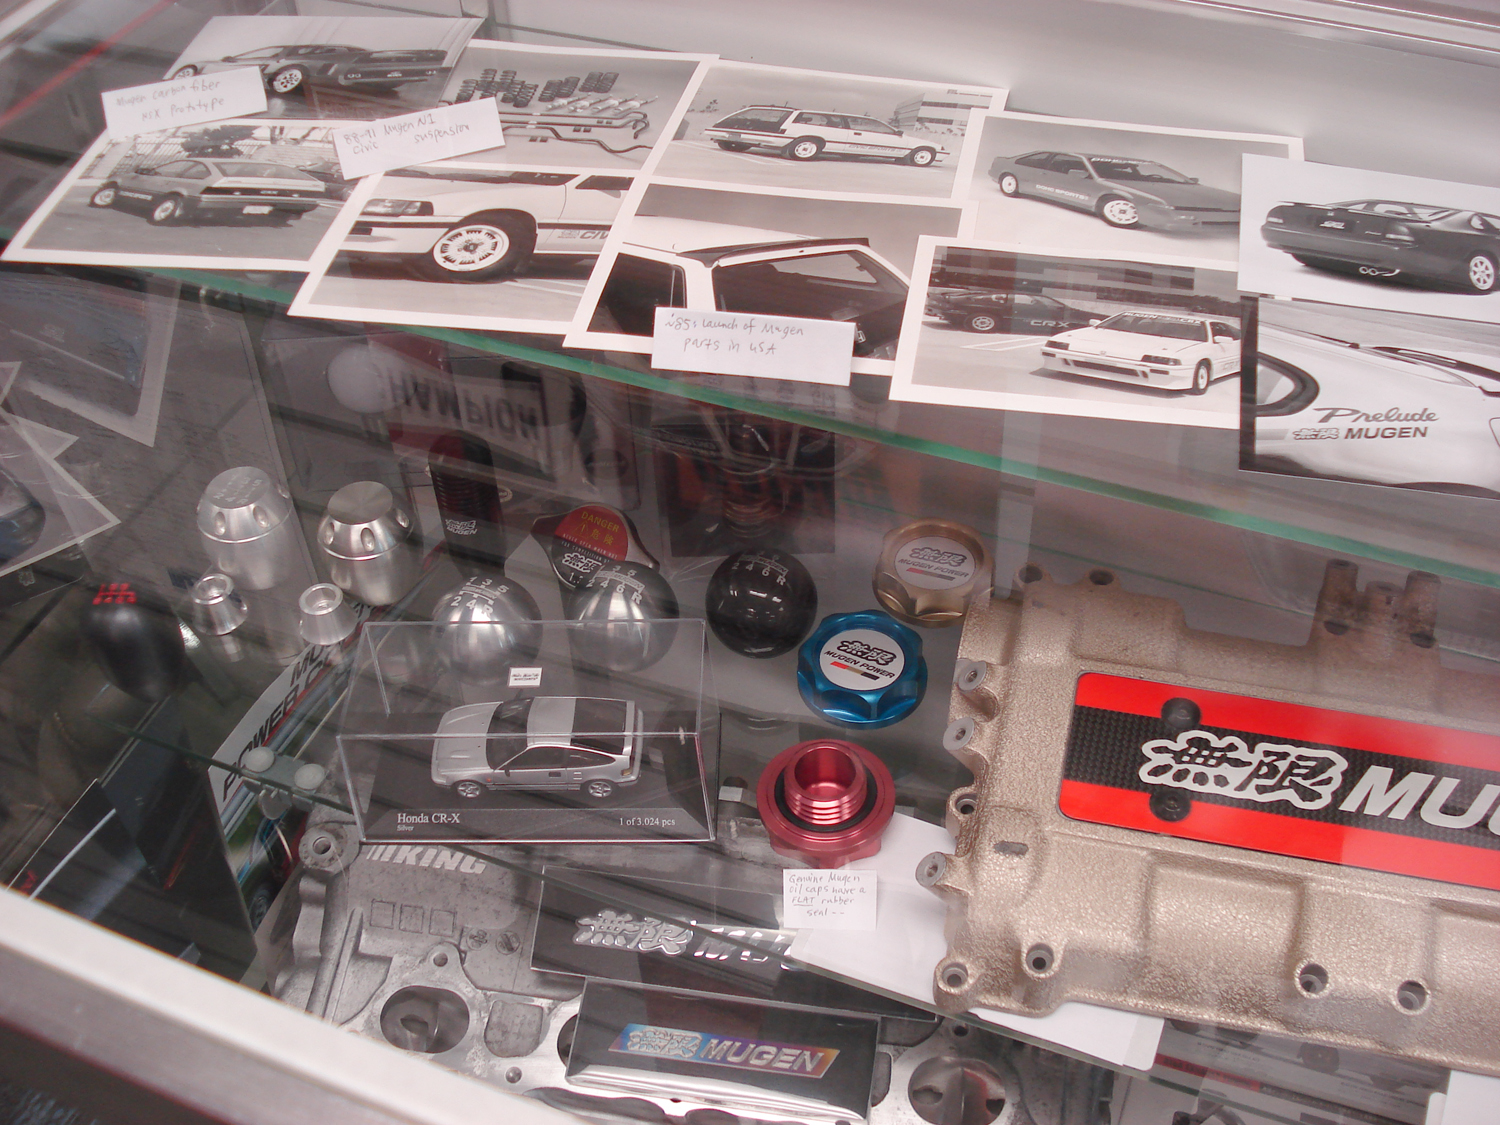
The cool little 1:43 scale die-cast Civic comes from Scott's personal collection. It sits on an envelope that delivered some of the first Mugen Civic EG parts catalogs to the USA.


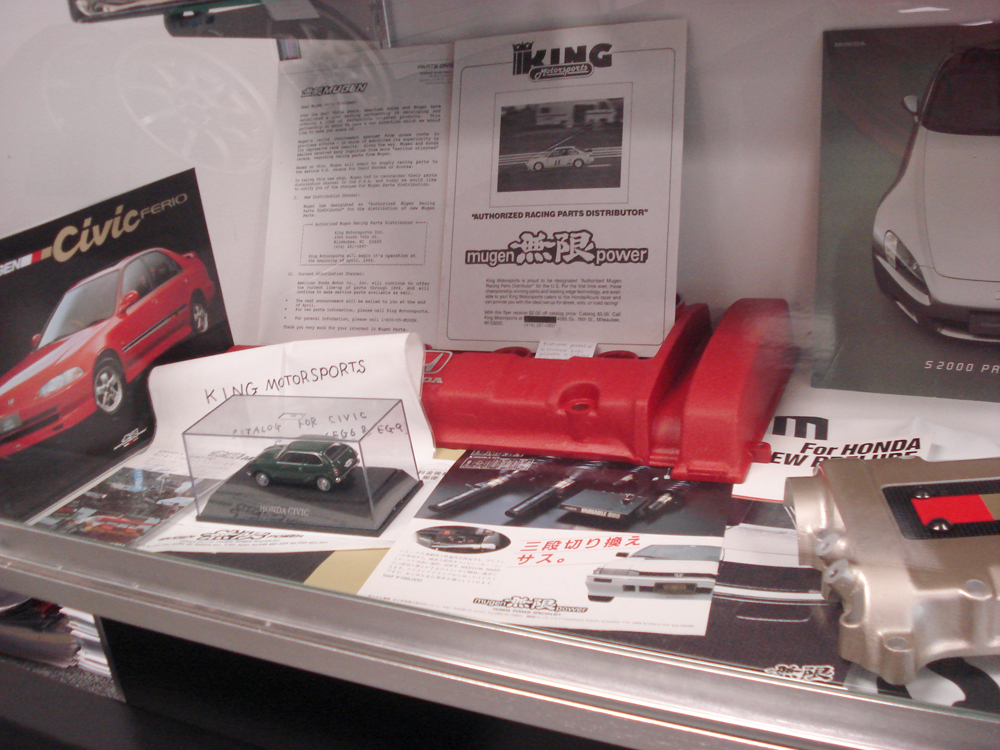
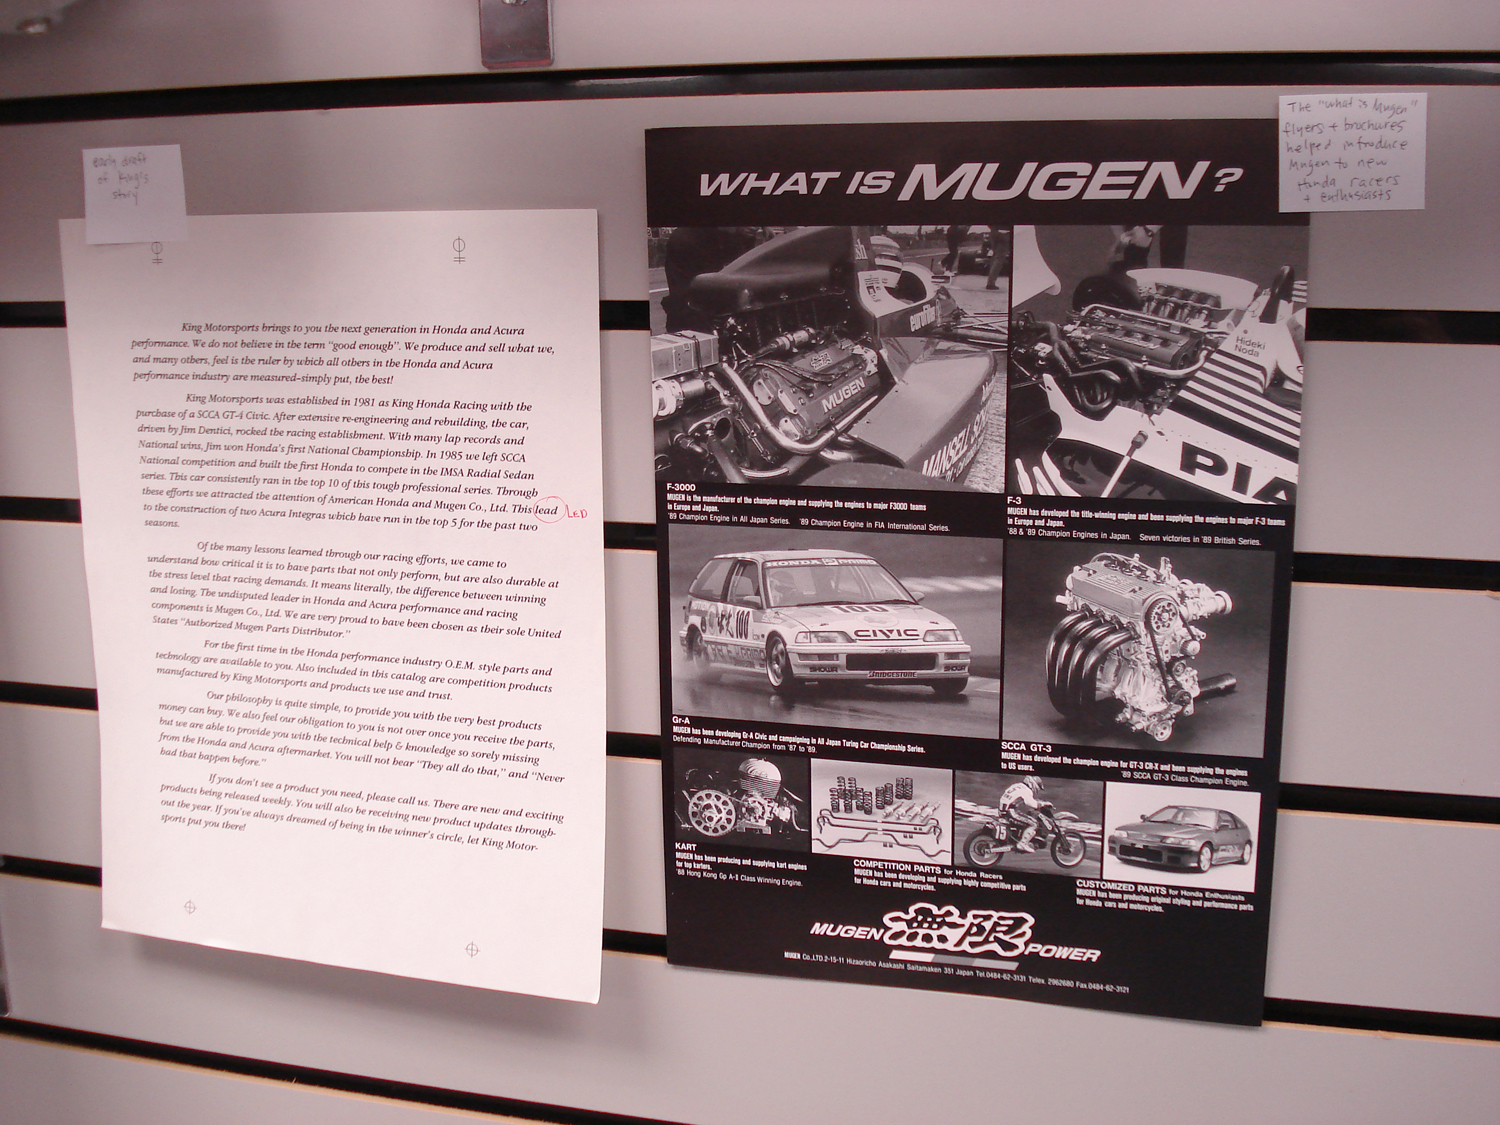
Below is a early, redlined draft of King's history that would eventually find its way into King's literature and website. Next to it is one of the "What is MUGEN?" pieces created in the 80s to help introduce the American enthusiasts to Mugen.


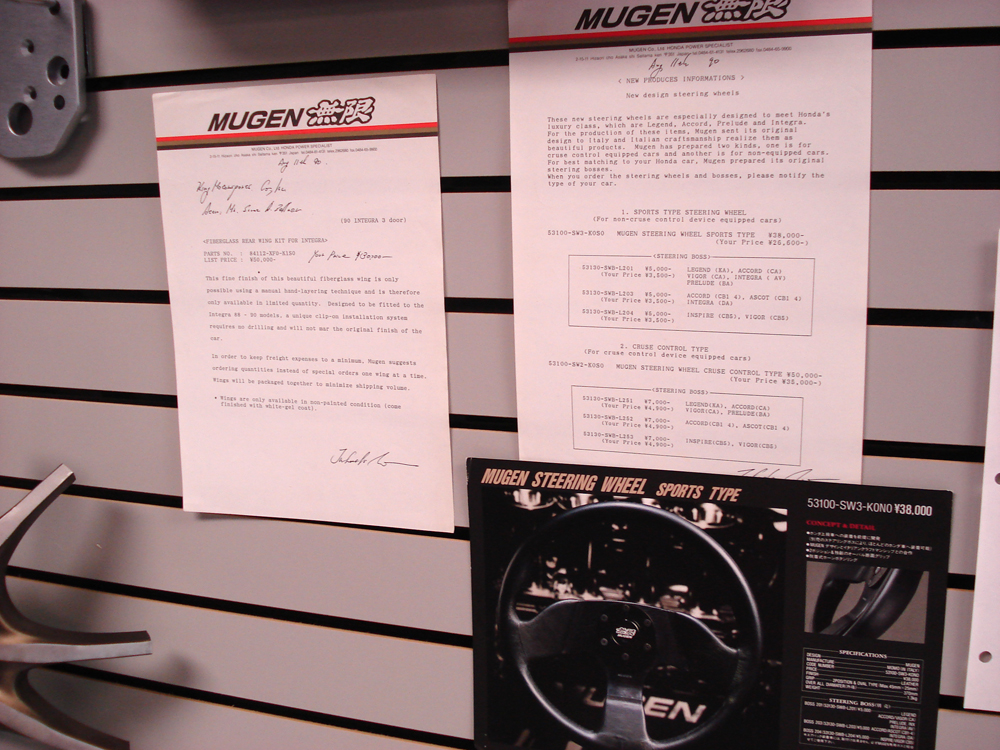
Below are correspondence from Mugen Japan from 1990 regarding the limited nature of the fiberglass rear wing kit for Integra and the introduction of 2 new Mugen steering wheels.


More pages from the dealer binder with detailed specifications of available performance and aero parts for Civic, Integra and CRX.


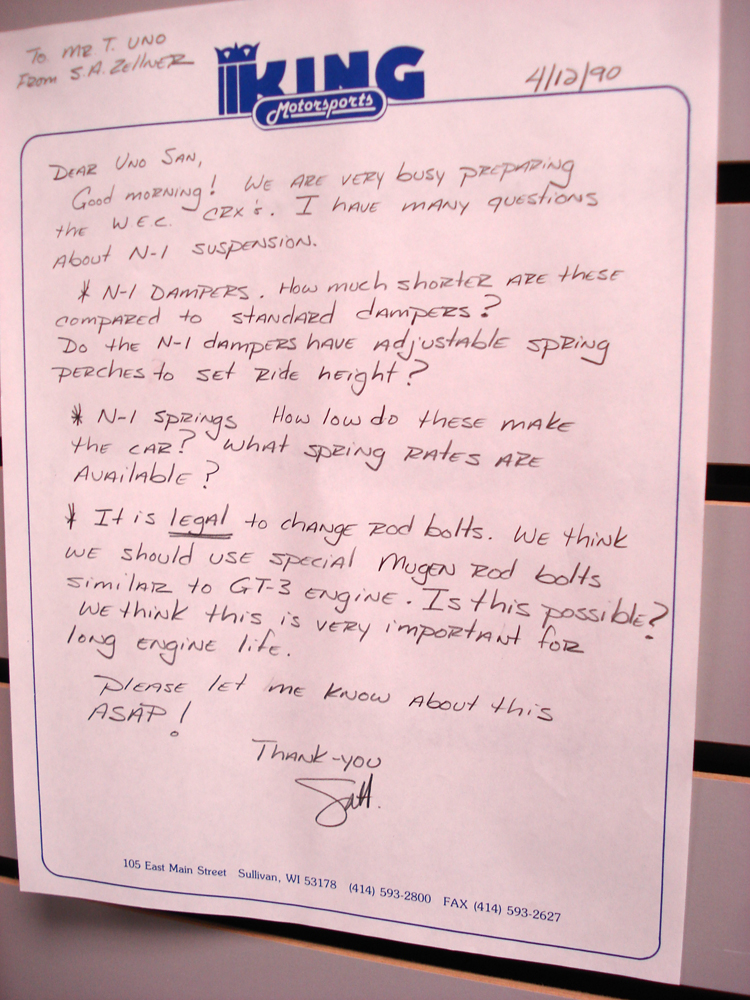
In a stack of old faxes I found this note from Scott to Mugen asking questions about the N-1 suspension. It's clear that the collaboration between the two companies runs quite deep!


And finally, here's a closer look at Showcase #3:


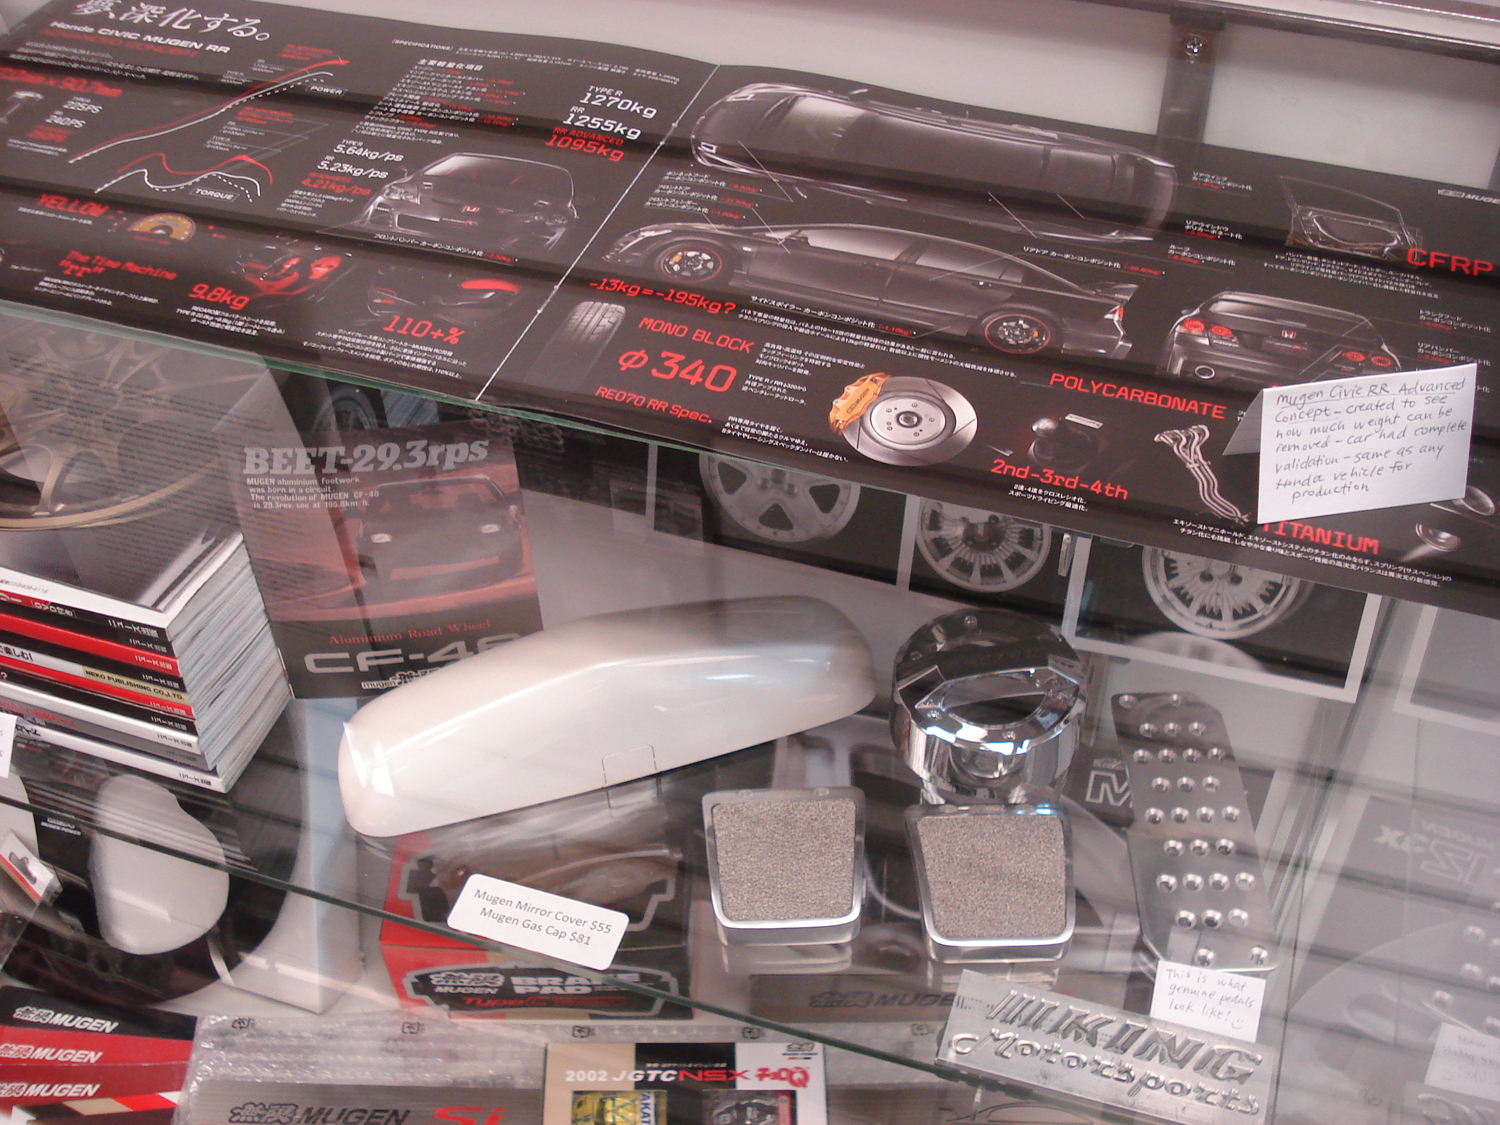
Very cool "What is Mugen" promo literature from the mid 80's plus a Mugen Time Machine watch among other goodies! Can you spot the Mugen folding hand fans? Of all the displays that were assembled, this one actually has the most items that are currently available for mere mortals to purchase. Sadly that awesome mug is not one of them!


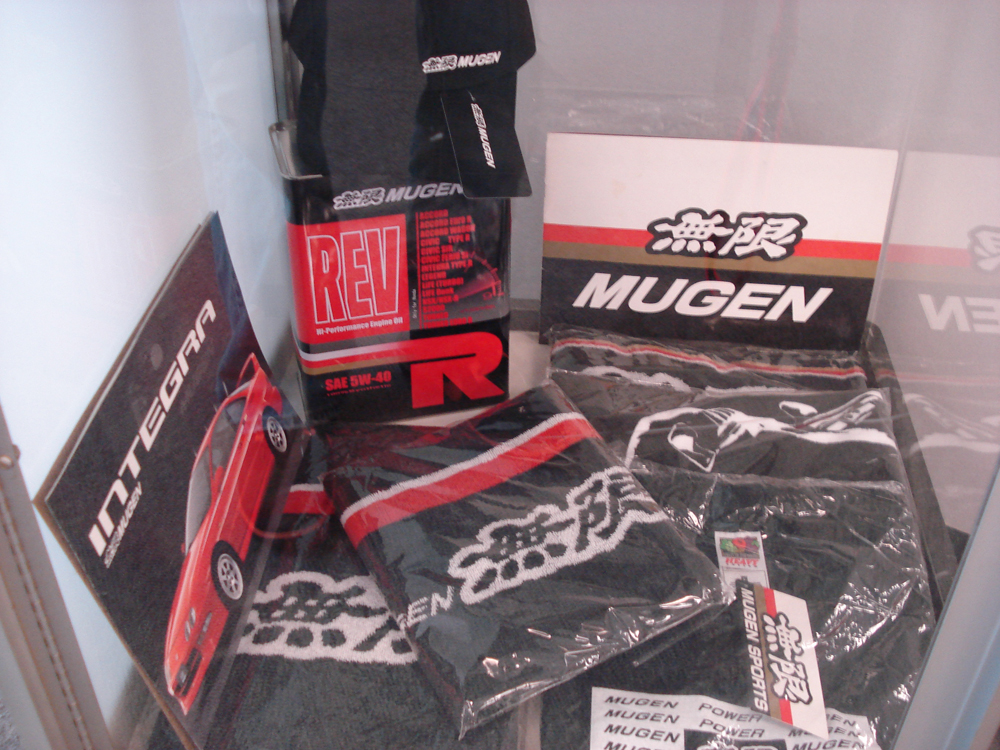
This empty container of genuine Mugen performance engine oil is one of my favorite Mugen package designs. Many Dyno Day attendees were drooling over the discontinued black Mugen t-shirt in the lower right of this picture.


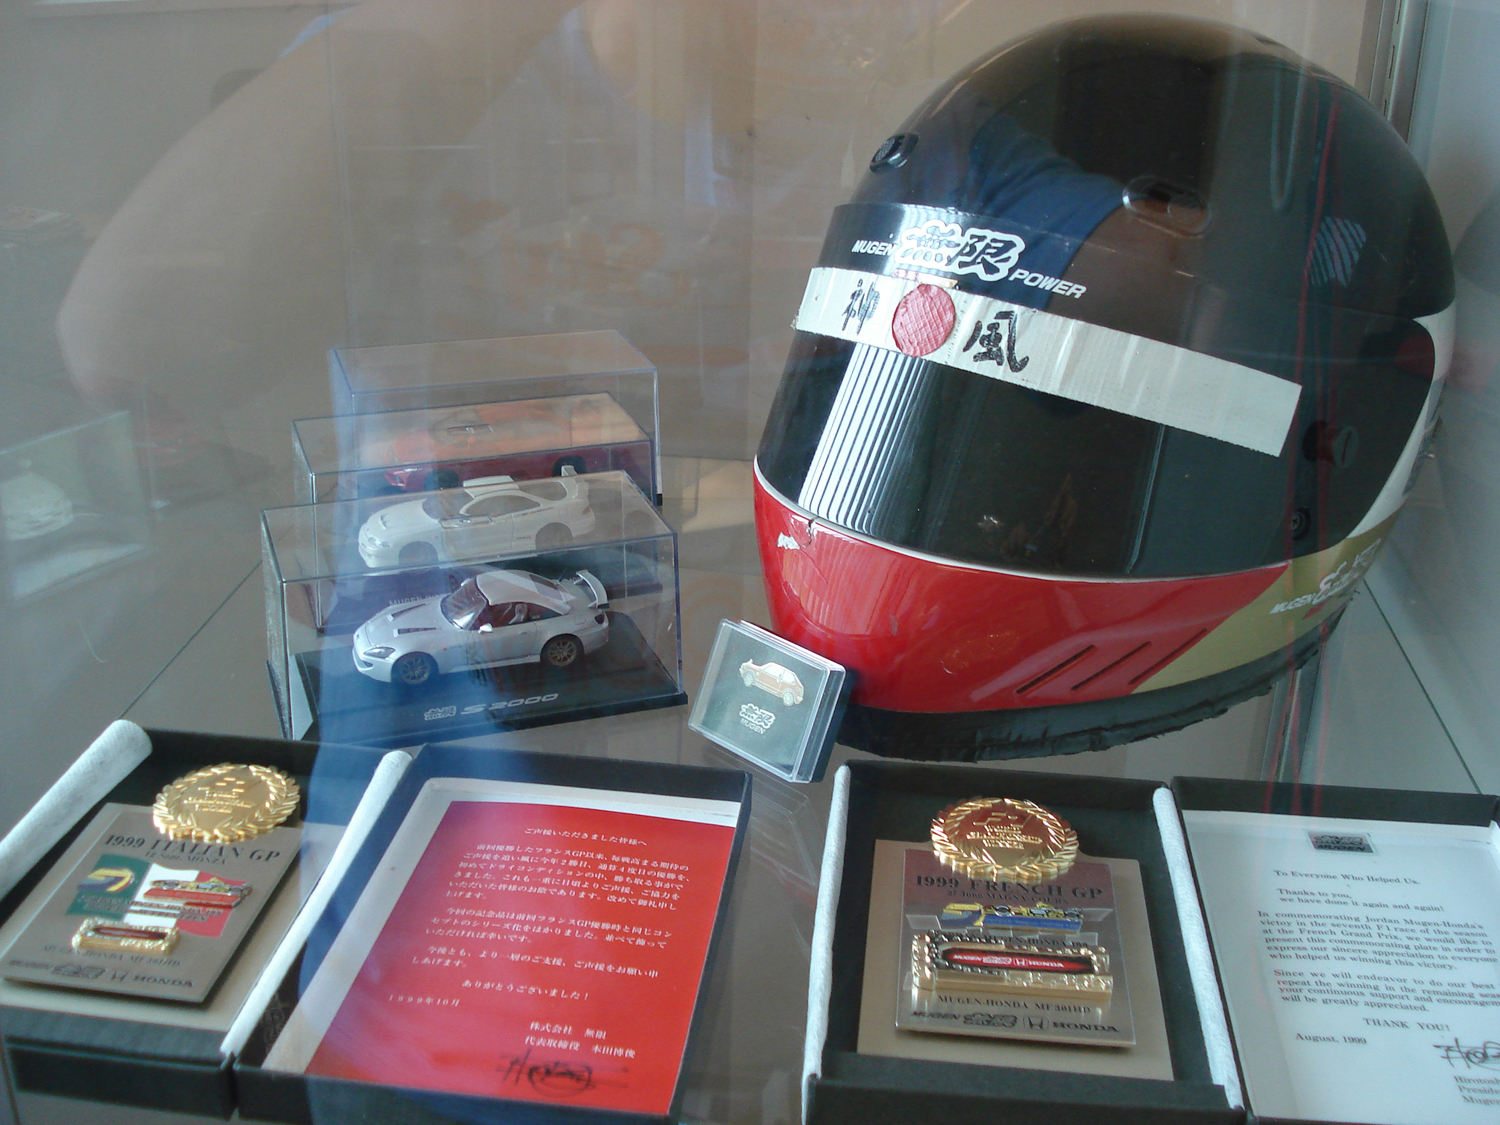
Crash lid worn by Bob Endicott for the 2005 SCCA World Challenge (King/Mugen RSX) season and Mugen F1 victory momentos... It's very likely that Dyno Day attendees were the first and last people to ever see these items on display!


I have to give Scott a huge thanks for letting me raid his office and private collections to assemble these displays. We really hoped the Dyno Day folks enjoyed seeing these historic and rare items!


We'll see you at Dyno Day 2014!


Mugen Cover Art - Three Decades of Valve Covers


We recently came across a 2-page spread of Mugen valve covers produced from 1973 to 2001. Called "MUGEN - One of the Art," the pages lay out 23 photos of Mugen valve covers spanning three decades of racing and performance.


1973 MF-318 - 1.3L L4 FJ1300:


1988 MF-204 - 2.0L L4 16V F-3:


1988 MF-308 - 3.0L V8 32V F2000:


1989 MF-358 - 3.5L V8 32V F-1 spec.:


1990 D16A BASE - 1.6L L4 16V SCCA GT3:


1992 MF-351H - 3.5L V10 40V F-1:


1993 MF-308 - 3.0L V8 32V F3000:


1993 MF-308 - 3.0L V8 32V F3000:


1994 MF-204 - 2.0L L4 16V F-3:


1994 MF-351HC - 3.5L V10 40V F-1:


1994 MF-351HD - 3.5L V10 40V F-1:


1995 H22A BASE - 2.0L L4 16V JTCC:


1995 MF-301H - 3.0L V10 40V F-1:


1996 MF-204A - 2.0L L4 16V VTEC F-3:


1996 MF-301HA - 3.0L V10 40V F-1:


1997 MF-204B - 2.0L L4 16V F-3:


1997 C32B BASE - 3.4L V6 24V JGTC:


1997 H22A BASE - 2.0L L4 16V JTCC:


1997 MF-301HB - 3.0L V10 40V F-1:


1998 MF-301HC - 3.0L V10 40V F-1:


1999 MF-301HD - 3.0L V10 40V F-1:


2000 MF-301HE - 3.0L V10 40V F-1:


2001 MF-408S - 4.0L V8 32V Le-Mans/ALMS:


All 23 Mugen valve covers:


Dyno Day 2013 Recap

This year's Dyno Day got an early start as attendees took our advice and showed up on time. :) In fact we had people arrive an hour early to chill with their friends as we set up the check-in booth. We had 224 registration goodie bags to hand out -- and we had nearly as many cars. Dyno runs ran through the day in the shop, with live video feeds piped into our showroom. In the showroom we had a rare and one-of-a-kind display of Mugen and King nostalgia prepared especially for Dyno Day. Some of these items have never been publicly displayed.

Deletah was once again on hand to fill the deepest parts of your ears and hearts, and Andy Noggle was on hand as our event photographer. Boy Scout Troop 93 served up BBQ chow as raffles and nice sponsor prizes were given out throughout the day.

Rounding out the event were show awards for Farthest Distance Traveled (William Wang from New Hampshire), King of the Dyno (556 HP daily driven Supra), Staff Pick (red EF Civic hatch), People's Choice (black 499 HP turbo S2000) and Lowest Pull (CR-Z at 122 HP).

During the day we offered 10% off all in-stock items and had a few garage sale items for sale -- including the motor out of the King Motorsports RSX Challenge Car.

We caught a nice break in the weather too. The sun was out just enough to bring out the shine on some amazing rides.

Thank you to all our many sponsors, attendees and volunteers who helped make the event so memorable! We're already at work planning the 2014 Dyno Day!


Jon L. sent us this awesome video recap of Dyno Day featuring a few camera techniques we've never seen before!

http://www.youtube.com/watch?v=NeYFXUXHGMo


You can see dozens of official event photos on our new GALLERY page.

And here are a few pictures from NoggsPhotography:


San Pedro: Debut Race! (Updated w/ Vid)

Our Prelude race car project known as San Pedro recently had a great day of testing at Gingerman Raceway. Once back at the shop we did some fine tuning and adjustments based on what we learned.


We prepped spare noses/airdams and splitters in anticipation of San Pedro's debut race at Michigan International Speedway in two weeks.


5/25/2013: San Pedro wins its first National SCCA EP race from the pole of the 2013 race season at Michigan International Speedway today complete with a new lap record! Congrats to Moser Racing - awesome result!


5/26/2013: Day 2 at Michigan International Speedway. San Pedro wins the qualifying race by 39 seconds! Way to go Moser Racing!


Day 2 at Michigan International Speedway and another flag to flag win for San Pedro and the Moser Racing team! Way to go guys!!!!


San Pedro captures the pole in its very first SCCA EP National race of the 2013 race season- pumped!! Go Joe Moser!!!


Fun San Pedro factoid- Top speed at Michigan International Speedway on the banking was 144 mph. Entry speed into Turn 1 off the banking was 62 mph. San Pedro brakes from 144 mph to 62 mph in 63 feet!!!!


The Mosers have posted the video on Youtube!

Engine build: EV 1.3 HF

In the King shop last week! We finished up an old school EV 1.3 HF build. This engine will soon be installed in a beautifully restored 1985 HF.


The tricky part of an old school engine build like this EV 1.3 HF is a shortage of OEM rebuild parts- they are getting very scare.


Because 1st. over bore pistons are no longer available, we commissioned Wiseco to build a forged piston with the exact dimensions of the factory piston with the bore size we needed. We stress relieved and deburred the factory connecting rods and the whole rotating assembly was balanced to our specifications.


The EV 1.3 HF cylinder head ready for final assembly. Valve seats were carefully blended and just a touch bowl work to increase efficiency. Will 50+ mpg be a reality using yestertech?


We also got this info & picture from Yawsport:

"Captured fresh out of the paint booth over 1 year ago, this champagne Honda Civic 1300 Hatchback (affectionately named "Champ") will adorn the fully blueprinted EV1 engine currently being finished up by King Motorsports. It's been a long road to find some of the engine internals needed to complete this detailed build, but it will definitely be worth the wait. Stay tuned for the full write up of this project as well as some custom suspension goodness."


The EV 1.3 HF engine is almost buttoned up and looking terrific!


http://www.kingmotorsports.com/engine_building.aspx

Chris K.'s Mugen Del Sol

Return of an old friend! Yesterday, long-time King Motorsports customer Chris K. brought in his Del Sol that has been in storage for many years.


We are in charge of bringing it back to life. Years ago we installed a Mugen B16B N1 crate engine and well as a cool set of Mugen MF-10L mirror face wheels. Since then, Chris has collected all the Mugen aero parts as well as some other really cool period Mugen bits. Once complete it will be a stunner!


Awakening the beast after many years of storage. Chris K's Del Sol equipped with a Mugen B16B N1 crate engine, Mugen valve cover, Mugen header and plenty of other rare Mugen bits.


See more performance parts for the Honda Del Sol on our online store!

Gallery: King Motorsports Dyno Day Shirts

With King's next Dyno Day less than a month away, I thought it might be fun to take a look back at the event shirt designs. Each year of the event, King has designed and printed event T-shirts for each attendee.


In recent years, we began smaller runs of specially-designed shirts for the Event Staff. Separate shirts would make it easier for attendees to find King staff on the day of the event.


Here's a look!


Dyno Day 2009:


This shirt was designed by my predecessor, Jude Z., who was also King's in-house designer for many years. This shirt was black and featured the RSX Challenge car tightly strapped down on King's dyno. I've never seen one of these shirts in person but would love to!


Dyno Day 2010:


2010's Dyno Day was the first event I worked on with King. The first thing I tackled was a logo for the event. I drew inspiration from King's dyno bay, which has a bright yellow safety zone painted around it.


That yellow shape safety zone became the foundation for the Dyno Day logo. I separated out the "2010" so it would be easy to swap out from year to year. The back of the shirt included a Mugen-equipped S2000 in clean vector art.


Some trivia... one of the early versions of this shirt had the dyno positioned incorrectly under the front wheels. D'oh! So glad we caught that before going to print!


We also designed a Staff version of the shirt for the year, which was to be printed on a red shirt. Unfortunately our shirt printer didn't have them printed in time for the event, so sadly this design never saw the light of day.


Dyno Day 2011:


For the next year, we decided to do a brighter shirt. The front includes the King #64 Grand Am car and some of the chassis codes you'll find in the King facility on any given day. Unlike the previous year, we chose not to feature a single car. From a design perspective, a challenge for auto event shirts is what vehicle (if any) to put on the shirt. You can put a car on the shirt, but it should have significant meaning to the enthusiasts or to the event. Or you can put an ensemble of cars on the shirt, but that quickly makes for a cluttered shirt. Or you can stylize the car, so it isn't so immediately recognizable as a certain model. Or you can leave cars off the shirt altogether.


Close up. Can you spot your own chassis code?


This year we were able to get the Staff version of the shirt printed up. The logo was re-used, but this time in red.


Dyno Day 2012:


This was a very special Dyno Day. As in previous years, Mugen representatives flew out from Tokyo to show off new products and meet enthusiasts. But in 2012, Mugen shipped the Mugen CR-Z: RR concept car from Japan to King's shop in Wisconsin -- this was one of the handful of times that a Mugen concept car had ever made this 6200 mile journey. This orange beauty had to be our color theme this year. I drew a vector version of the CR-Z: RR for the front, and we added the Mugen logo for the first time on a Dyno Day shirt.


Here's the Staff version of the shirt:


Dyno Day 2013:


This year's theme is "Honda Nostalgia," which we've defined loosely as pre-EG6 era vehicles. King designed and built some of the very first Honda race cars in the USA, and we wanted to celebrate the engineering and simplicity of those early Honda models. The front of the shirt includes one of my favorite photos of the King-built GT5 Civic race car. I felt this year needed a new version of the Dyno Day logo to better fit with the nostalgia (1970's) theme. These vintage photographs are so awesome I was tempted to slap the photo alone on the shirt -- no logos or anything else -- and call it a day. :)


The back of the shirt includes an awesome photo of the GT4 Civic. I always wanted to work MILWAUKEE, WISCONSIN into the shirt and was able to this year.


I split out the car into a triptych to make the overall design vertical, and to give the sense of speed to the GT5 Civic -- as though it was moving so fast it could barely be photographed.


Here's a preview of the Staff version of the shirt for this year.


If you've missed out on any of these shirts, the event Attendee shirt is usually available for sale on the King website after the event. The best way to get one is to sign up and join us for the event! Hope to see you there!


San Pedro: Unleashed for Testing


We put our Prelude race car project known as "San Pedro" through the paces for testing at Gingerman Raceway this week, and the results were fantastic!


San Pedro's driver's office. Easy to read analog gauges, GPS based data aq and adjustable brake bias. Uncomplicated and clean!


Testing going well. First set of Hoosiers are now history.... :)


Starting to use some brakes.... Huge brake ducts and trick race pads. This is way they should look when you use them hard!


The driver says there was a balance problem. The crew refers to this as driver running out of talent :)

For the record, we are extremely happy the driver wants to push the boundaries of adhesion. Sometimes that means going over the limit to find exactly where that limit is. That's precisely why we go testing! We have plenty more splitters where this one came from (it helps that we made our own).


That's a wrap from Gingerman Raceway! We learned what the car likes and finished up 2 seconds under the lap record. A very good day!


Want to ride  along? Watch the San Pedro test video now posted on YouTube!


Re-inventing "San Pedro" Part 2 (Updated)


We've had so many pictures to share of our 4th gen Honda Prelude race car project (dubbed "San Pedro") that we've decided it's high time to start a new blog post! Welcome to "Re-inventing 'San Pedro' Part 2"!


Update 1/18/2013:


This week we have been working on building the plug from which the mold for the front air dam will be made. The airdam will provide a platform to mount the front splitter once completed. Here we are roughing out the foam core to the basic shape we are looking for.


Once the basic shape has been roughed out, Bondo is applied and sanded into a finished shape. This is a very time consuming process as the entire air dam has to be symmetric -- with a perfect surface finish. Up next, building the mold from this plug and making finished pieces out of carbon fiber! Stay tuned.....


Update 1/24/2013:


Work continues on the front airdam plug. After numerous coats of Bondo and shaping, we are getting close to a finalized shape. Next step is several applications of high build primer and sanding to make the surface of the airdam plug absolutely perfect with no pin holes or sanding marks. This is roughly what the airdam it will look like when attached to the front bumper.


Update 1/30/2013:


We have now completed the plug for the front airdam mold. Before the mold is made from this plug, it will be liberally coated with wax and then with a mold release agent so the fiberglass used in making the mold does not stick to the plug.


Here is an example of what the final mold looks like. The molds are designed to have great strength so there is no potential for any dimension of the final part to change during the lay up process.


The next step in producing the airdam for San Pedro is vacuum bag moulding.

Vacuum bag moulding uses a flexible film to enclose the part and seal it from outside air. A vacuum is then drawn on the vacuum bag and atmospheric pressure compresses the part during the cure process. Vacuum bag material is available in a tube shape or a sheet of material. When a tube shaped bag is used, the entire part can be enclosed within the bag. When using sheet bagging materials, the edges of the vacuum bag are sealed against the edges of the mould surface to enclose the part against an air-tight mould. When bagged in this way, the lower mold is a rigid structure and the upper surface of the part is formed by the flexible membrane vacuum bag. The flexible membrane can be a reusable silicone material or an extruded polymer film. After sealing the part inside the vacuum bag, a vacuum is drawn on the part (and held) during cure. This process can be performed at either ambient or elevated temperature with ambient atmospheric pressure acting upon the vacuum bag. A vacuum pump is typically used to draw a vacuum. An economical method of drawing a vacuum is with a venturi vacuum and air compressor.

A vacuum bag is a bag made of strong rubber-coated fabric or a polymer film used to compress the part during a cure or hardening process. In some applications the bag encloses the entire material, or in other applications a mold is used to form one face of the laminate with the bag being a single layer to seal to the outer edge of the mold face. When using a tube shaped bag, the ends of the bag are sealed and the air is drawn out of the bag through a nipple using a vacuum pump. As a result, uniform pressure approaching one atmosphere is applied to the surfaces of the object inside the bag, holding parts together while the adhesive cures. The entire bag may be placed in a temperature-controlled oven, oil bath or water bath and gently heated to accelerate curing.


Here are rolls of carbon fiber material that will be used to make the final airdam.


Daytona Red race cars have taken over the shop today!


Update 2/26/2013:

San Pedro update! The mold for the front air dam has been completed. Notice the robust construction of the mold to insure there is no chance of a core shift. Pictured is the backside of the mold. The upper and lower half are bolted together and then unbolted to release the final part.


Here is the inside of the front air dam mold for San Pedro. The surface finish has to be glass smooth as your finished part will pick up any imperfections.


A look at the first carbon fiber air dam out of the mold for San Pedro. Next up fitting to the car and measuring for the splitter plank....


Update 3/26/2013:

The front splitter/airdam is now complete and mounted. Next up building shrouding for the radiator, brake ducts and an airbox...


Update 4/3/2013:

In the shop today: TIG welding the aluminum airbox for San Pedro.


Update 4/4/2013:

Yesterday we bid a fond farewell to San Pedro. Next week we'll be testing San Pedro at an "unidentified" race track working various chassis setups. Here are a few photos before San Pedro was loaded up to head to its new home.


San Pedro basking in the sunlight after a winter makeover...


Detail shot of the front airdam/splitter profile. Lot's of downforce to be expected. How much? We shall soon see :)


All that's needed is the spacer between the seat and steering wheel :)


King Motorsports: Engine Builds (Updated)

King Motorsports is a leader in building Honda engines that balance power and reliability, and we've been doing it for nearly 30 years!


Read our staff interviews with Mike Lindquist and Chad LeBeau for a glimpse into the care we put into builds.


Here are some of the motors we've been working on recently...


This is a B Series cylinder head we are putting the finishing touches on. We're doing a King Motorsports Ultra cylinder head prep which will be shipped out to its new home in Brazil shortly!


This is a 85 x 89 KMS B Series Turbo engine just finished up for a customer. Ready to install!


Here's another angle for the newly-completed King Motorsports Turbo B. Note the KMS valve cover venting with fresh powder coating.


The finishing touch on every King Motorsports prepared engine is this uniquely-numbered authentication tag. All engines we prep are serialized and all build specs achieved.


Here is an unclothed 87.2 x 81.5 B Series turbo build in the engine room waiting for final dressing:


The Turbo B Series long block build ... now fully dressed and awaiting installation.


Update 2/14/2013:

This week on our Flow Bench we are dialing in a customer's cylinder head. There is no substitute for real world numbers-- no guesswork here....

http://www.kingmotorsports.com/c-231-cnc-heads-valve-jobs-head-porting-milling.aspx


King Motorsports factoid: In the over 30+ years we've been building engines, we have found the majority of advertised piston dome values to be off. The only way to calculate true compression is to CC the cylinder head and measure the piston dome volume as shown below. This is important step is part of EVERY engine build we do at King Motorsports.

http://www.kingmotorsports.com/c-206-engine-building.aspx


Here we are CC'ing a cylinder head. Once we have the volume of the combustion chamber, combined with the volume of the piston dome plus a little math- we arrive at our compression ratio. Oh- and don't forget to measure the valve to piston clearance, but that's another chapter :)

http://www.kingmotorsports.com/c-231-cnc-heads-valve-jobs-head-porting-milling.aspx


Just finished up the D series race engine. Next up some header and exhaust development on the dyno, then off to hopefully win another SCCA championship :)

http://www.kingmotorsports.com/c-194-engine.aspx


Update 2/21/2013:

Full Race Turbo AP1 S2000 project just burst to life in the shop! Checking vitals then on to the dyno for tuning.....

http://www.kingmotorsports.com/c-173-dyno-tuning.aspx


Making sweet AP1 turbo noise on the dyno.....


Update: 2/28/2013

This morning in the engine room we are checking piston to valve clearance on a set of Kelford Stage 2 cams on a K20A bottom engine. We use a cutway cylinder head so we can actually see and measure the clearances.

http://www.kingmotorsports.com/engine_building.aspx


Here's a look at what you can see with the cutaway cylinder head..


The stock K20 VTC cam gear gives 50 degrees of advance. When installing a higher lift camshaft set there can be piston to valve clearance issues at maximum advance. Previously the only way to limit the VTC advance was to use a TSX VTC gear which is 25 degrees. Through our dyno development program on the K20 engine we saw 25 degrees advance is not enough to make optimum low/mid range power. Using this knowledge we designed a new King Motorsports VTC cam gear that limits the advance to 30, 35 or 40 degrees. Now you can have the not only great top end power with a solid mid range to match!

http://www.kingmotorsports.com/p-4294-kms-k-series-adjustable-cam-gears.aspx


One of the current projects in the shop is this EK Turbo coupe. We just finished up the engine, now are working on the fabricating the intercooler, intercooler piping, air filter setup, dump tube and exhaust system- then onto the dyno for some tuning!

http://www.kingmotorsports.com/c-173-dyno-tuning.aspx


Update: 3/3/2013

After mapping out where we are running the intercooler piping, etc., we are hard at work fabricating a battery box for a lightweight battery on the our Turbo EK Civic Coupe project.

http://www.kingmotorsports.com/c-242-fabrication.aspx


Work continues on the Turbo EK Coupe project in the shop. Here we begin wiring the Hondata Coil on Plug retrofit kit.

http://www.kingmotorsports.com/p-4122-hondata-coil-packcoil-on-plug-retrofit.aspx


In the fab shop today- just finishing up a King Motorsports prepped B series intake for a client.

http://www.kingmotorsports.com/p-4048-king-porting-service-edelbrock-performer-x-intake-manifold-b-series.aspx


Update 4/5/2013:

In the shop this morning- fabricating intercooler tanks for a B series turbo build.

http://www.kingmotorsports.com/c-242-fabrication.aspx


We just completed this H22 build. King Motorsports cylinder head prep, sleeved 13:1 with Skunk Pro 3 cams and a Euro R intake. Installation and dyno work next!

http://www.kingmotorsports.com/c-194-engine.aspx