Fakespotting: Mugen Riveted Metal Badge


The riveted metal Mugen badges are commonly found on front lips and aero pieces. These badges were included on many previous-generation, discontinued Mugen body pieces that circulate the secondary market. Given enough time, miles and repaints, the badges have become one of the only remaining indicators to tell a genuine apart from a replica body part. There are few ways to spot a replica/fake metal rivet badge:

1. Packaging. If the emblem does not include the proper package (or no package), it may be a replica. Note that Mugen have not sold the badge in the colored red-gold-black diplay bag, only the more generic bag.

2. Painted versus embossed. The genuine badge is embossed on sturdy metal. If you run your finger over it, you should be able to feel the logo.

3. Logo spacing. The replica badge has extra spacing around the kanji and MUGEN logo. The genuine has an overall tighter design with less space around the kanji and MUGEN logo.


Here is a comparison photo of the packaging.


Photos of genuine badge courtesy of Wilhelm C.


You can find genuine Mugen emblems and decals on the King Motorsports online store:

http://www.kingmotorsports.com/c-147-decals-stickers-emblems.aspx

Unboxing: Skunk2 Alpha Series Header for DC5/EP3


Over the years I've only added modest bolt-ons to improve the power output on my 2002 Civic Si (EP3) hatchback. My collection of bolt-ons includes a Mugen airbox, Mugen Twin Loop, RBC intake manifold and K-Pro. After a quick call with Scott at King Motorsports, I settled on his recommendation to go with the Skunk2 Racing Alpha Series header.


Scott said they've seen respectable gains from the Skunk2 header and the build quality gets his thumbs up. From what I've read online, the Alpha is essentially the same design as Skunk2's top-shelf MegaPower line, but at a lower price point thanks to some advanced manufacturing technology (and probably concessions on materials used).


General feedback I've read from owners is that people love this header. Fitment on K20A3/A2 is good, so long as it is done by a professional. Folks with a K24 swap may have to do a bit of magic with their front sway bars -- a common issue that affects all aftermarket header choices.


This is the first race header I've ever purchased. I had a lot of questions about what would be included out of the box, so for you fellow newbies out there, this post is for you. Keep in mind this is for the DC5/EP3 (Skunk2 part #412-05-1910) -- so your results may vary for other fitments.

The box itself is fairly sturdy and red and black graphics scream performance. This is one delivery you don't want to leave on your front porch overnight. For you married folks, this is a car part delivery that will be hard to hide, ha ha.


The header was wrapped in bubble wrap which provides reasonable protection during shipment. The entire contents of the box:

- Alpha series header
- adapter pipe
- donut gasket
- oxygen sensor defouler
- 2 front sway bar brackets - allows for side-to-side repositioning of the sway bar thanks to elongated mount openings.
- owner's kit - a black envelope that includes a Skunk2 brochure and registration card with serial number.
- Skunk2 Racing decal

Here are the front sway bar brackets, defouler and donut gasket:


Here is the adapter pipe:


Here is one of the 2 oxygen sensor bungs. Remove this bolt to install the oxygen sensor.:


Here is the second oxygen sensor bung. Remove bolt to install oxygen sensor or defouler.:


The top has an ALPHA badge and holographic sticker with serial number:


The underside has two ALPHA stamps near the hanger:


There is one more badge that says "FOR OFF ROAD USE ONLY. NEVER TO BE USED ON POLLUTION CONTROLLED VEHICLES" just downstream of the hanger:


Next up -- installation and dyno tuning!

See more Skunk2 Racing products at the King Motorsports online store!
http://www.kingmotorsports.com/m-43-skunk2-racing.aspx


Fakespotting: Mugen Metal Badge Emblems


The metal Mugen emblems are a fantastic finishing touch to Mugen aero parts. The current generation of metal emblems appear on Mugen's grilles, wings and other parts. There are few ways to spot a replica/fake metal emblem.

1. Packaging. If the emblem does not include a package, it may be a replica.

2. Thickness of the emblem. The genuine emblem is about 2mm thick (for both the 11cm and 15cm emblems). Replicas are typically 1mm thick.

3. Beveled edges. The genuine emblems have a distinct, beveled edge.

4. Cut, not stamped. The genuine emblems have their Mugen logo precisely cut into the metal, not stamped into the metal.

5. Colors. Genuine emblems are currently only available in brushed metal (no color) with black logos; they do not come in red, blue, yellow or other colors. The genuine emblem is also available in a special Titanium ("neochrome") finish.


Here are a few comparison pictures -- plus photos of the genuine packaging.


You can find genuine Mugen emblems and decals on the King Motorsports online store:
http://www.kingmotorsports.com/c-147-decals-stickers-emblems.aspx

Local Motion: Andy Thompson’s CR-X SiR


We don’t have to tell you there are passionate Honda owners all over the world. We’ve helped countless enthusiasts achieve their goals, whether it’s a fully-built race car or a daily driver that performs and looks great on the street. One of these enthusiasts is Andy Thompson – and he lives right here in Wisconsin. He’s local to our facility in New Berlin, Wisconsin and is close enough to stop by from time to time. We were lucky enough to see his amazingly clean CR-X SiR at our 2014 Dyno Day event.


His CR-X is a 100% legally imported JDM RHD beauty that took over 3 months to locate and import in 2008. Because Andy imported it, he’s the first and only Stateside owner. He took it from fairly rough shape and has built up an “OEM perfection” build that stays true to the period and is fueled by Andy’s background in both graphic design and mechanical engineering. If you ask us, that’s a potent education for crafting a clean ride. Good taste plus the skills to achieve your vision? That’s a win-win combo.


The love he’s put into his old school Honda definitely deserves a special showcase, so we caught up with Andy to get the 411 on his build. Andy says that compliments can be hard to come by in the import scene, but I think you’ll agree his CR-X deserves them.

Why a CR-X?

Andy: I feel that many people forget to realize the fact that vintage Japanese cars can hold as much history as any other car. It’s true that many older Japanese cars are built like cheap utilities -- including the Honda CR-X -- but that doesn’t make them any less important than any other car in the scope of automotive history. Many of us grew up with affordable tuner cars, including myself, buying my first CR-X at 13 and owning five EFs before I even bothered to try a different car (an S2000), but unlike many, I can’t just forget and leave the EF chassis behind.

At 17 I sold off almost everything I owned in order to seize the opportunity to bring this CR-X into the US -- fully legal and VIN matched. The car was sold as an extremely dirty rolling shell, with engine shipped separate, but it was all there. Rust free, and most importantly able to be registered just before the laws changed.

Having owned a CR-X since 13, I had grown an undivided love towards the weird little cars, and knew instantly that this car had the potential I was looking for.


Classy choices for a teenager Andy! You were raised right! Tell us about your CR-X.

Andy: The exact model is a 1990 EF8 SiR Glasstop in Torino Red Pearl. For a little background info, SiRs were only made in Steel roof and Glasstop models. The Glasstop was a rare dealer option, in which was only sold in black and red. The red models were extremely rare as compared to the black, in which I only know of one that resides in the US at this time.


Since 2008, I have been slowly working at this car to build an example of one of the cleanest CR-X projects while paying respect to what Honda intended when their engineers designed this lovable little machine. I continually strive for OEM perfection, and aftermarket modifications that complement the vehicle in a vintage grip car sort of manner.


Every year I try to do something interesting to the car. This past spring, I completed an EK9 32 mm 5-lug conversion with EK9 brakes in order to fit a set of extremely rare DP Motorsport Pacific wheels I picked up brand new in box from 1987. Because I have a BS in Graphic Design, visual and complementary aesthetics are very important to me; these era-specific turbine wheels were perfect for the car.


Wait so you found classic wheels that are even older than your car? And they were brand new?

Andy: Yes-- I purchased the wheels earlier this year from a guy in Ohio. The wheels were manufactured in 1987 and were still brand new, unused in their original boxes. 2 of the 4 were still sealed in their original bags never opened. So the wheels had sat for 27 years before I got a hold of them.


Holy cow that is awesome. What were the next mods?

Andy: The 5-lug swap project became quite an ordeal once I got into it, including sandblasting and powdercoating most of the suspension and brakes -- and acquiring a lot of new hardware, ball joints, bearings, etc. I met Scott at King Motorsports earlier this year and knew he was the guy to help me tie up all of the loose ends on my laundry list of parts to make the conversion happen.


What does the future hold for you and your CR-X?

Andy: Currently I am very happy with how the car sits. If I were to list future plans for the car, the top of the list would include new old stock front and rear bumpers, trim, and side moldings; OEM fog lights; and a working bumper pole (I have one, it’s just junk). I am also always on the look for old rare wheels, and would love to find a set of SSR Air Stage or Auswuch for it.

I’m happy with the stock B16 engine, it runs perfect and all accessories work, including the AC, thank god. Perhaps unrealistically, I have always considered a Honda N22 swap (I’m a pretty big diesel fan). I think a very interesting project could come about from the swap.

I’m very thankful that King Motorsports is able to help keep these “golden era” Hondas on the road. Valuable resources like that don’t come around often.

Enjoy my CR-X and remember to keep the classics alive!


Exterior
Complete matching VIN Real EF8
Torino Red Pearl Color
JDM SiR Cyber Top (glass roof, rare option)
JDM SiR Wing
JDM SiR front lip
JDM SiR Power folding mirrors
JDM SiR Amber glass
JDM Window visors

Interior
JDM NSX Seats
JDM SiR Back seats
JDM ATC Sprint Steering wheel (Mugen Horn Button)
JDM Mitsubishi Mini Disk Player/CD Player
HKS Shift knob
Cartiva Bamboo Floor Mats

Engine
Original matched B16A
HKS Sport Exhaust

JDM Integra Type R Valve Cover
JDM Integra Type R Oil Cap

Suspension
Skunk 2 Pro C Coilovers
Function 7 Lower Control Arms (Spherical Bearings)
ASR Subframe Brace
Spoon lower tie bar
Skunk 2 Pro Series adjustable control arms front
Skunk 2 Pro Series adjustable control arms rear
EK9/ITR 5 lug Front Spindles (Machined for SiR/DA Wheel Bearing)
EK9/ITR 5 Lug Rear Spindles
Powdercoated DA Front Knuckles
Powdercoated EK9 Rear hubs

Brakes
Powdercoated EK9 Front Calipers
Powdercoated EK9 Rear Calipers
OEM EK9 Brake Rotors
Techna Fit Braided Stainless Steel Brake Lines
Project Mu NS 400 Brake Pads

Wheels
15 X 6.5 +18 1987 DP Motorsport Pacific Wheels
185/55 R15 Yokohama S Drive Tires
Mugen Lug Nuts
Volk Rays Valve Stems


See more pics on Andy’s Flickr account:
https://www.flickr.com/photos/108200011@N02/sets/72157646023680793/

Find parts for your CR-X on King's online store:
http://kingmotorsports.com/s-86-crx.aspx

In the Shop: Porting K Series Skunk2 Intake Manifold

In our shop recently: We put our vertical mill to good use porting a Skunk2 K Series intake manifold for a 74mm throttle body. This manifold is headed for install on a K24/K20, with dyno tuning shortly afterwards.


Our customer Jason S. asked, "Can't this be done on a flap wheel?" The answer is that it is difficult to get the precision to open up the throttle body exactly 4mm with a flapper wheel. We're all about precision!


We are also porting the intake runners.


Here is a close up of the before (right side) and after (left side).


Call or email us to talk about your porting job!

http://kingmotorsports.com/advsearch.aspx?SearchTerm=port

Skunk2 Intake Manifolds


Dyno Day 2014: Recap


This year's annual event brought together people and cars for another great celebration of Honda automobiles! We put a lot of effort into putting together a fun and safe event and were happy to see this year bring in a great caliber of cars to show off. And a great caliber of people too!


In this recap we've assembled some voices and photos from Dyno Day 2014!

==

First up, a message from Scott Z (President of King Motorsports Unlimited):

Dyno Day 2014 was a huge success! Our biggest yet! Amazing cars from all over the country, an impressive turn out of ITR's with an estimated 700+ in attendance! Wow!!

We would like to give a shout out to the staff at King Motorsports:
Bob
Chad
Frank
Mike S.
Tim

And our volunteers:
Anne
Ellen
Dustin
Joe
Nadya
Sean
Steve

With special thanks to our MC, HondaPro Jason!

Without their over the top help we could not have made this event happen!

And thank YOU for all your support through the years!

Can't wait for 2015!


==


==


Next a recap from a regular Dyno Day attendee and King fan Calvin Quam:

New Berlin, WI was the place to be on June 29th, 2014!

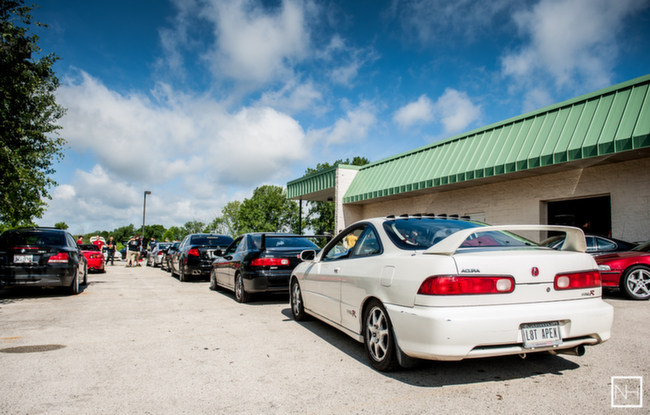
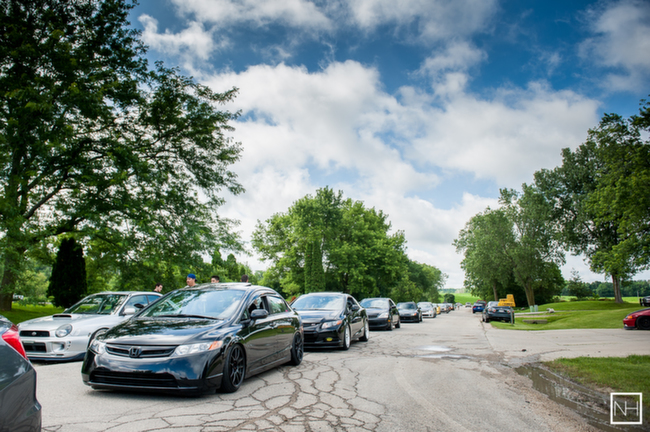
With the weather working in everybody's favor after some early morning drizzle, the sun came out as the cars and spectators rolled in to the largest "Honda" gathering for Wisconsin. With more cars than parking, people came from all over to be apart of it all. License plates from over 16 states could be found on several Honda platforms, not including a few from Ontario. Many of these out of state plates came on one of the most lusted after chassis, the Integra Type R. Thanks to ITR Expo 2014 being held the following Monday and Tuesday at Road America(Elkhart Lake, Wi), many of the participants to that event came a day early to check out Dyno Day '14.

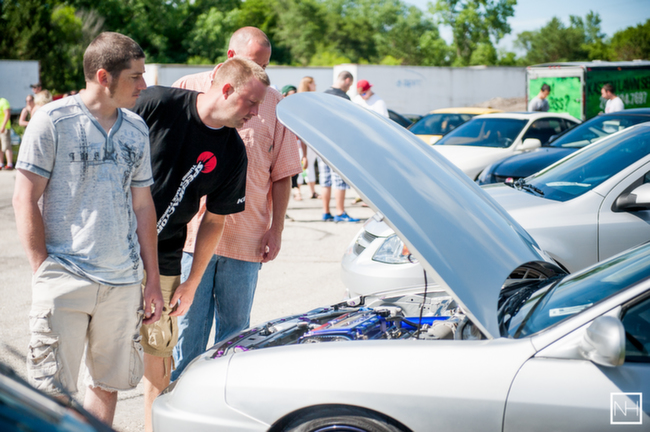
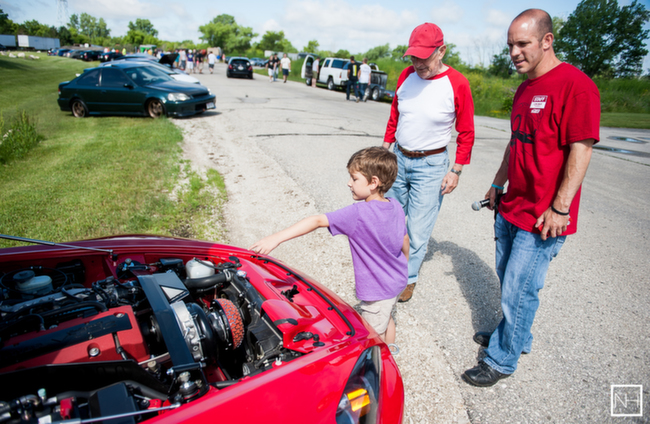
One unlucky ITR owner who drove from Florida had an unfortunate mishap, bending several valves on the way to the show. To the amazement of many onlookers, the head was removed for a parking lot valve replacement during the show. The smiles and cheers of joy when it fired to life were priceless, making you proud to be part of such a great car community with enthusiasts helping each other.

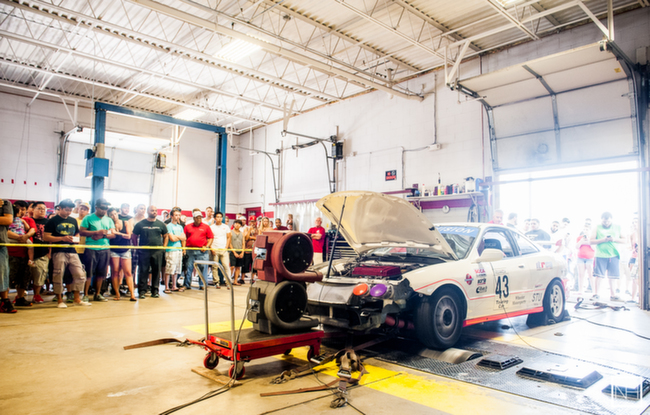
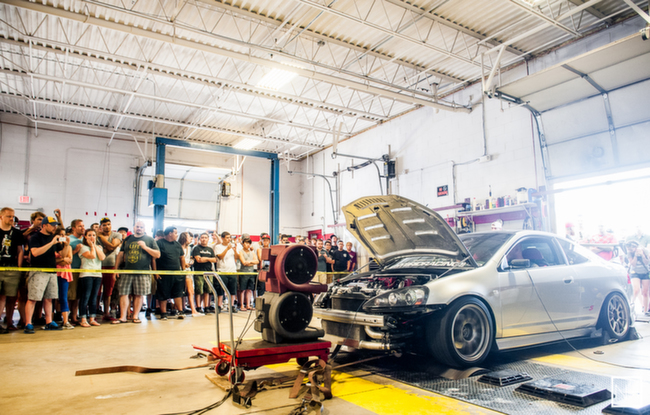
High revving dyno pulls, well-built show cars and great food provided by local Boy Scout Troop 93 are just a few things that make this show put on by King Motorsports so memorable. Events like these show any automobile enthusiast what its all about and grows us as a community. Put this show on your list of events to attend next year, I promise you won't regret it!


==


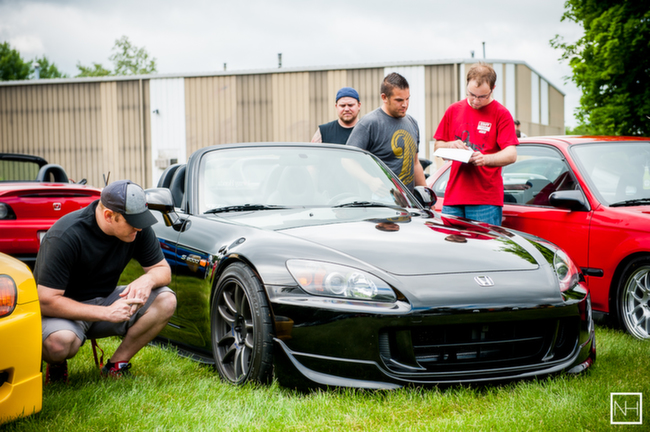
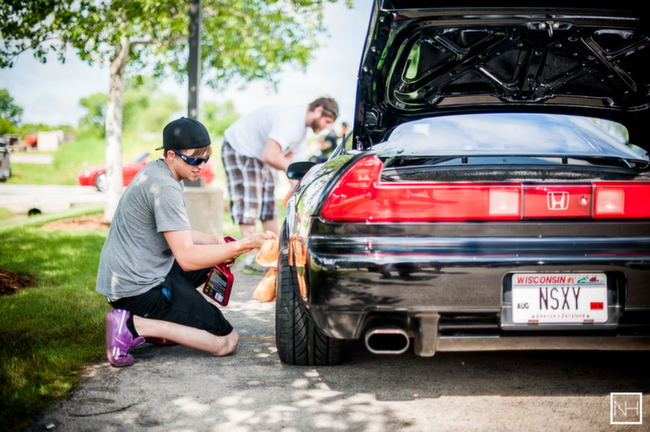
This black NSX was the winner of the STAFF PICK award, selected by the King staff and Hondapro Jason:


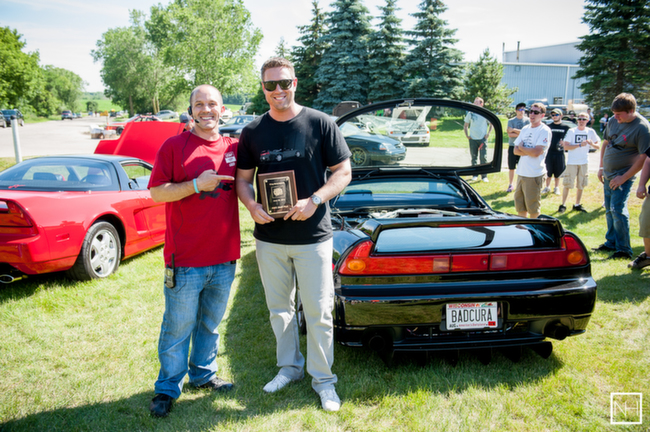
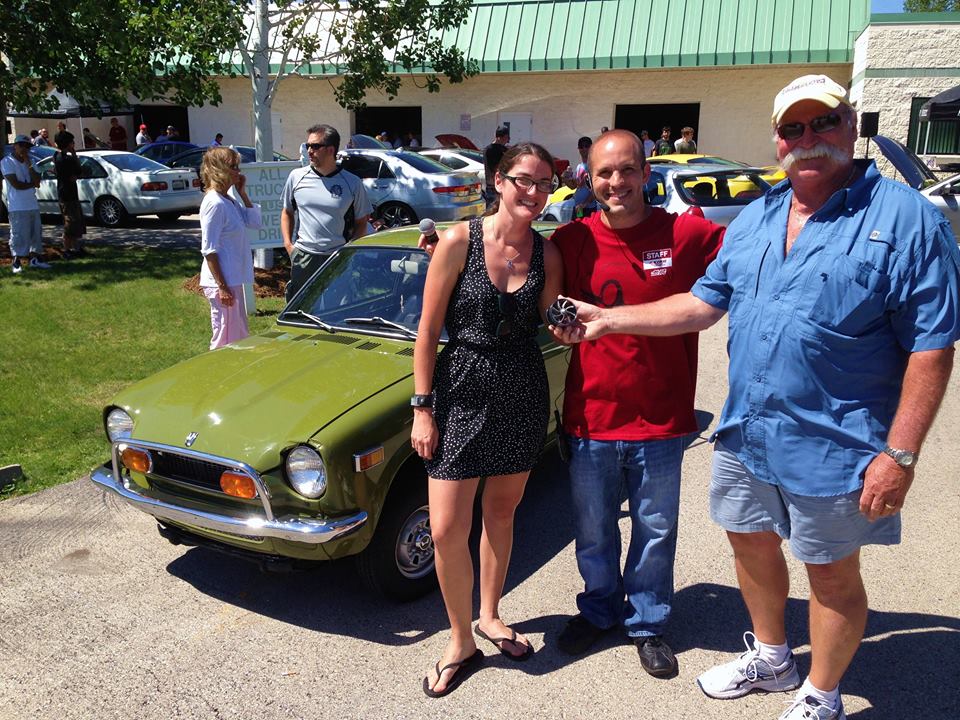
Here is a pic with the winners of the coveted King Motorsports Unlimited Dyno Day 2014 lowest horsepower award -Tracy and Dan Geiger and their awesome original paint Z600. They took home the "Turbonator" for extra hp!


==


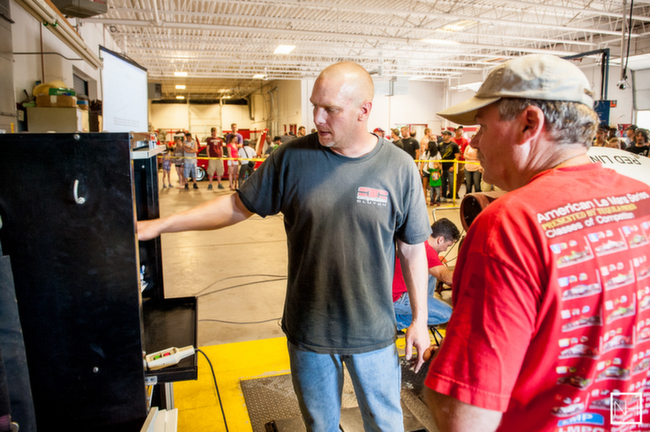
Recap from Honda celebrity and this year's event emcee, Hondapro Jason:


I like to help and volunteer when I can, so I asked Scott at King Motorsports if he would like some help on Dyno Day 2014. His response was "Yes! Would you like to emcee the event?" I agreed and at 8:15am I arrived after a 2 hour trip to King. I got all my 'gear on' then went to 'work'!

We wanted to bring a more personal feel to this year's Dyno Day. So armed with a microphone and loudspeakers, I interviewed the owners of some cars while standing next to their rides. This brought crowds around and really showcased some of the cars that would normally just get pictures taken and walked by.

The show this year had so much energy and love from the community. Scott and I were thanked about 500 times from various people. I enjoyed the show because you can see everything from a modded NSX to a showroom condition 1971 Z600.

While there were many highlights from the show, one thing stood out: An unfortunate event that happened to a guy named Craig. His timing belt broke on his B18 motor 40 miles from the King. This lead to everyone watching him rebuild the head and replace the valves; while working in the parking lot on a lunch cooler. "I couldn't of picked a better place to break down. They (King Motorsports) had all the parts I needed," said Craig.

That is a story I will be telling for a while!


==


Thanks and see you next year!


Many thanks to our official 2014 event photographer, Nick Hanson!


Check out more pictures of the event at Noggs Photography too! (Thanks Andy!):
http://noggsphotography.com/#/page/a731/king2014/

Noggs has a couple photos of Craig's parking lot repairs!


Couldn't make it to this year's Dyno Day? Be sure to make it to next year's event! Sign up for our newletter at kingmotorsports.com and LIKE our Facebook page to be the first to know when next year's event date is announced!


1989 Civic Si USDM Restoration: Travis Weaver's EF Time Machine


We always enjoy sharing the passion that goes into our customer builds. A typical product of that passion? Countless hours of wrenching. But the lesser-celebrated outpouring of skill, perserverance and resourcefulness? That comes in the form of the hunt for parts. In the case of Travis Weaver of the Pacific Northwest, a hunt for 20-year-old OEM and Mugen parts took him around the USA, then internationally. He became so good at it, he even made a living at it for a time.

Travis recently shared a pic of his Mugen EF exhaust - which he said took him nine years to find. Nine years! That got our attention, and we contacted him for his story.


***

My older brother first got me into Honda's back in the late 1990's when he purchased a teal colored 1992 Civic VX. He ended up swapping in a JDM B16A engine with a GSR tranny back around late ‘98. We had a lot of fun at the local street races in our early teenage years. I eventually bought my first Civic as well in 1999. It was a 1990 Civic STD 4 speed. Back in the earlier days they were largely frowned upon due to their square, boxy look.

I eventually sold my first car and purchased a 1990 Civic Si in 2002. I fell in love with that car. From when I first purchased the car, I wanted to do a complete JDM EF9 conversion on it after seeing pictures of one in California. In the earlier days if you wanted to find parts you were limited to your local importer (which typically only sold engines), eBay, or do what I did and contact a wrecker overseas and import parts yourself. I found a company in Malaysia back in 2003 with a complete EF9 front clip. With a very risky bet, I sealed the deal and five long months later had my first JDM clip complete with B16A and EF9 conversion. I ended up painting the entire car Milano Red and was the first local person to do a JDM EF back in 2003.

I eventually landed a job working for the largest indoor Honda/Acura Auto wrecker/JDM engine importer in 2005. Soon after I became their Inventory Manager and JDM parts specialist -- which was a great experience but after a few years I got tired of killing Hondas and became more focused on preserving and restoring them.

A few years later -- feeling the pressure of the economy and the unsure feeling of my own personal future -- I decided to sell my 1990 Si. It ended up going to a good home to a guy in East Coast Canada. I must say it was the biggest mistake that I made. I ended up driving a Mitsubishi 3000GT for a few months to focus on school but I got the itch again. I had so many regrets and so many things that I dreamed about doing to my old Si that I decided to start from scratch and do a full 1989 Civic Si USDM restoration. That way I can do things right the first time and go in a slightly different direction so it would not be like history repeating itself. Now I specifically chose the 1989 Civic Si because in the USA it was a one-year-only car, much like the 1997 Integra Type-R. I began to put out ads looking specifically for an ‘89 only.

Eventually I found a good clean shell with perfect seats, straight body and in overall great shape. The only problem is the engine was bad. I rented a trailer and made the three hour drive in the snow to buy the car. Upon arriving the owner informed me it still ran but made a horrible noise from the timing belt area. I towed it back and had my mechanic Thomas Strom diagnose the problem. Turned out to be a bad water pump. With a new factory pump and timing belt, mixed with a valve adjustment, I gave this 1989 Civic Si a new chance at life with 187k miles on her. I sold my 3000GT and with further inspiration from Thomas I decided to make a goal, take my time and stick to it.

My goal was to do a complete factory restoration on the car. We began tracking down rare USA accessories along with new old stock (NOS) parts from Honda. Almost all of the parts were either discontinued or no longer available. I then started contacting specific dealers to see if they had old inventory that was never reentered into the system when Honda changed its part numbers from HondaCode to what we have today. After I exhausted all of my resources here in the States, I then turned to Google Translators. I began contacting dealers all over the world. I managed to source new rare parts from Malaysia, Germany, UK, New Zealand, Spain, Japan, and even Canada – despite the challenge of different part numbers and inventory systems with many of them.

I used to have a Mugen addiction with my original 1990 Civic Si but finding parts for an EF were very hard and very expensive. I was able to source a real EF9 Mugen header along with some Mugen RNR's and a set of MR5 Final Versions. The one item I could not find was a Mugen EF exhaust. I managed to find two different ones that popped up for sale between 2006-2008 but was outbid both times on Yahoo Auctions. With my current restoration I told myself that I have to be true to both the year and the USDM theme that I am going for. It becomes a slippery slope once you diverge from your intended goal. All was fine until my good friend Moe from EFparts presented me with a USDM brochure from 1988 which showed the Mugen CF-48's as a factory option for the fourth gen. I knew that the pre 87's were offered with some Mugen goodies but this little piece of Honda literature gave me a valid excuse to go MUGEN WHORE again while still maintaining the factory look.

I managed to secure a set of crusty 14" CF-48's with aero discs and preceded to restore them. I have been keeping in touch with a few owners of the Mugen EF exhausts over the years in the event that they may want to part ways with it. Eventually I got a taker and finally brought home my current exhaust. Soon after I decided to give Scott Zellner a call at King Motorsports to discuss the Mugen spring rates offered with the sports suspension. After chatting with him for almost an hour he informed me he had two new sets of the old Mugen suspension still in stock. I could not believe that after all these years they were still around. I quickly purchased both new sets.

I could not be happier with how everything turned out for this build. I now have a true time machine that to me represents what Honda of North America was all about.

You can also follow the car's progress on Facebook. I created a page specifically for it here:
https://www.facebook.com/civic.si.944?tsid=0.7764118500053883&source=typeahead


***

Here are pictures Travis shared with us from his build! Thanks Travis, we can't wait to see what you do with it next!


VTEC Just Caked In Yo!


Last week King Motorsports fan Chris M. sent us the above Honda-inspired cake that he scored for his 30th birthday. That Facebook post cooked up a fantastic buffet of other Honda-themed cakes! You're in luck, we're serving up a slice of VTEC sweets!

Dustin K's 17th birthday: A faithful replica of his 94 Civic DX coupe with an EX/Si swap! Complete with grille and even wiper blades.


 Exhaust and red/clear tail lights!


 Dustin K also took a bite out of his 95 Civic DX hatchback with a 97-spec JDM ITR swap, painted EBP!


 Is that a Wisconsin license plate?


Dave B shared this EK9 wedding cake! Complete with amber side marker lights, pink trim and Type-R badging!


The cake came with its own mechanic maybe?


Back to Dustin K. Here's his S2000 which he chomped down for his 22nd birthday.


His Honda cake master has really improved over the years! Check out the red Honda badge, clean black seams and metallic blue exhaust tips!


 Stephanie M made this Bisimoto wagovan completely by hand, by herself! Nothing premade, she says!


What do you get Hondapro Jason for his birthday?


 Nathan G's wife surprised him with this beauty complete with spark plug wires!


 Here's a contribution from Simon P, who's grandma is texting her girlfriends a pic of his 30th birthday Integra. CarCake 624 is just about to cross the Finish Line!


Peter F's Honda has red wheels, a very small sunroof, plenty of roof-mounted air diverters, and is about to run over the Maytag Repairman.


Brandon C whipped this DC5 up for a friend and in true DIY fashion this was his first attempt at anything cake-related! Remember kids that a Ding Dong is never a proper substitute for jack stands!


Dustin K's Honda cake legacy also stretches back to his 18th, a milestone that included this frighteningly precise model of a Civic coupe with 5-spoke wheels and flame decals.


Joe K got himself a cake with Volk TE37s!


High school included this amazing CRX with swapped LS motor for Ryan P and Dustin K.


 Tyler K's wife crafted up this tasty valve cover for his 26th birthday!


Who you gonna call to get one of these fantastic cakes? Dustin K reaches out to the Cake Master Michael K, pictured below on the left!


Stephanie M hand-built this B series motor completely out of edible dough -- she says it tasted like a giant sugar cookie!


Alain M's 30th was powered by this amazing Honda tribute with an unusually short spark plug cover. Feast your eyes on that ornate oil fill cap!


Have a Honda-themed cake to share? Visit and contribute to the gallery on the King Motorsports Facebook thread!

Fakespotting: Mugen Oil Caps


Why does it matter?

There are many different styles, designs and colors of Mugen oil caps that are currently available for sale. Genuine Mugen oil caps are made with the best materials available and finished in color coatings that will not fade as quickly as fakes. Genuine Mugen oil caps also use a specifically-engineered, flat, grooved rubber seal for proper fit and oil containment designed for the heat generated by your motor.

How do I spot fakes?

1. Genuine Mugen oil caps will have a flat, ridged rubber seal around the threads. Fakes have a rounded seal that resemble a common o-ring. The picture below shows a genuine oil cap with the flat, grooved rubber seal.

How to spot fake Mugen oil cap

2. New, genuine Mugen oil caps ship with the self-adhesive center Mugen badge held in place with a small piece of clear tape. Mugen ships this way so owners can control the rotation of the circular badge upon installation. Oil caps with the Mugen badge pre-installed will not have a properly rotated Mugen logo upon installation.

3. Price seems too low to be true, or ships from a locale or seller that is not known to carry genuine items.

4. Mugen part number is missing from the package. Fakes can include elaborately copied packages that include the clear folded box, printed cardboard and black display foam.

5. Seller has many oil caps for sale, but this is one of the only Mugen products they sell. Beware of sellers that only sell some combination of reservoir covers, pedals, oil caps, shift knobs and radiator caps -- the most commonly produced fakes.

How do I buy genuine?

Obviously we recommend that you to buy from King Motorsports, where you can rest assured that your Mugen products are genuine and made with the correct materials and quality control that Mugen intended. If you are buying an item second hard, follow the same caution you would with any other purchase. Ask to see photos of packaging, if they have it. Ask if they have an original invoice -- many private sellers of second-hand items within the USA often have boxes (applies to larger parts boxed up in cardboard with original Mugen stickers) and invoices that are printed with KING MOTORSPORTS on them.

http://www.kingmotorsports.com/advsearch.aspx?SearchTerm=mugen+oil+cap