Mugen Cover Art - Three Decades of Valve Covers


We recently came across a 2-page spread of Mugen valve covers produced from 1973 to 2001. Called "MUGEN - One of the Art," the pages lay out 23 photos of Mugen valve covers spanning three decades of racing and performance.


1973 MF-318 - 1.3L L4 FJ1300:


1988 MF-204 - 2.0L L4 16V F-3:


1988 MF-308 - 3.0L V8 32V F2000:


1989 MF-358 - 3.5L V8 32V F-1 spec.:


1990 D16A BASE - 1.6L L4 16V SCCA GT3:


1992 MF-351H - 3.5L V10 40V F-1:


1993 MF-308 - 3.0L V8 32V F3000:


1993 MF-308 - 3.0L V8 32V F3000:


1994 MF-204 - 2.0L L4 16V F-3:


1994 MF-351HC - 3.5L V10 40V F-1:


1994 MF-351HD - 3.5L V10 40V F-1:


1995 H22A BASE - 2.0L L4 16V JTCC:


1995 MF-301H - 3.0L V10 40V F-1:


1996 MF-204A - 2.0L L4 16V VTEC F-3:


1996 MF-301HA - 3.0L V10 40V F-1:


1997 MF-204B - 2.0L L4 16V F-3:


1997 C32B BASE - 3.4L V6 24V JGTC:


1997 H22A BASE - 2.0L L4 16V JTCC:


1997 MF-301HB - 3.0L V10 40V F-1:


1998 MF-301HC - 3.0L V10 40V F-1:


1999 MF-301HD - 3.0L V10 40V F-1:


2000 MF-301HE - 3.0L V10 40V F-1:


2001 MF-408S - 4.0L V8 32V Le-Mans/ALMS:


All 23 Mugen valve covers:


Dyno Day 2013 Recap

This year's Dyno Day got an early start as attendees took our advice and showed up on time. :) In fact we had people arrive an hour early to chill with their friends as we set up the check-in booth. We had 224 registration goodie bags to hand out -- and we had nearly as many cars. Dyno runs ran through the day in the shop, with live video feeds piped into our showroom. In the showroom we had a rare and one-of-a-kind display of Mugen and King nostalgia prepared especially for Dyno Day. Some of these items have never been publicly displayed.

Deletah was once again on hand to fill the deepest parts of your ears and hearts, and Andy Noggle was on hand as our event photographer. Boy Scout Troop 93 served up BBQ chow as raffles and nice sponsor prizes were given out throughout the day.

Rounding out the event were show awards for Farthest Distance Traveled (William Wang from New Hampshire), King of the Dyno (556 HP daily driven Supra), Staff Pick (red EF Civic hatch), People's Choice (black 499 HP turbo S2000) and Lowest Pull (CR-Z at 122 HP).

During the day we offered 10% off all in-stock items and had a few garage sale items for sale -- including the motor out of the King Motorsports RSX Challenge Car.

We caught a nice break in the weather too. The sun was out just enough to bring out the shine on some amazing rides.

Thank you to all our many sponsors, attendees and volunteers who helped make the event so memorable! We're already at work planning the 2014 Dyno Day!


Jon L. sent us this awesome video recap of Dyno Day featuring a few camera techniques we've never seen before!

http://www.youtube.com/watch?v=NeYFXUXHGMo


You can see dozens of official event photos on our new GALLERY page.

And here are a few pictures from NoggsPhotography:


San Pedro: Debut Race! (Updated w/ Vid)

Our Prelude race car project known as San Pedro recently had a great day of testing at Gingerman Raceway. Once back at the shop we did some fine tuning and adjustments based on what we learned.


We prepped spare noses/airdams and splitters in anticipation of San Pedro's debut race at Michigan International Speedway in two weeks.


5/25/2013: San Pedro wins its first National SCCA EP race from the pole of the 2013 race season at Michigan International Speedway today complete with a new lap record! Congrats to Moser Racing - awesome result!


5/26/2013: Day 2 at Michigan International Speedway. San Pedro wins the qualifying race by 39 seconds! Way to go Moser Racing!


Day 2 at Michigan International Speedway and another flag to flag win for San Pedro and the Moser Racing team! Way to go guys!!!!


San Pedro captures the pole in its very first SCCA EP National race of the 2013 race season- pumped!! Go Joe Moser!!!


Fun San Pedro factoid- Top speed at Michigan International Speedway on the banking was 144 mph. Entry speed into Turn 1 off the banking was 62 mph. San Pedro brakes from 144 mph to 62 mph in 63 feet!!!!


The Mosers have posted the video on Youtube!

Engine build: EV 1.3 HF

In the King shop last week! We finished up an old school EV 1.3 HF build. This engine will soon be installed in a beautifully restored 1985 HF.


The tricky part of an old school engine build like this EV 1.3 HF is a shortage of OEM rebuild parts- they are getting very scare.


Because 1st. over bore pistons are no longer available, we commissioned Wiseco to build a forged piston with the exact dimensions of the factory piston with the bore size we needed. We stress relieved and deburred the factory connecting rods and the whole rotating assembly was balanced to our specifications.


The EV 1.3 HF cylinder head ready for final assembly. Valve seats were carefully blended and just a touch bowl work to increase efficiency. Will 50+ mpg be a reality using yestertech?


We also got this info & picture from Yawsport:

"Captured fresh out of the paint booth over 1 year ago, this champagne Honda Civic 1300 Hatchback (affectionately named "Champ") will adorn the fully blueprinted EV1 engine currently being finished up by King Motorsports. It's been a long road to find some of the engine internals needed to complete this detailed build, but it will definitely be worth the wait. Stay tuned for the full write up of this project as well as some custom suspension goodness."


The EV 1.3 HF engine is almost buttoned up and looking terrific!


http://www.kingmotorsports.com/engine_building.aspx

Chris K.'s Mugen Del Sol

Return of an old friend! Yesterday, long-time King Motorsports customer Chris K. brought in his Del Sol that has been in storage for many years.


We are in charge of bringing it back to life. Years ago we installed a Mugen B16B N1 crate engine and well as a cool set of Mugen MF-10L mirror face wheels. Since then, Chris has collected all the Mugen aero parts as well as some other really cool period Mugen bits. Once complete it will be a stunner!


Awakening the beast after many years of storage. Chris K's Del Sol equipped with a Mugen B16B N1 crate engine, Mugen valve cover, Mugen header and plenty of other rare Mugen bits.


See more performance parts for the Honda Del Sol on our online store!

San Pedro: Unleashed for Testing


We put our Prelude race car project known as "San Pedro" through the paces for testing at Gingerman Raceway this week, and the results were fantastic!


San Pedro's driver's office. Easy to read analog gauges, GPS based data aq and adjustable brake bias. Uncomplicated and clean!


Testing going well. First set of Hoosiers are now history.... :)


Starting to use some brakes.... Huge brake ducts and trick race pads. This is way they should look when you use them hard!


The driver says there was a balance problem. The crew refers to this as driver running out of talent :)

For the record, we are extremely happy the driver wants to push the boundaries of adhesion. Sometimes that means going over the limit to find exactly where that limit is. That's precisely why we go testing! We have plenty more splitters where this one came from (it helps that we made our own).


That's a wrap from Gingerman Raceway! We learned what the car likes and finished up 2 seconds under the lap record. A very good day!


Want to ride  along? Watch the San Pedro test video now posted on YouTube!


Re-inventing "San Pedro" Part 2 (Updated)


We've had so many pictures to share of our 4th gen Honda Prelude race car project (dubbed "San Pedro") that we've decided it's high time to start a new blog post! Welcome to "Re-inventing 'San Pedro' Part 2"!


Update 1/18/2013:


This week we have been working on building the plug from which the mold for the front air dam will be made. The airdam will provide a platform to mount the front splitter once completed. Here we are roughing out the foam core to the basic shape we are looking for.


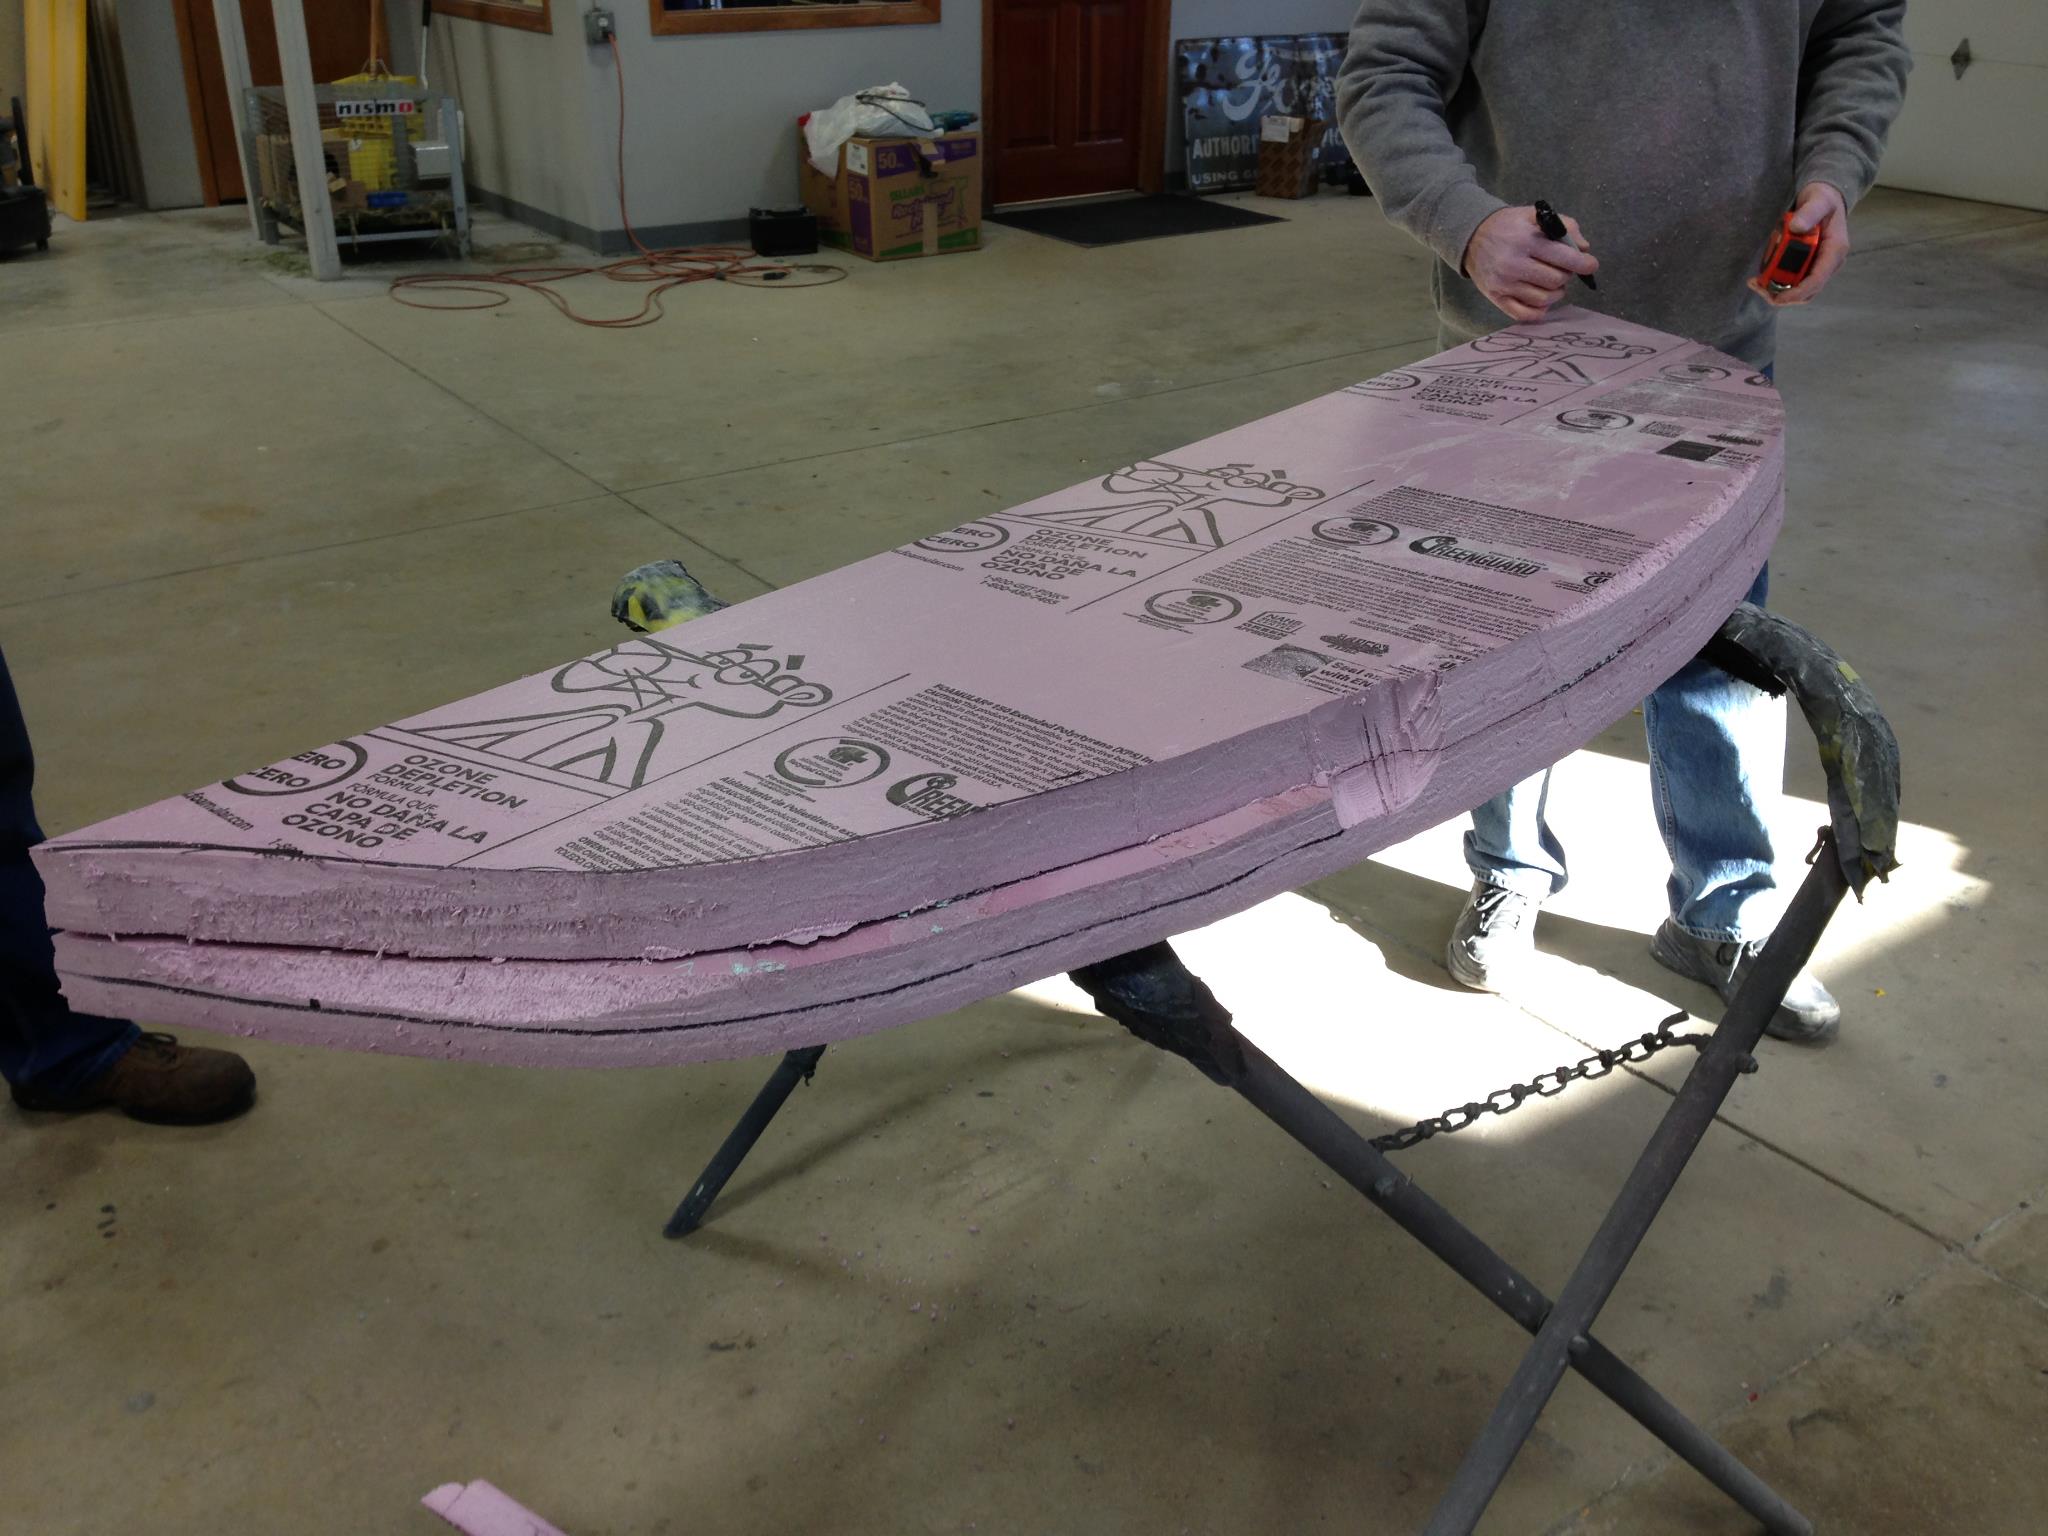
Once the basic shape has been roughed out, Bondo is applied and sanded into a finished shape. This is a very time consuming process as the entire air dam has to be symmetric -- with a perfect surface finish. Up next, building the mold from this plug and making finished pieces out of carbon fiber! Stay tuned.....


Update 1/24/2013:


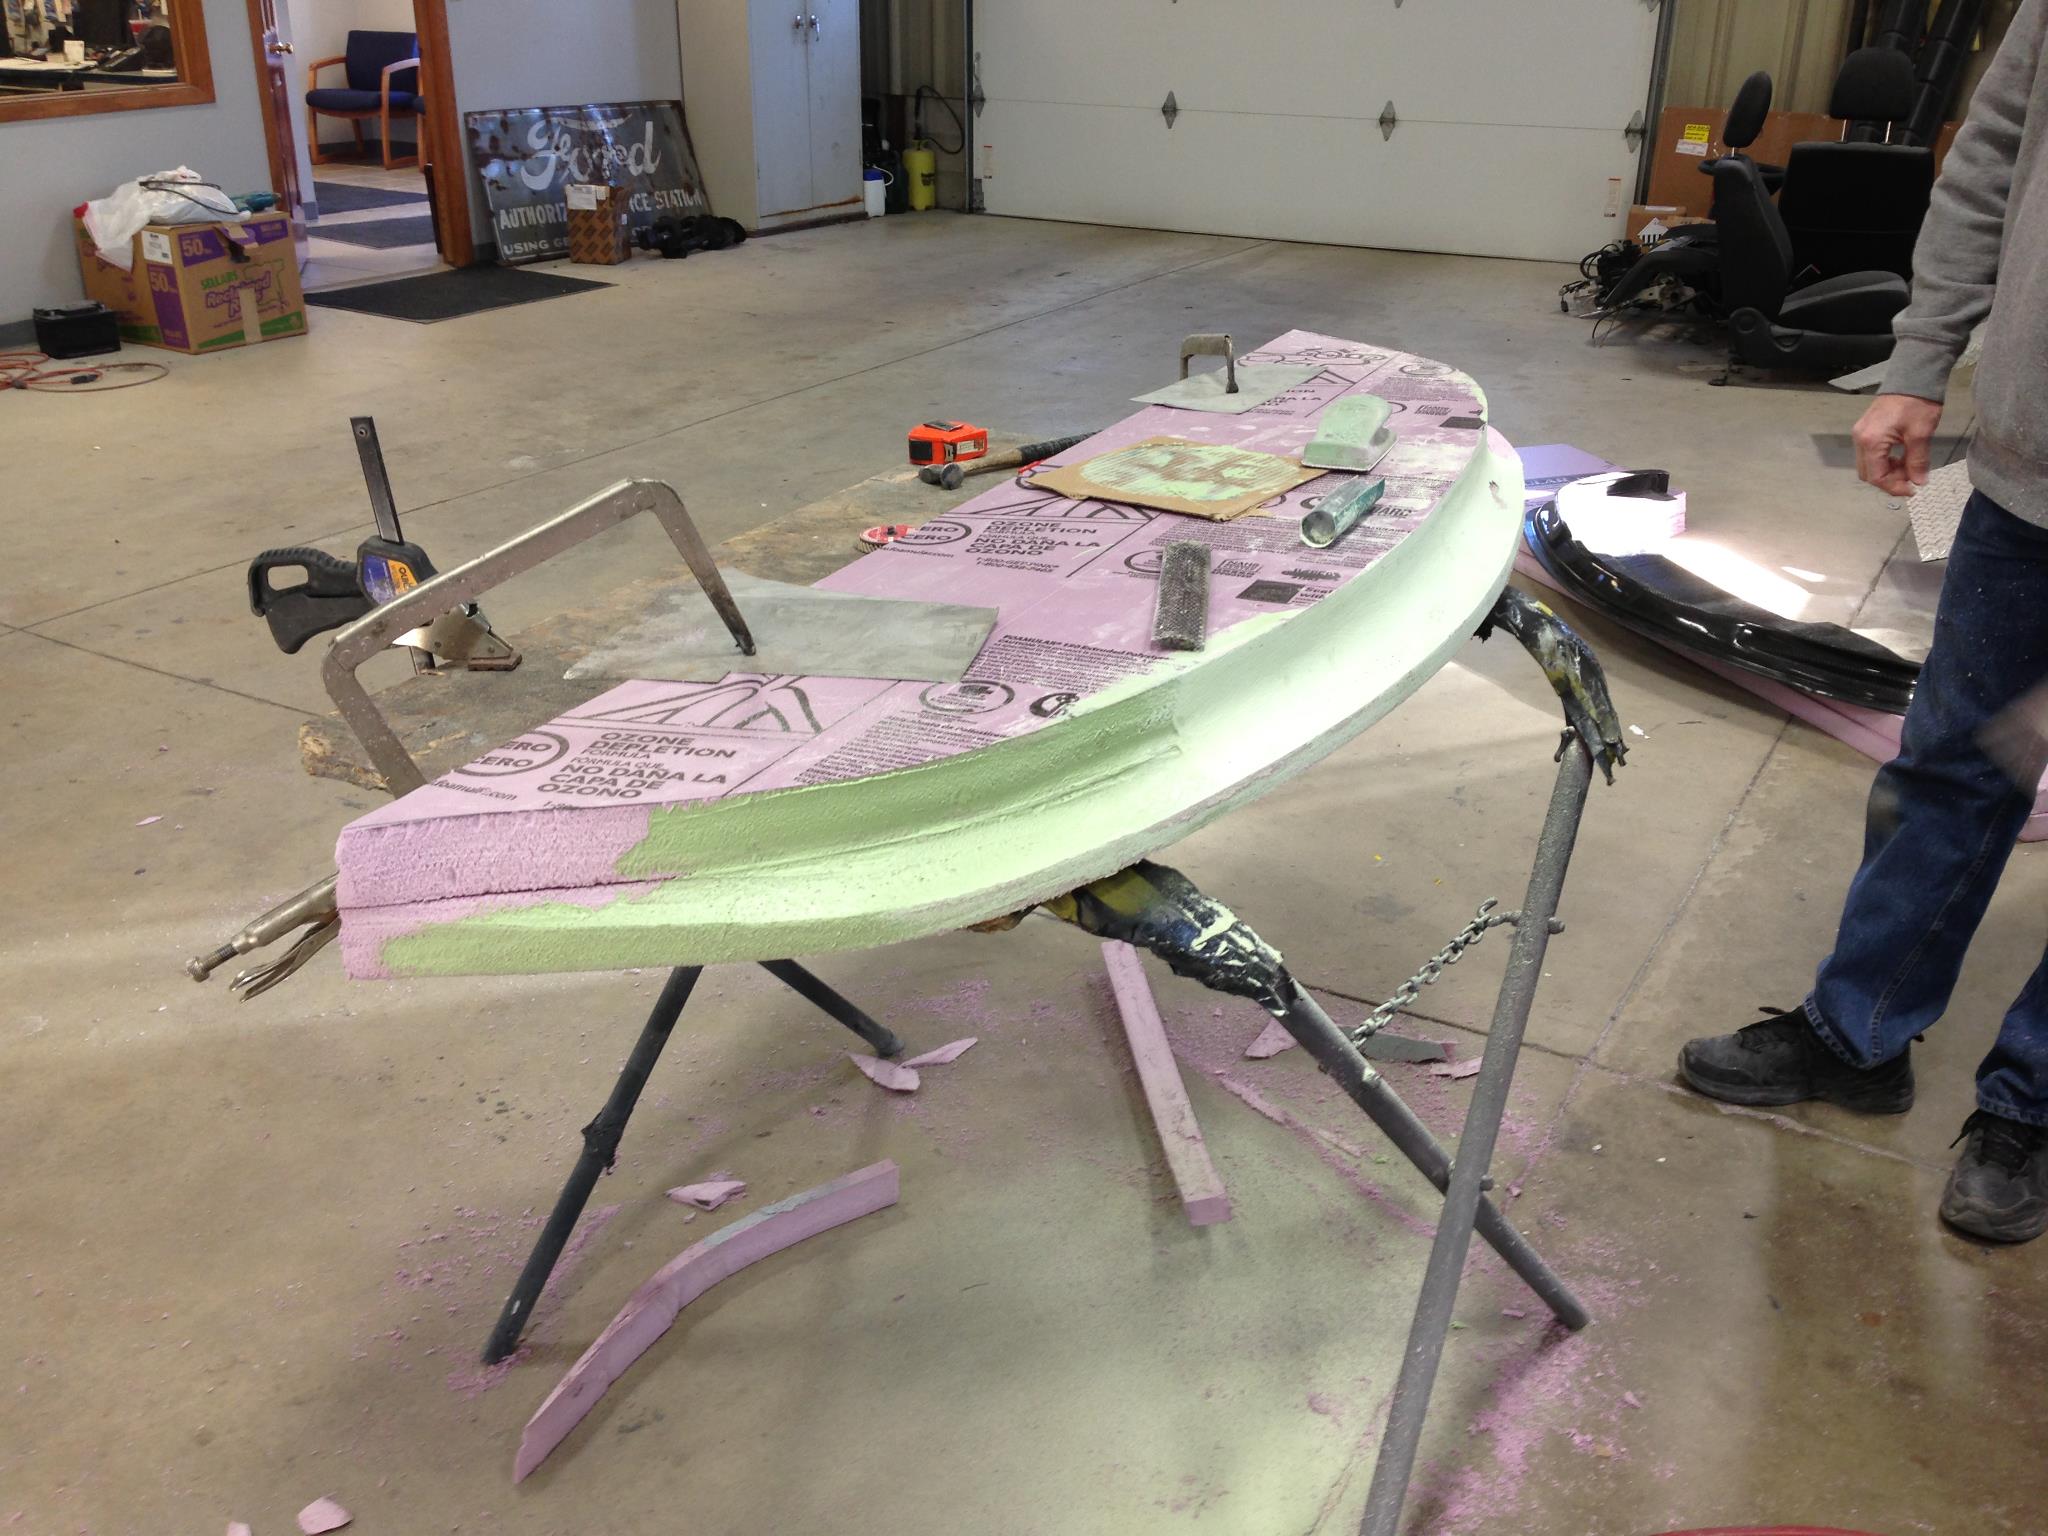
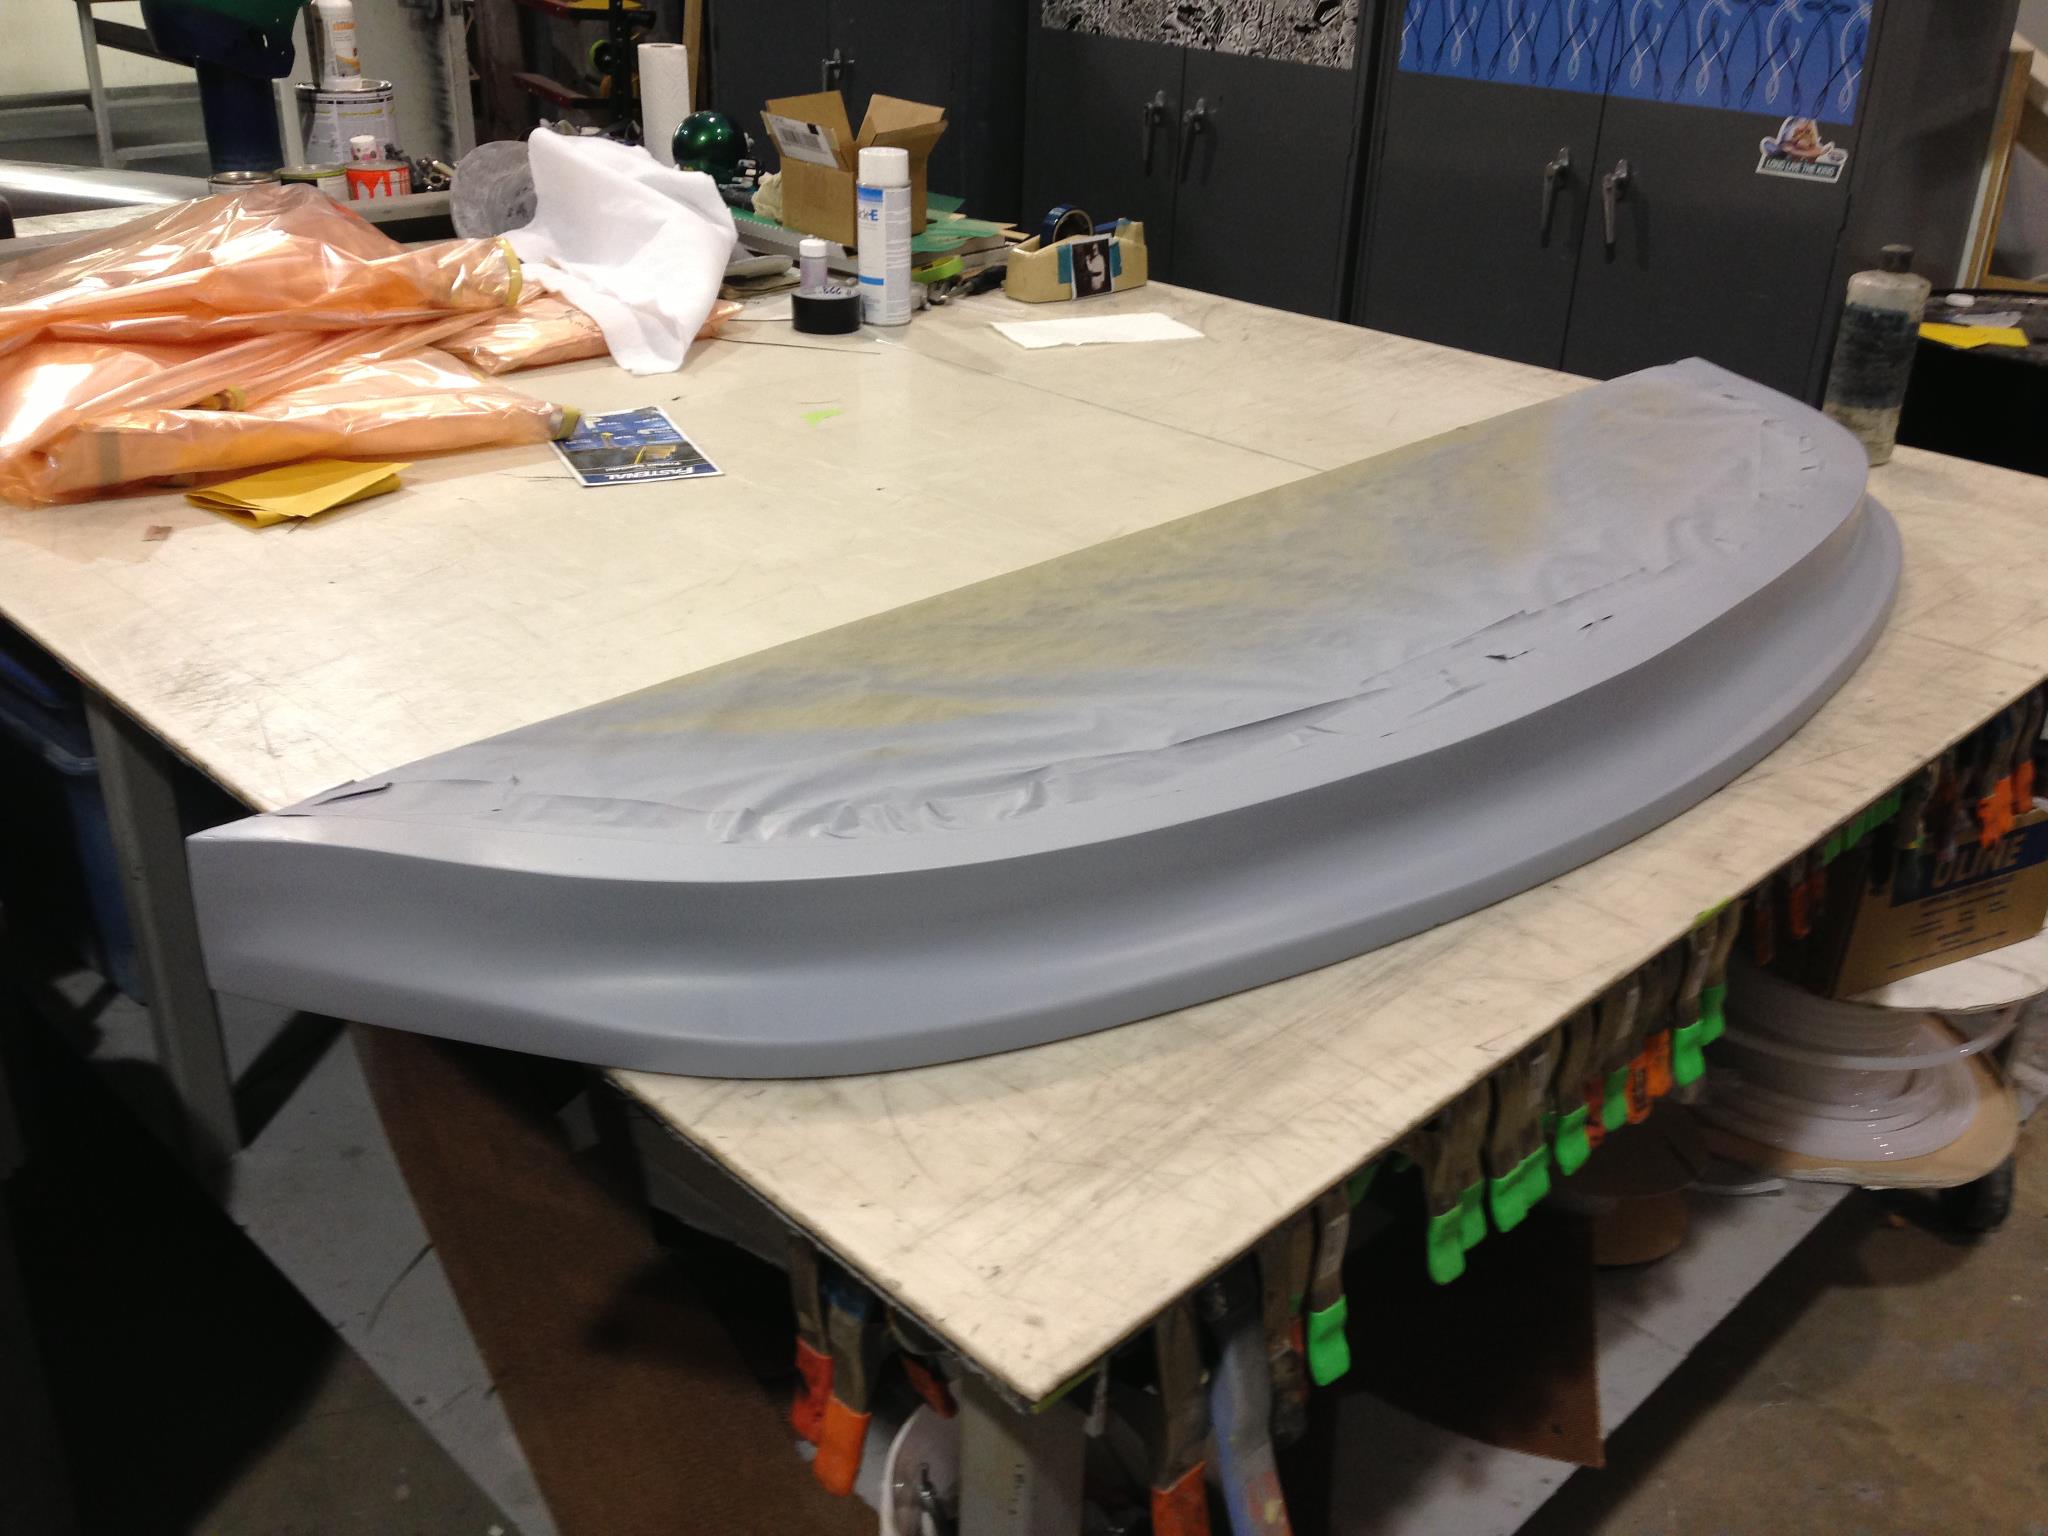
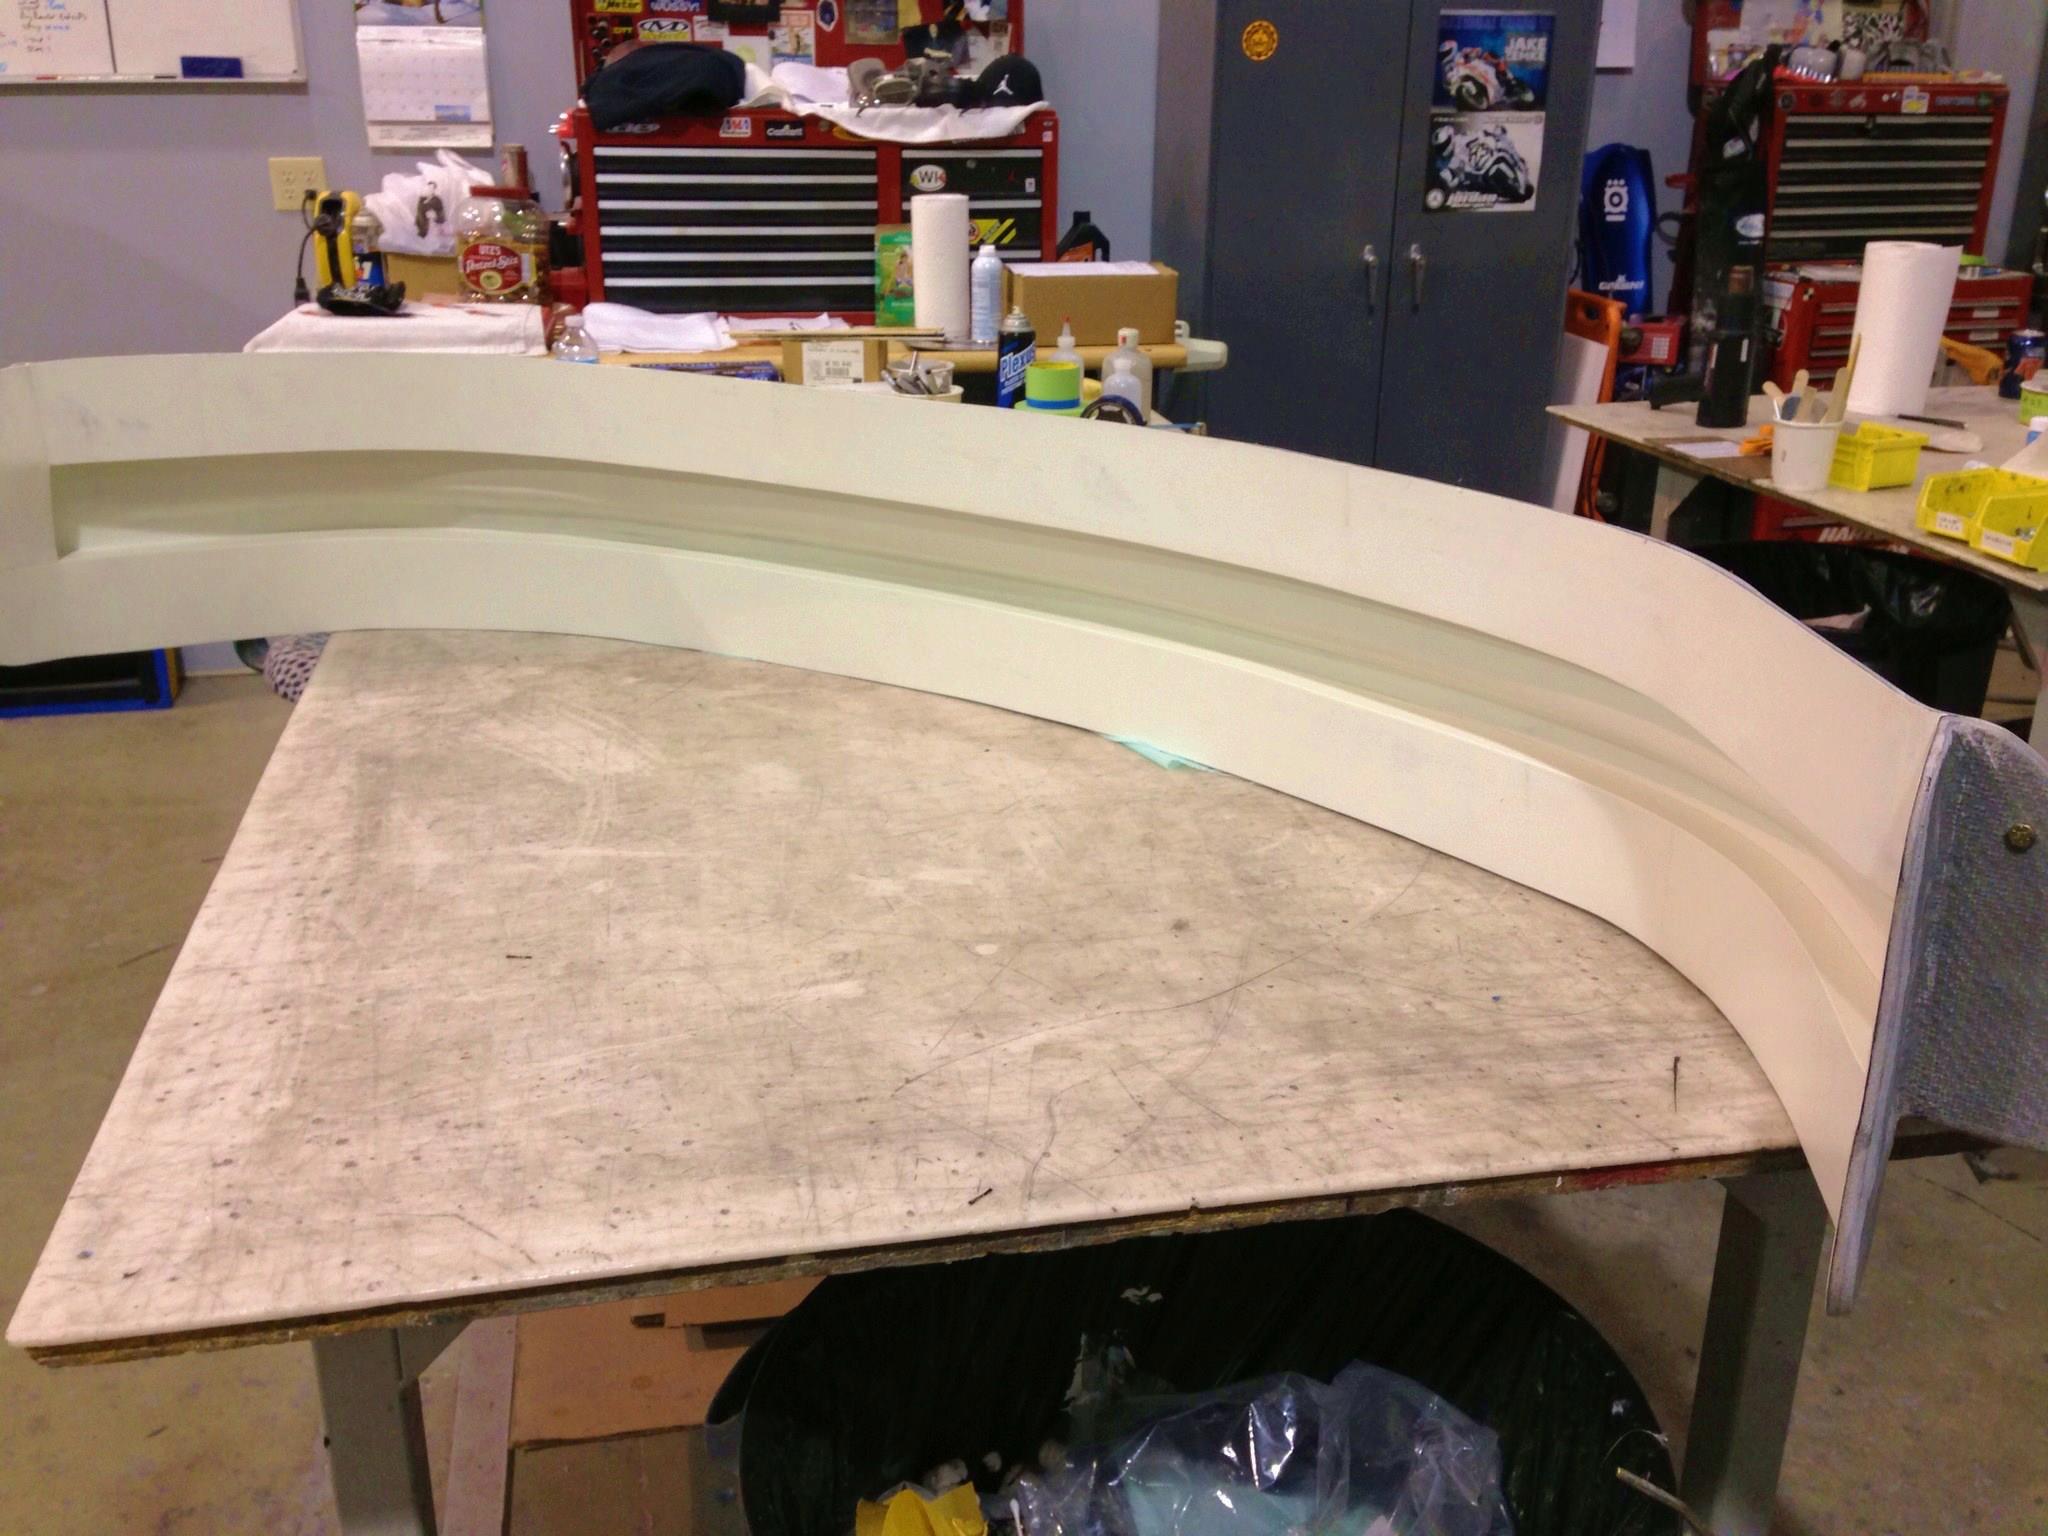
Work continues on the front airdam plug. After numerous coats of Bondo and shaping, we are getting close to a finalized shape. Next step is several applications of high build primer and sanding to make the surface of the airdam plug absolutely perfect with no pin holes or sanding marks. This is roughly what the airdam it will look like when attached to the front bumper.


Update 1/30/2013:


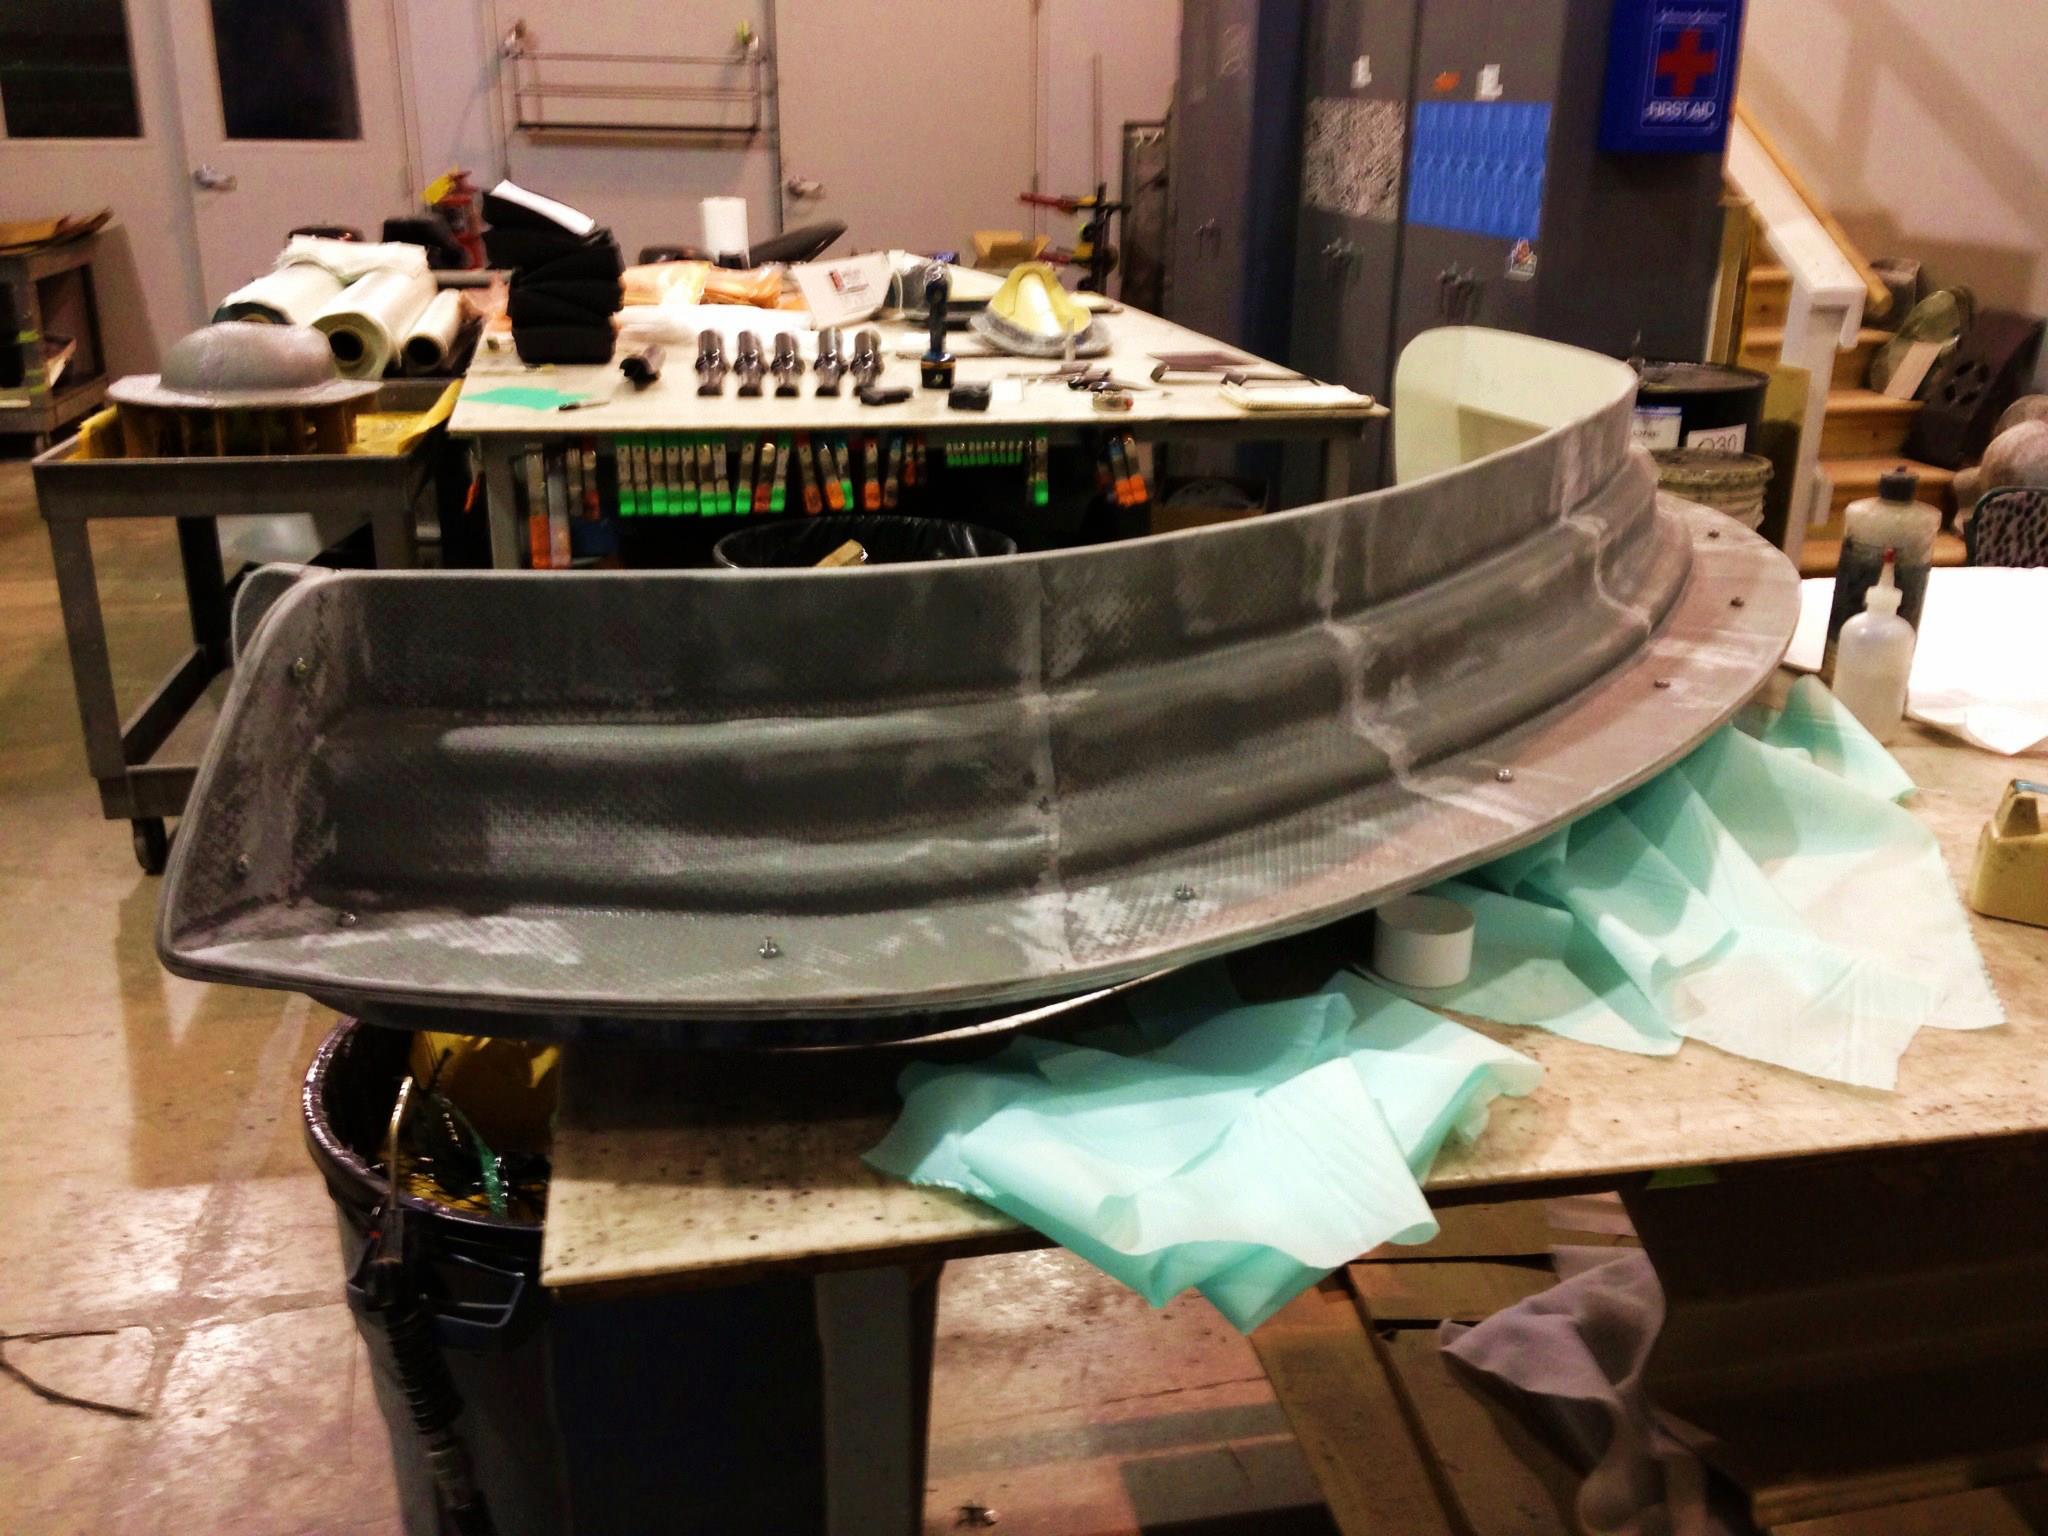
We have now completed the plug for the front airdam mold. Before the mold is made from this plug, it will be liberally coated with wax and then with a mold release agent so the fiberglass used in making the mold does not stick to the plug.


Here is an example of what the final mold looks like. The molds are designed to have great strength so there is no potential for any dimension of the final part to change during the lay up process.


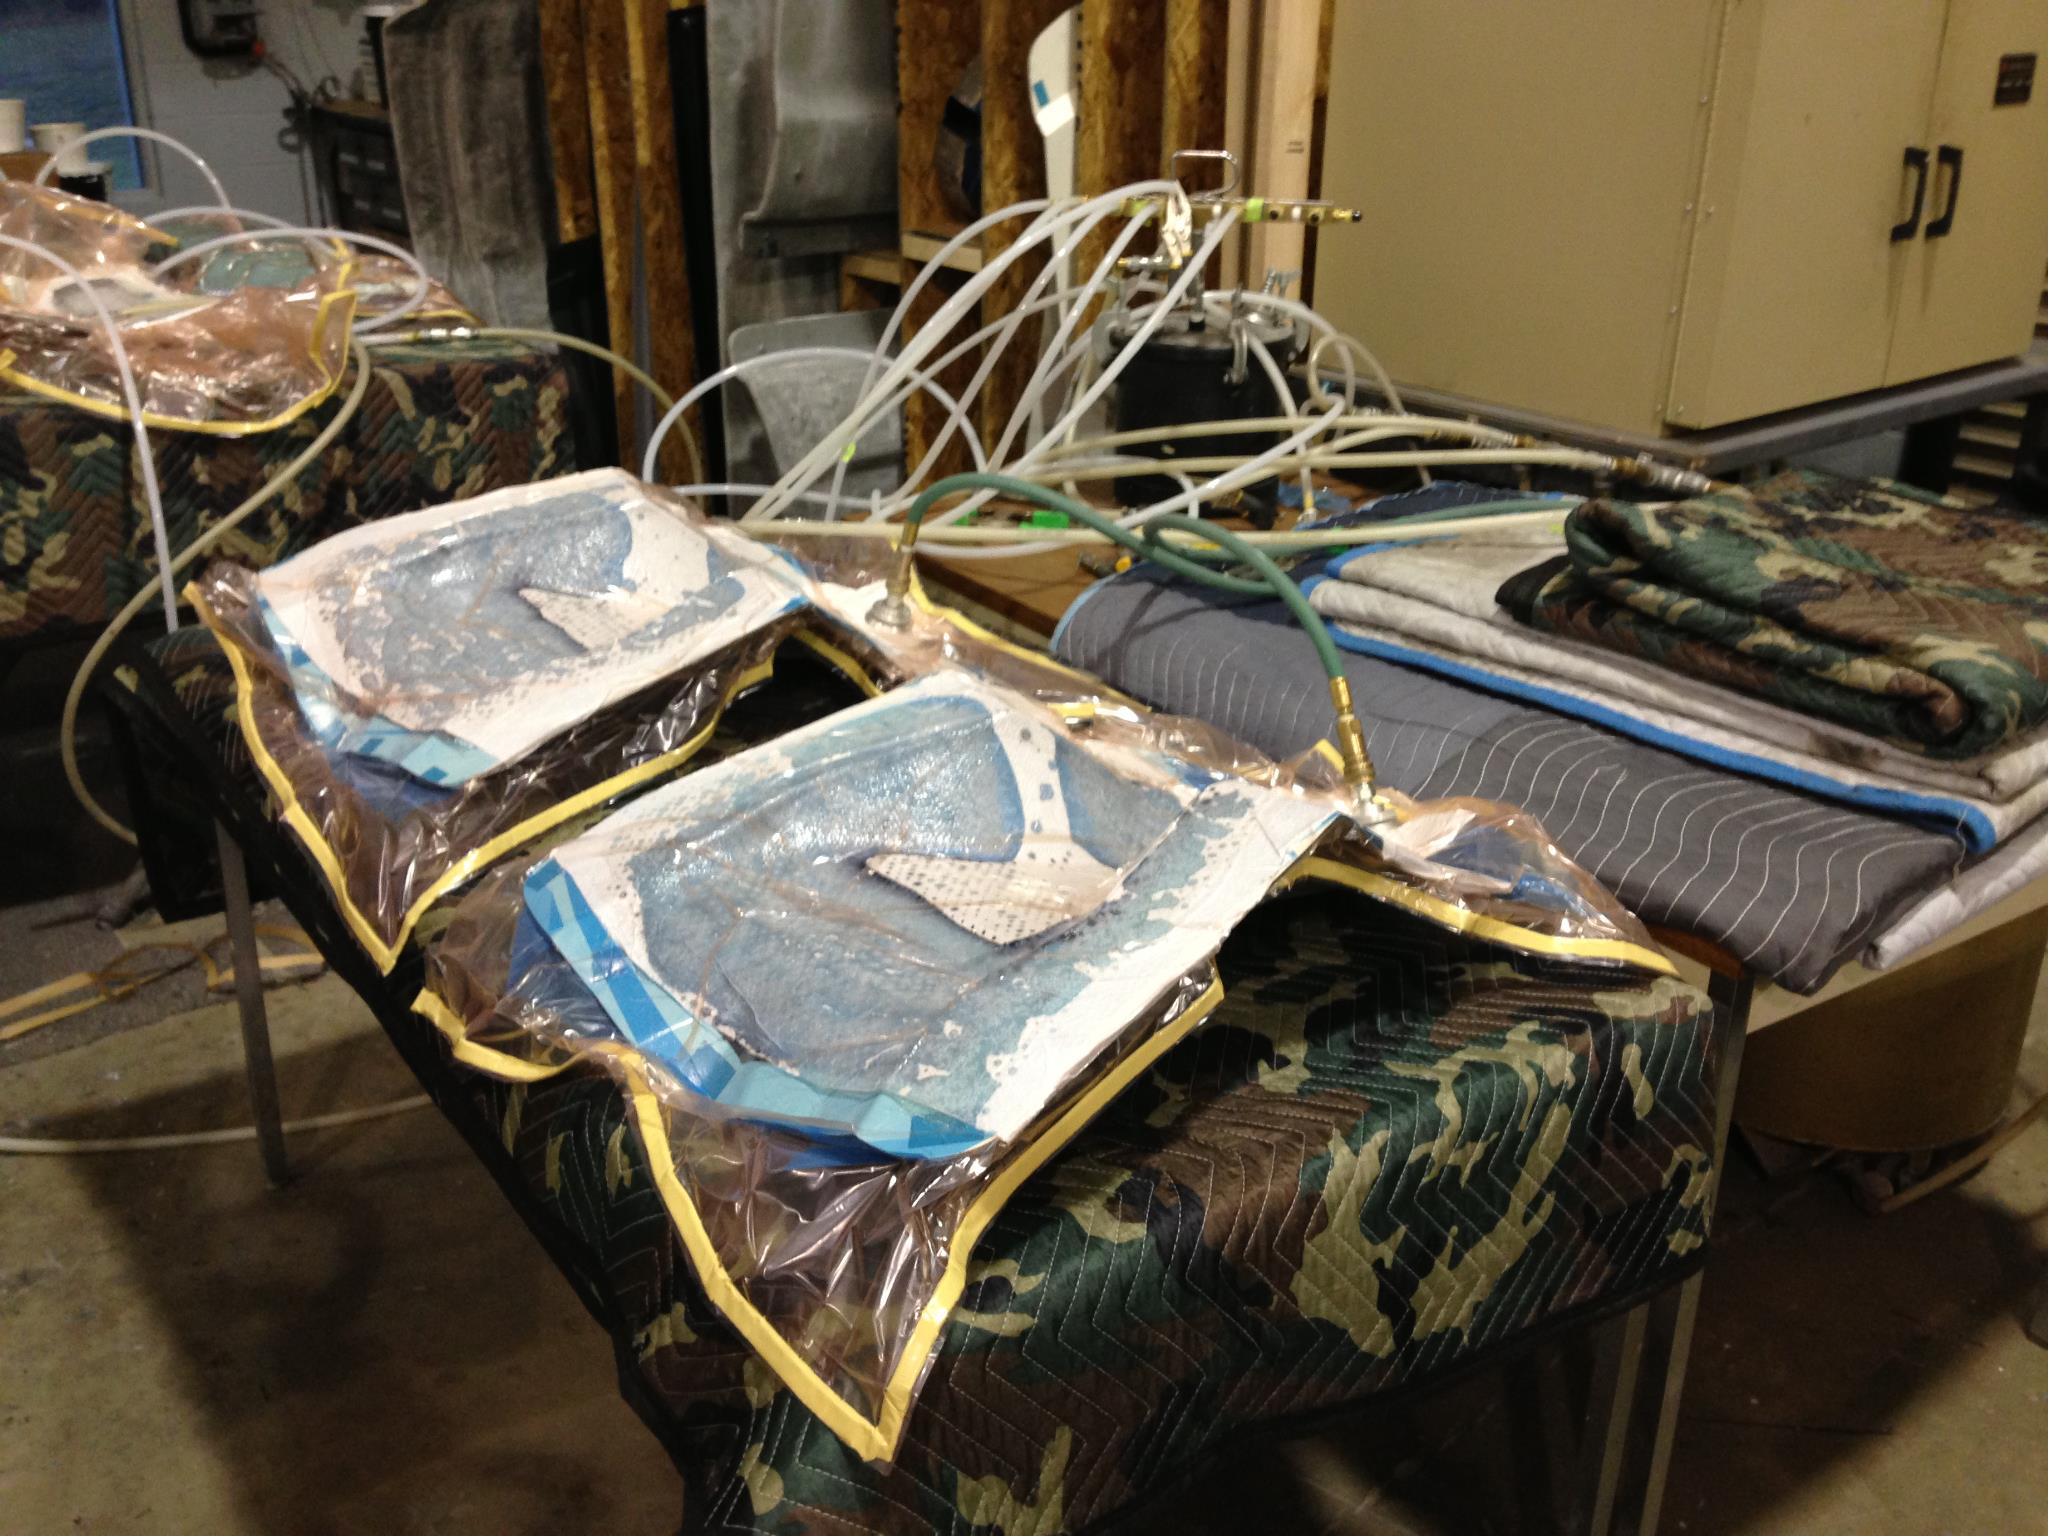
The next step in producing the airdam for San Pedro is vacuum bag moulding.

Vacuum bag moulding uses a flexible film to enclose the part and seal it from outside air. A vacuum is then drawn on the vacuum bag and atmospheric pressure compresses the part during the cure process. Vacuum bag material is available in a tube shape or a sheet of material. When a tube shaped bag is used, the entire part can be enclosed within the bag. When using sheet bagging materials, the edges of the vacuum bag are sealed against the edges of the mould surface to enclose the part against an air-tight mould. When bagged in this way, the lower mold is a rigid structure and the upper surface of the part is formed by the flexible membrane vacuum bag. The flexible membrane can be a reusable silicone material or an extruded polymer film. After sealing the part inside the vacuum bag, a vacuum is drawn on the part (and held) during cure. This process can be performed at either ambient or elevated temperature with ambient atmospheric pressure acting upon the vacuum bag. A vacuum pump is typically used to draw a vacuum. An economical method of drawing a vacuum is with a venturi vacuum and air compressor.

A vacuum bag is a bag made of strong rubber-coated fabric or a polymer film used to compress the part during a cure or hardening process. In some applications the bag encloses the entire material, or in other applications a mold is used to form one face of the laminate with the bag being a single layer to seal to the outer edge of the mold face. When using a tube shaped bag, the ends of the bag are sealed and the air is drawn out of the bag through a nipple using a vacuum pump. As a result, uniform pressure approaching one atmosphere is applied to the surfaces of the object inside the bag, holding parts together while the adhesive cures. The entire bag may be placed in a temperature-controlled oven, oil bath or water bath and gently heated to accelerate curing.


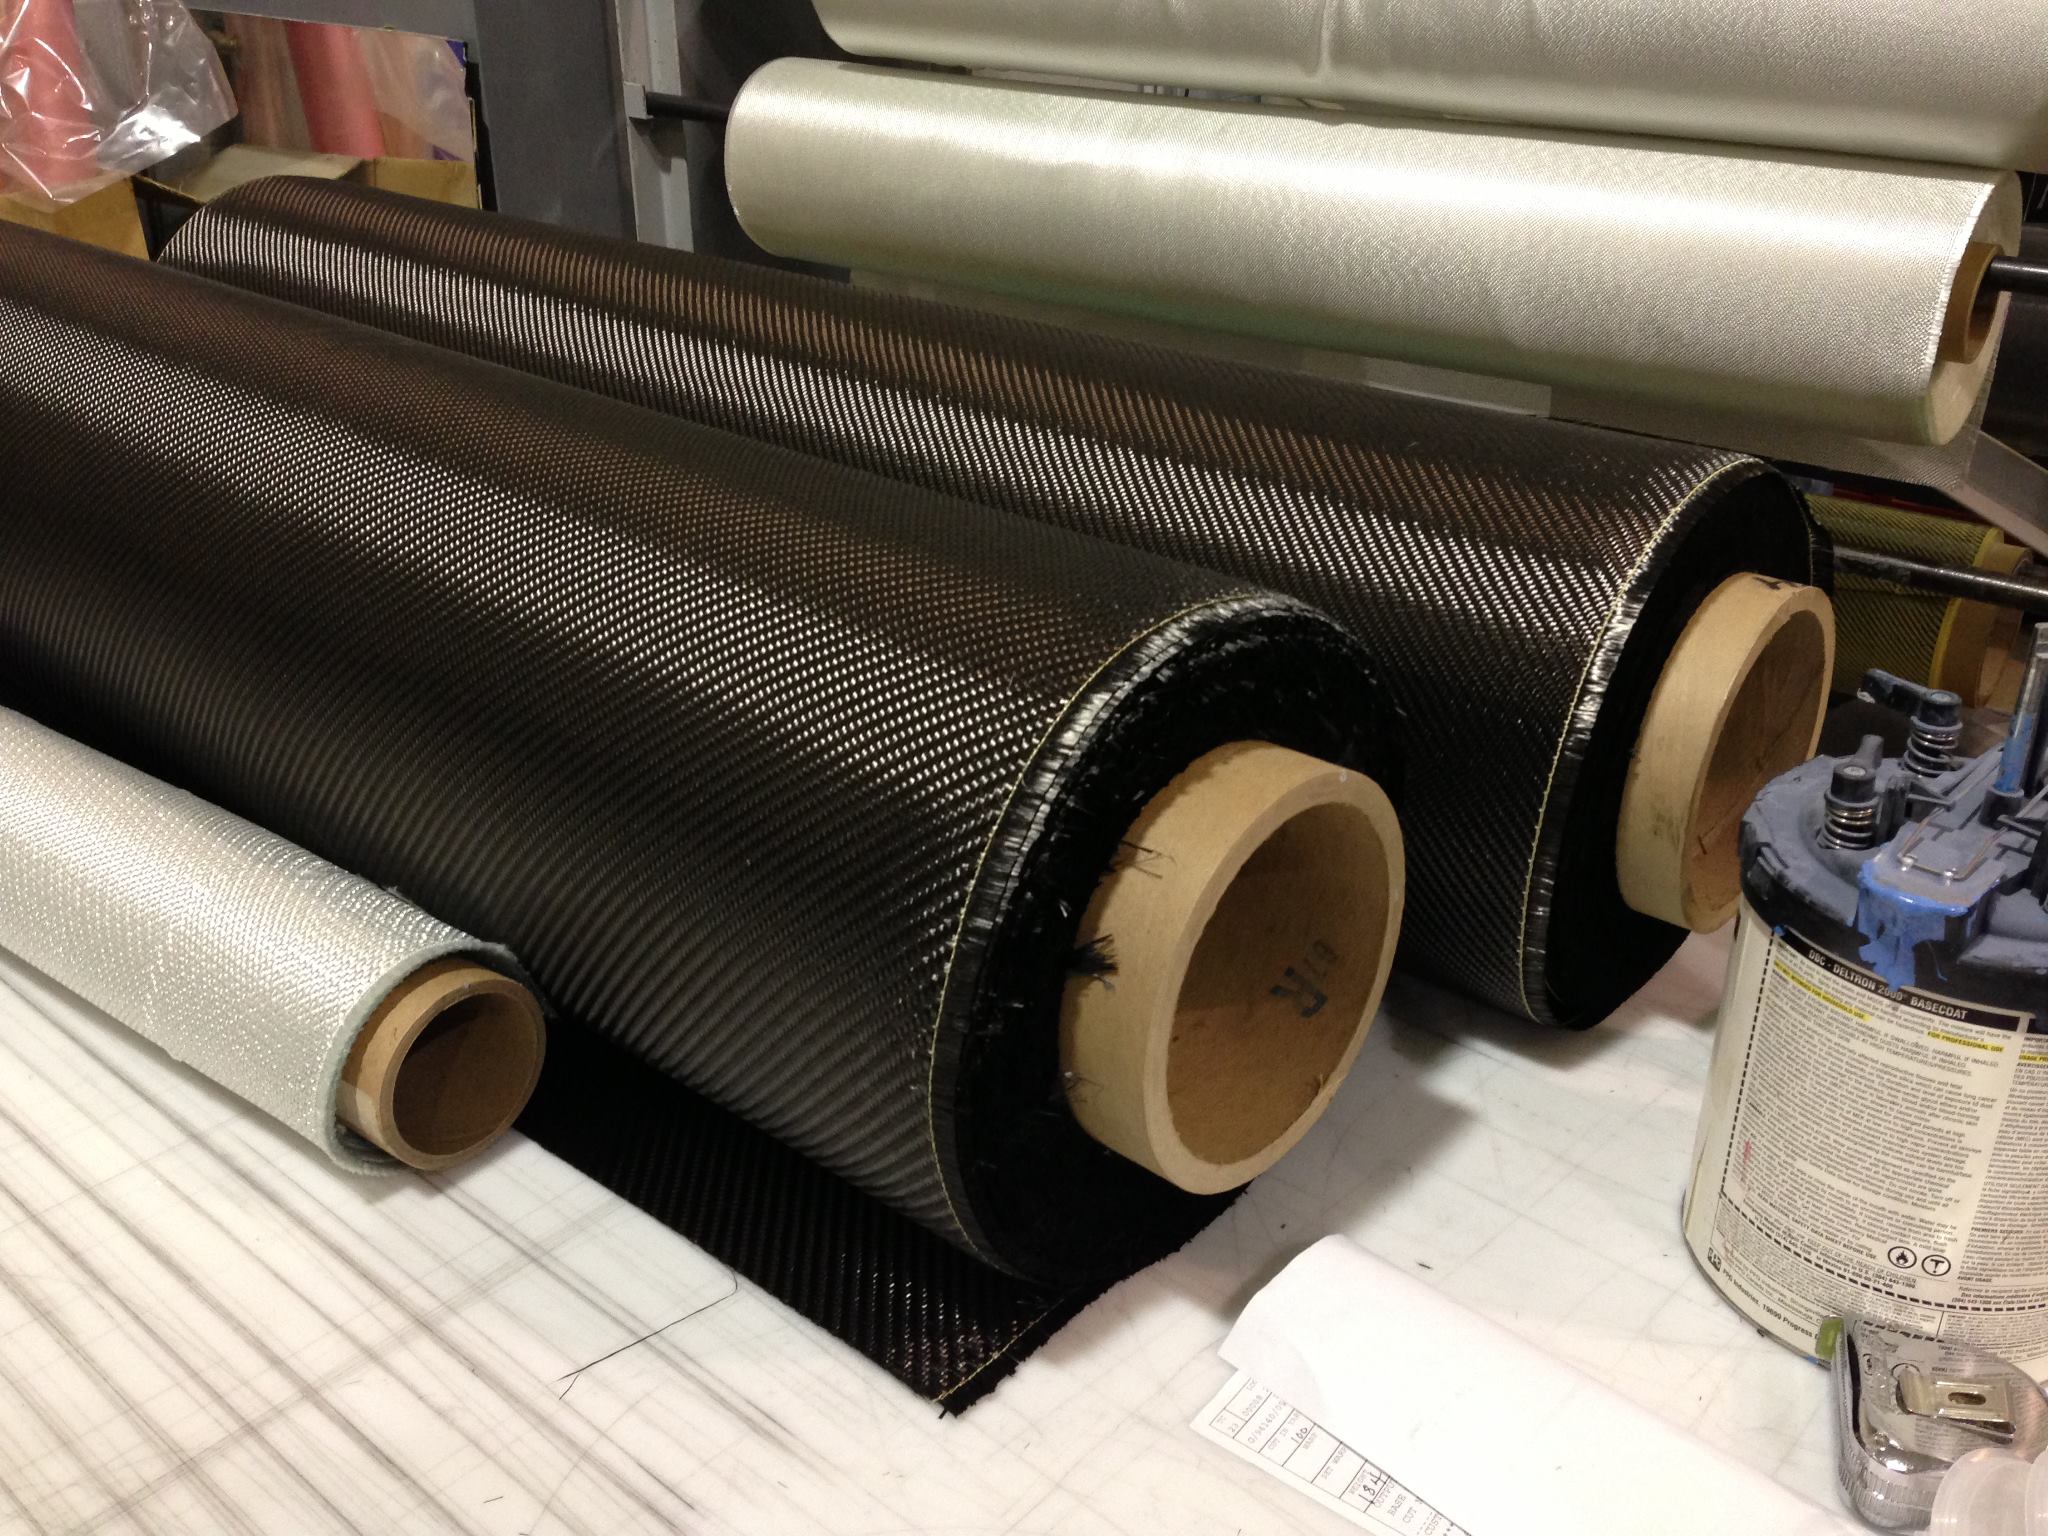
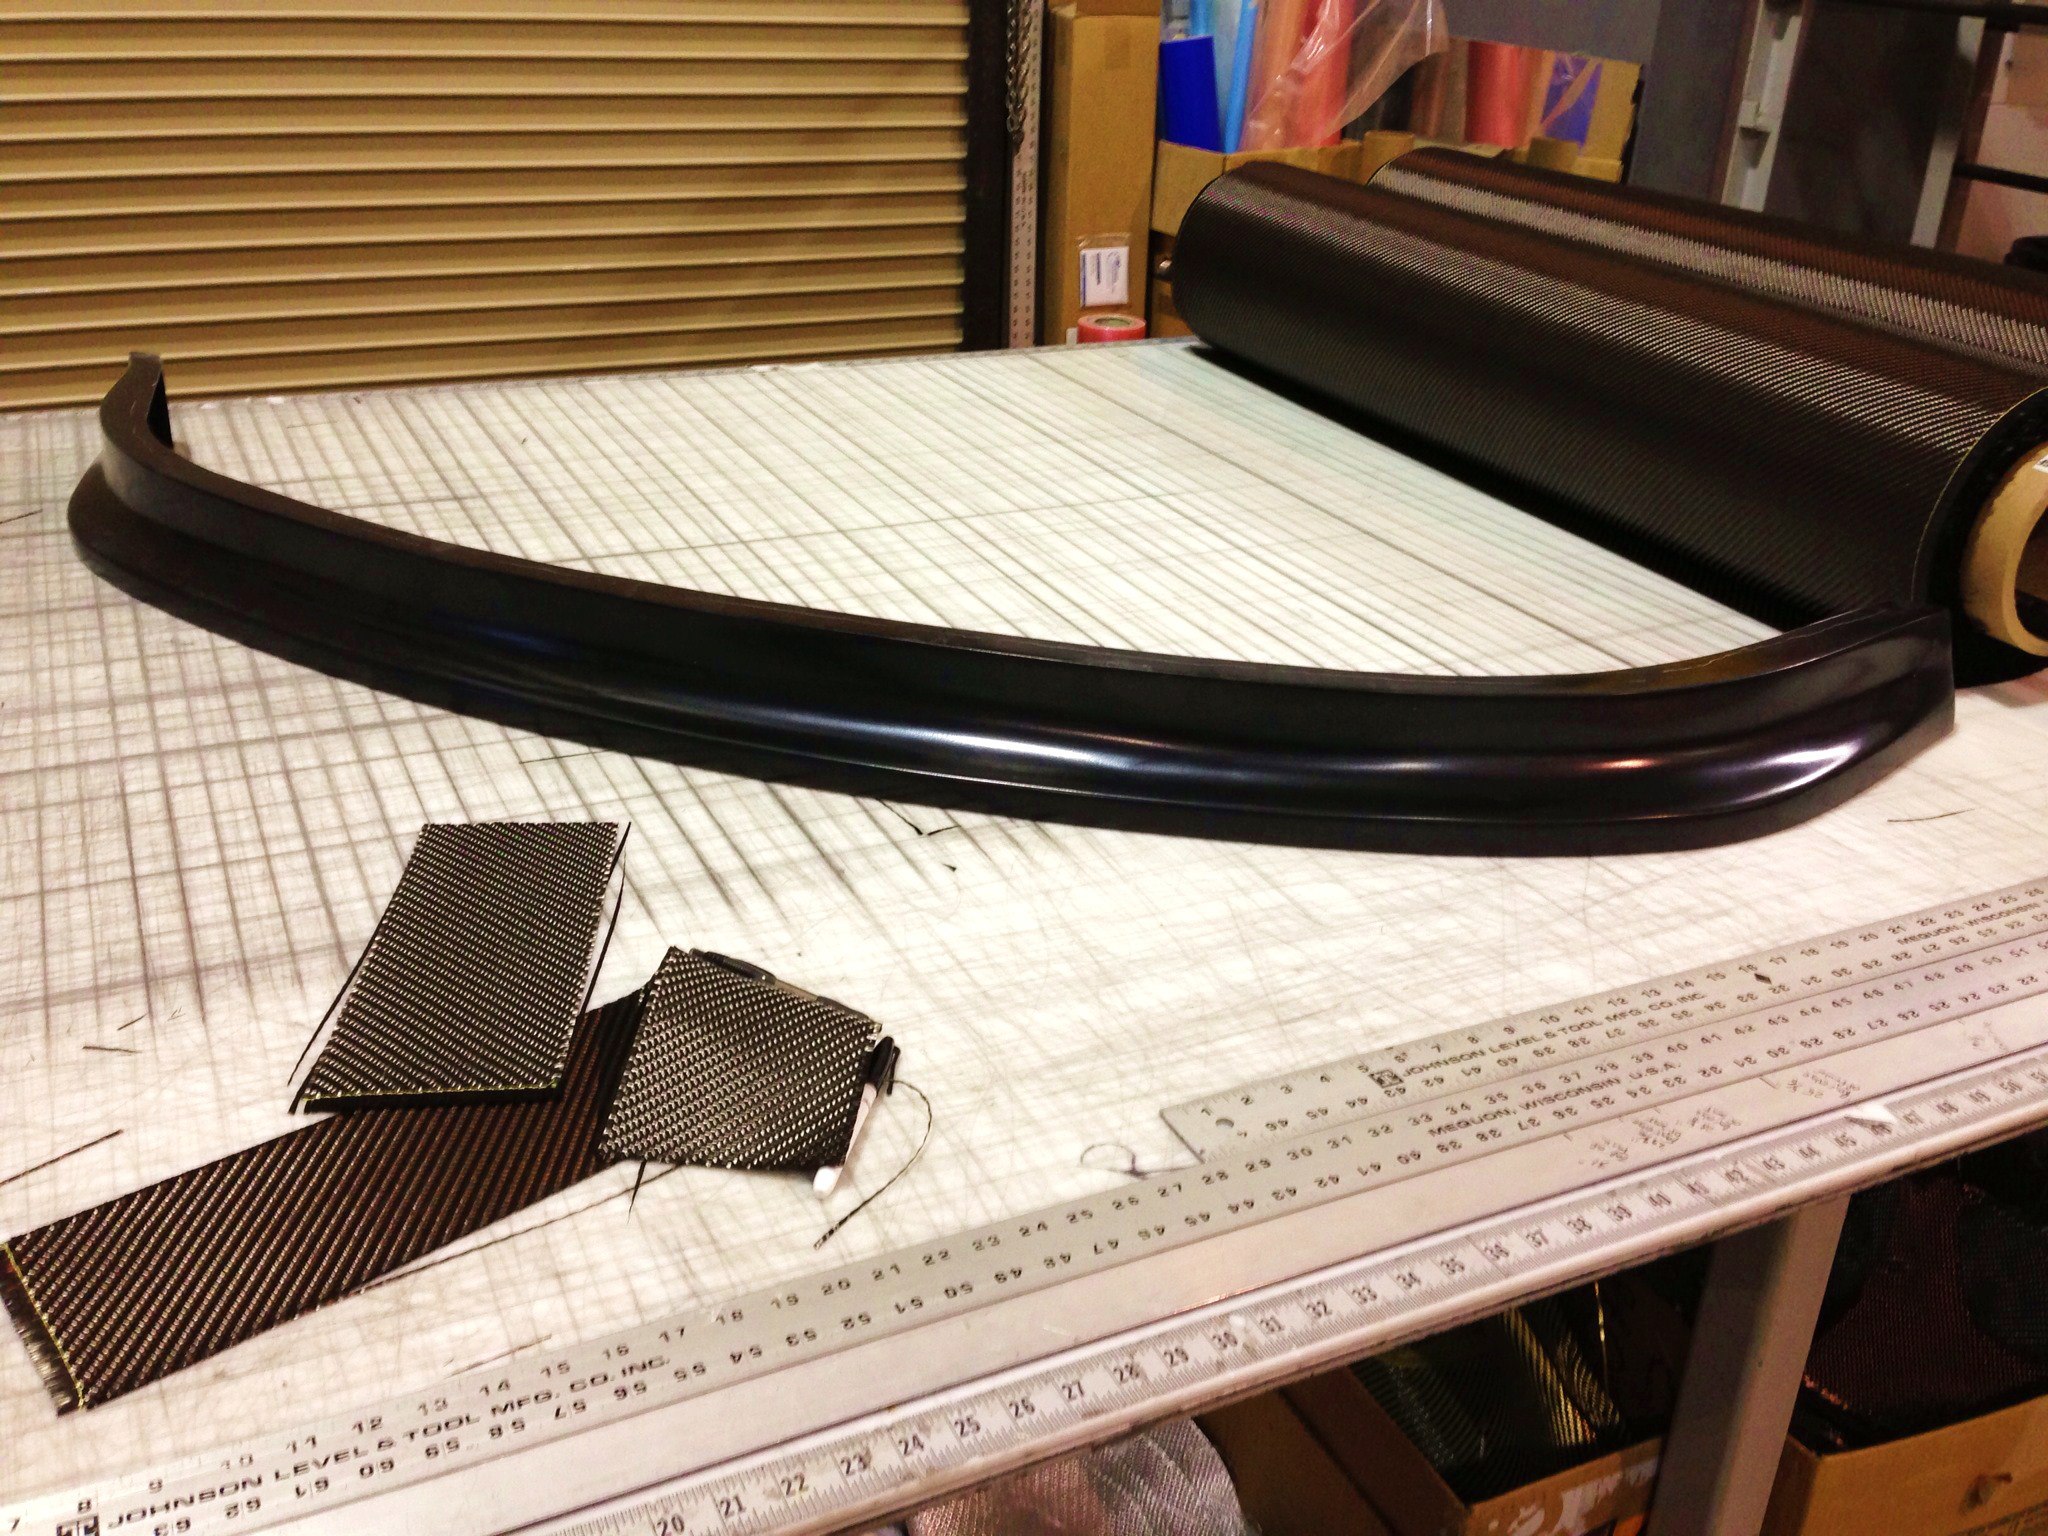
Here are rolls of carbon fiber material that will be used to make the final airdam.


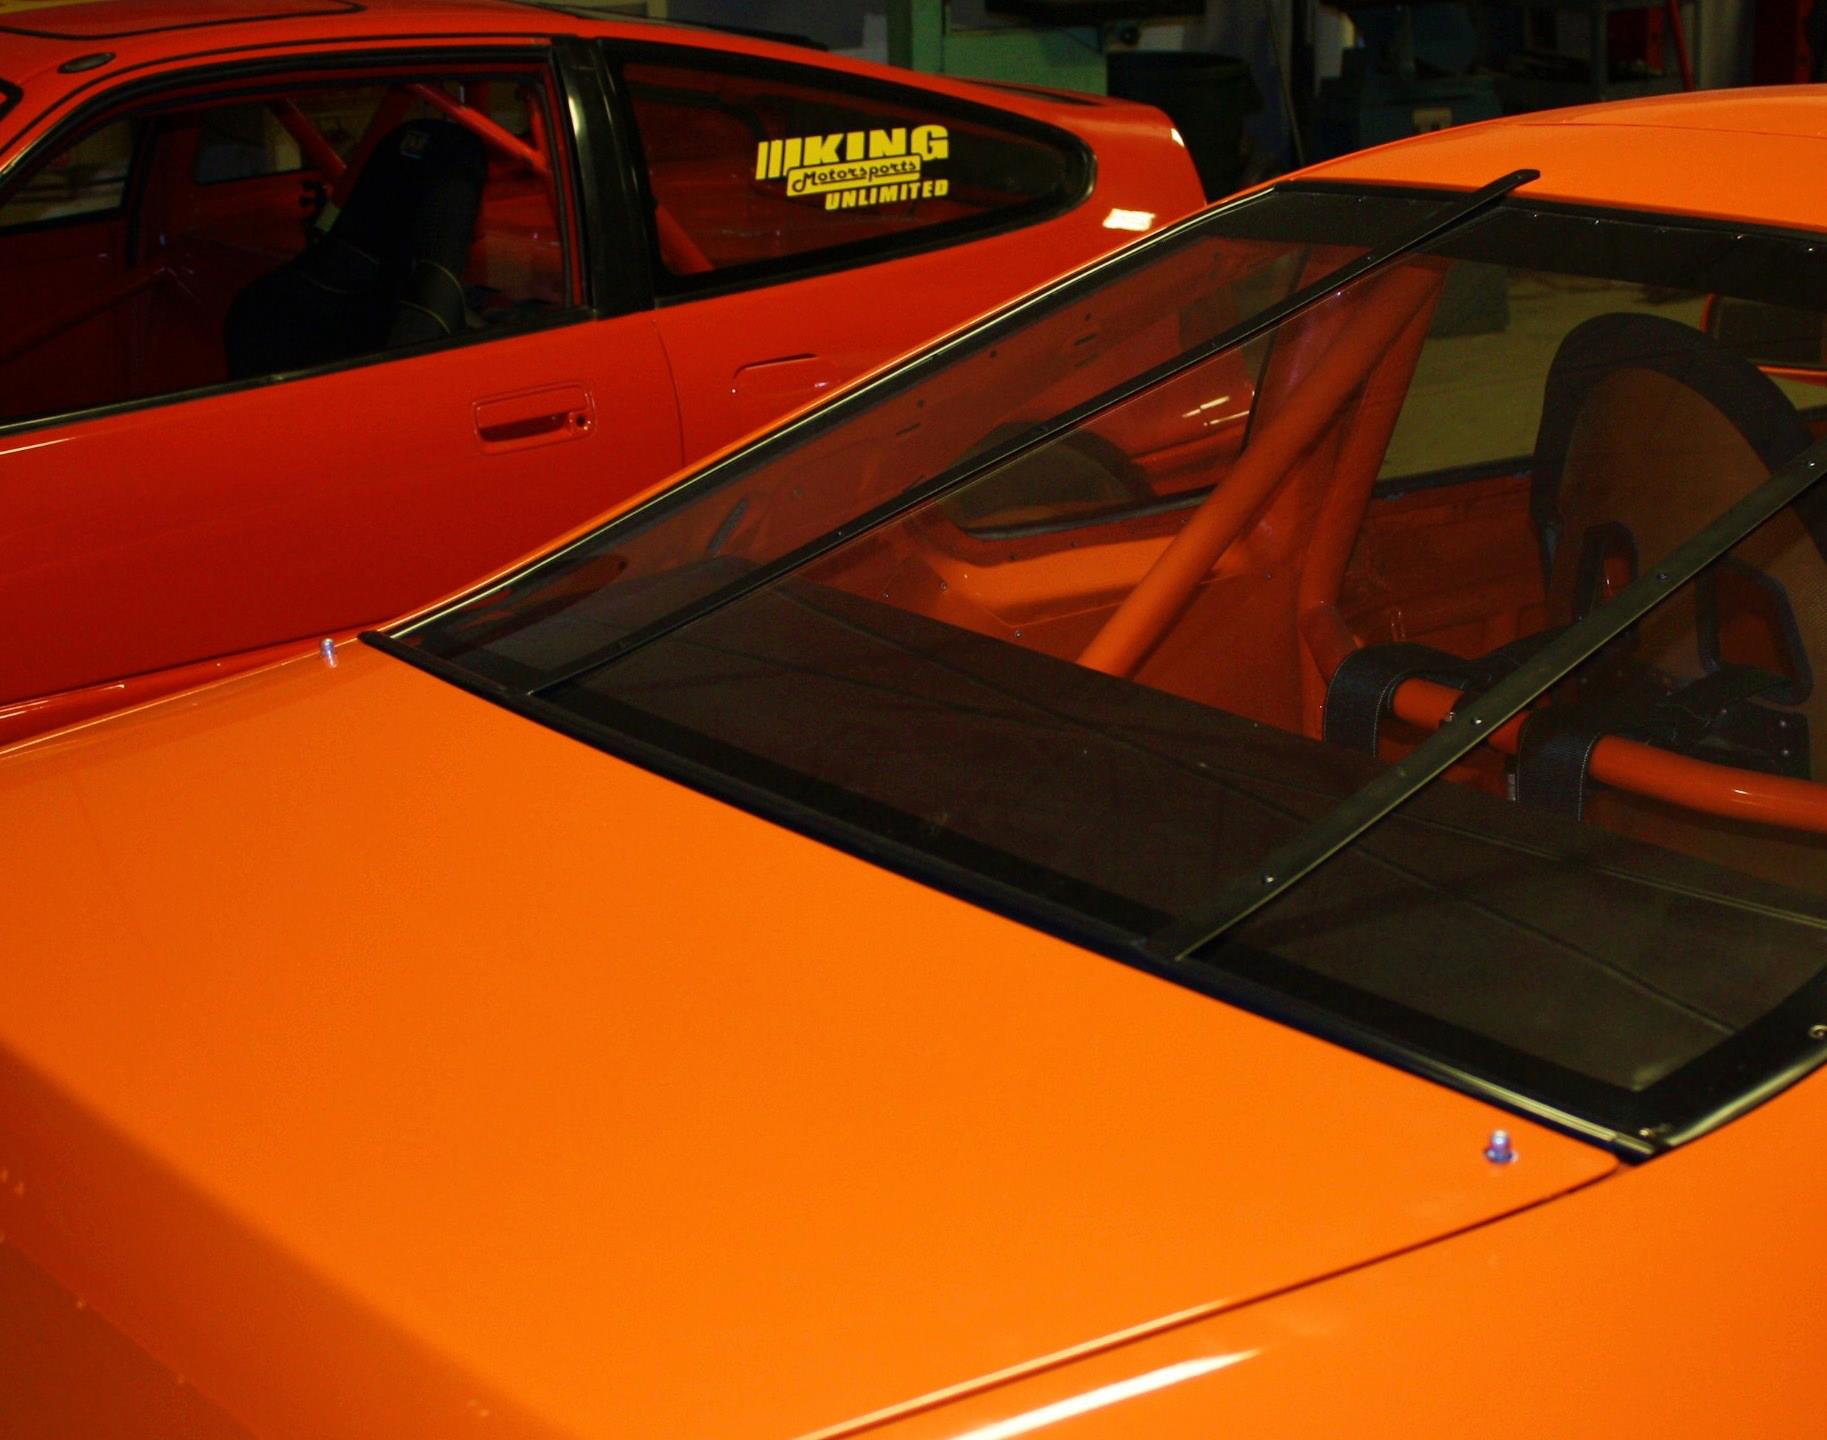
Daytona Red race cars have taken over the shop today!


Update 2/26/2013:

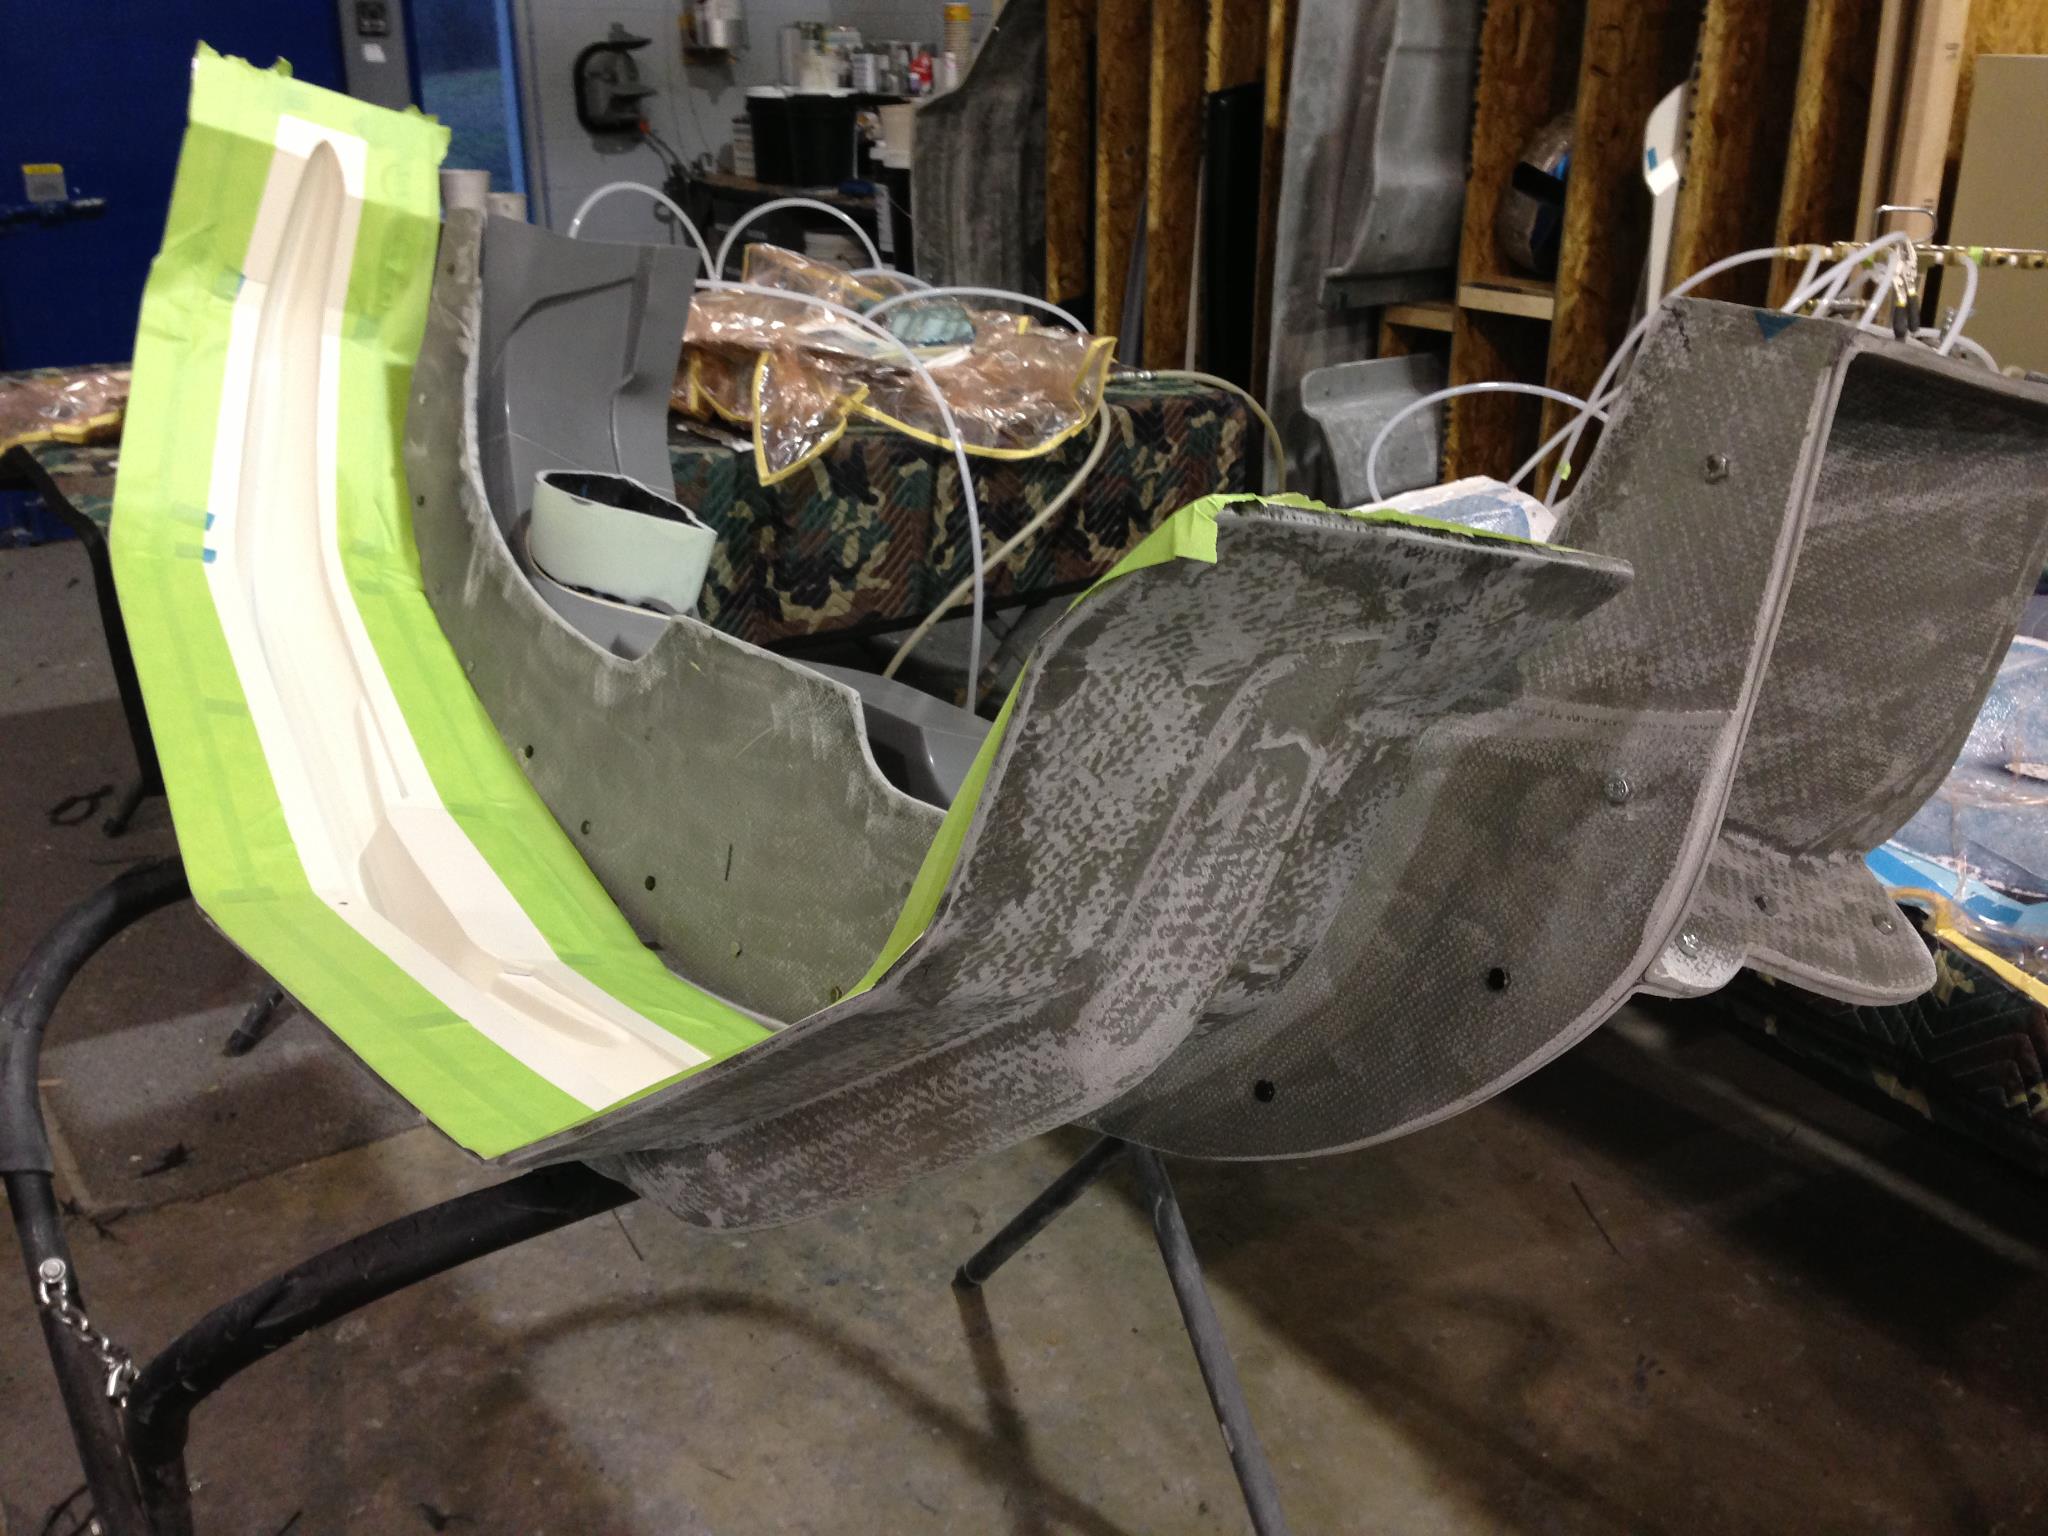
San Pedro update! The mold for the front air dam has been completed. Notice the robust construction of the mold to insure there is no chance of a core shift. Pictured is the backside of the mold. The upper and lower half are bolted together and then unbolted to release the final part.


Here is the inside of the front air dam mold for San Pedro. The surface finish has to be glass smooth as your finished part will pick up any imperfections.


A look at the first carbon fiber air dam out of the mold for San Pedro. Next up fitting to the car and measuring for the splitter plank....


Update 3/26/2013:

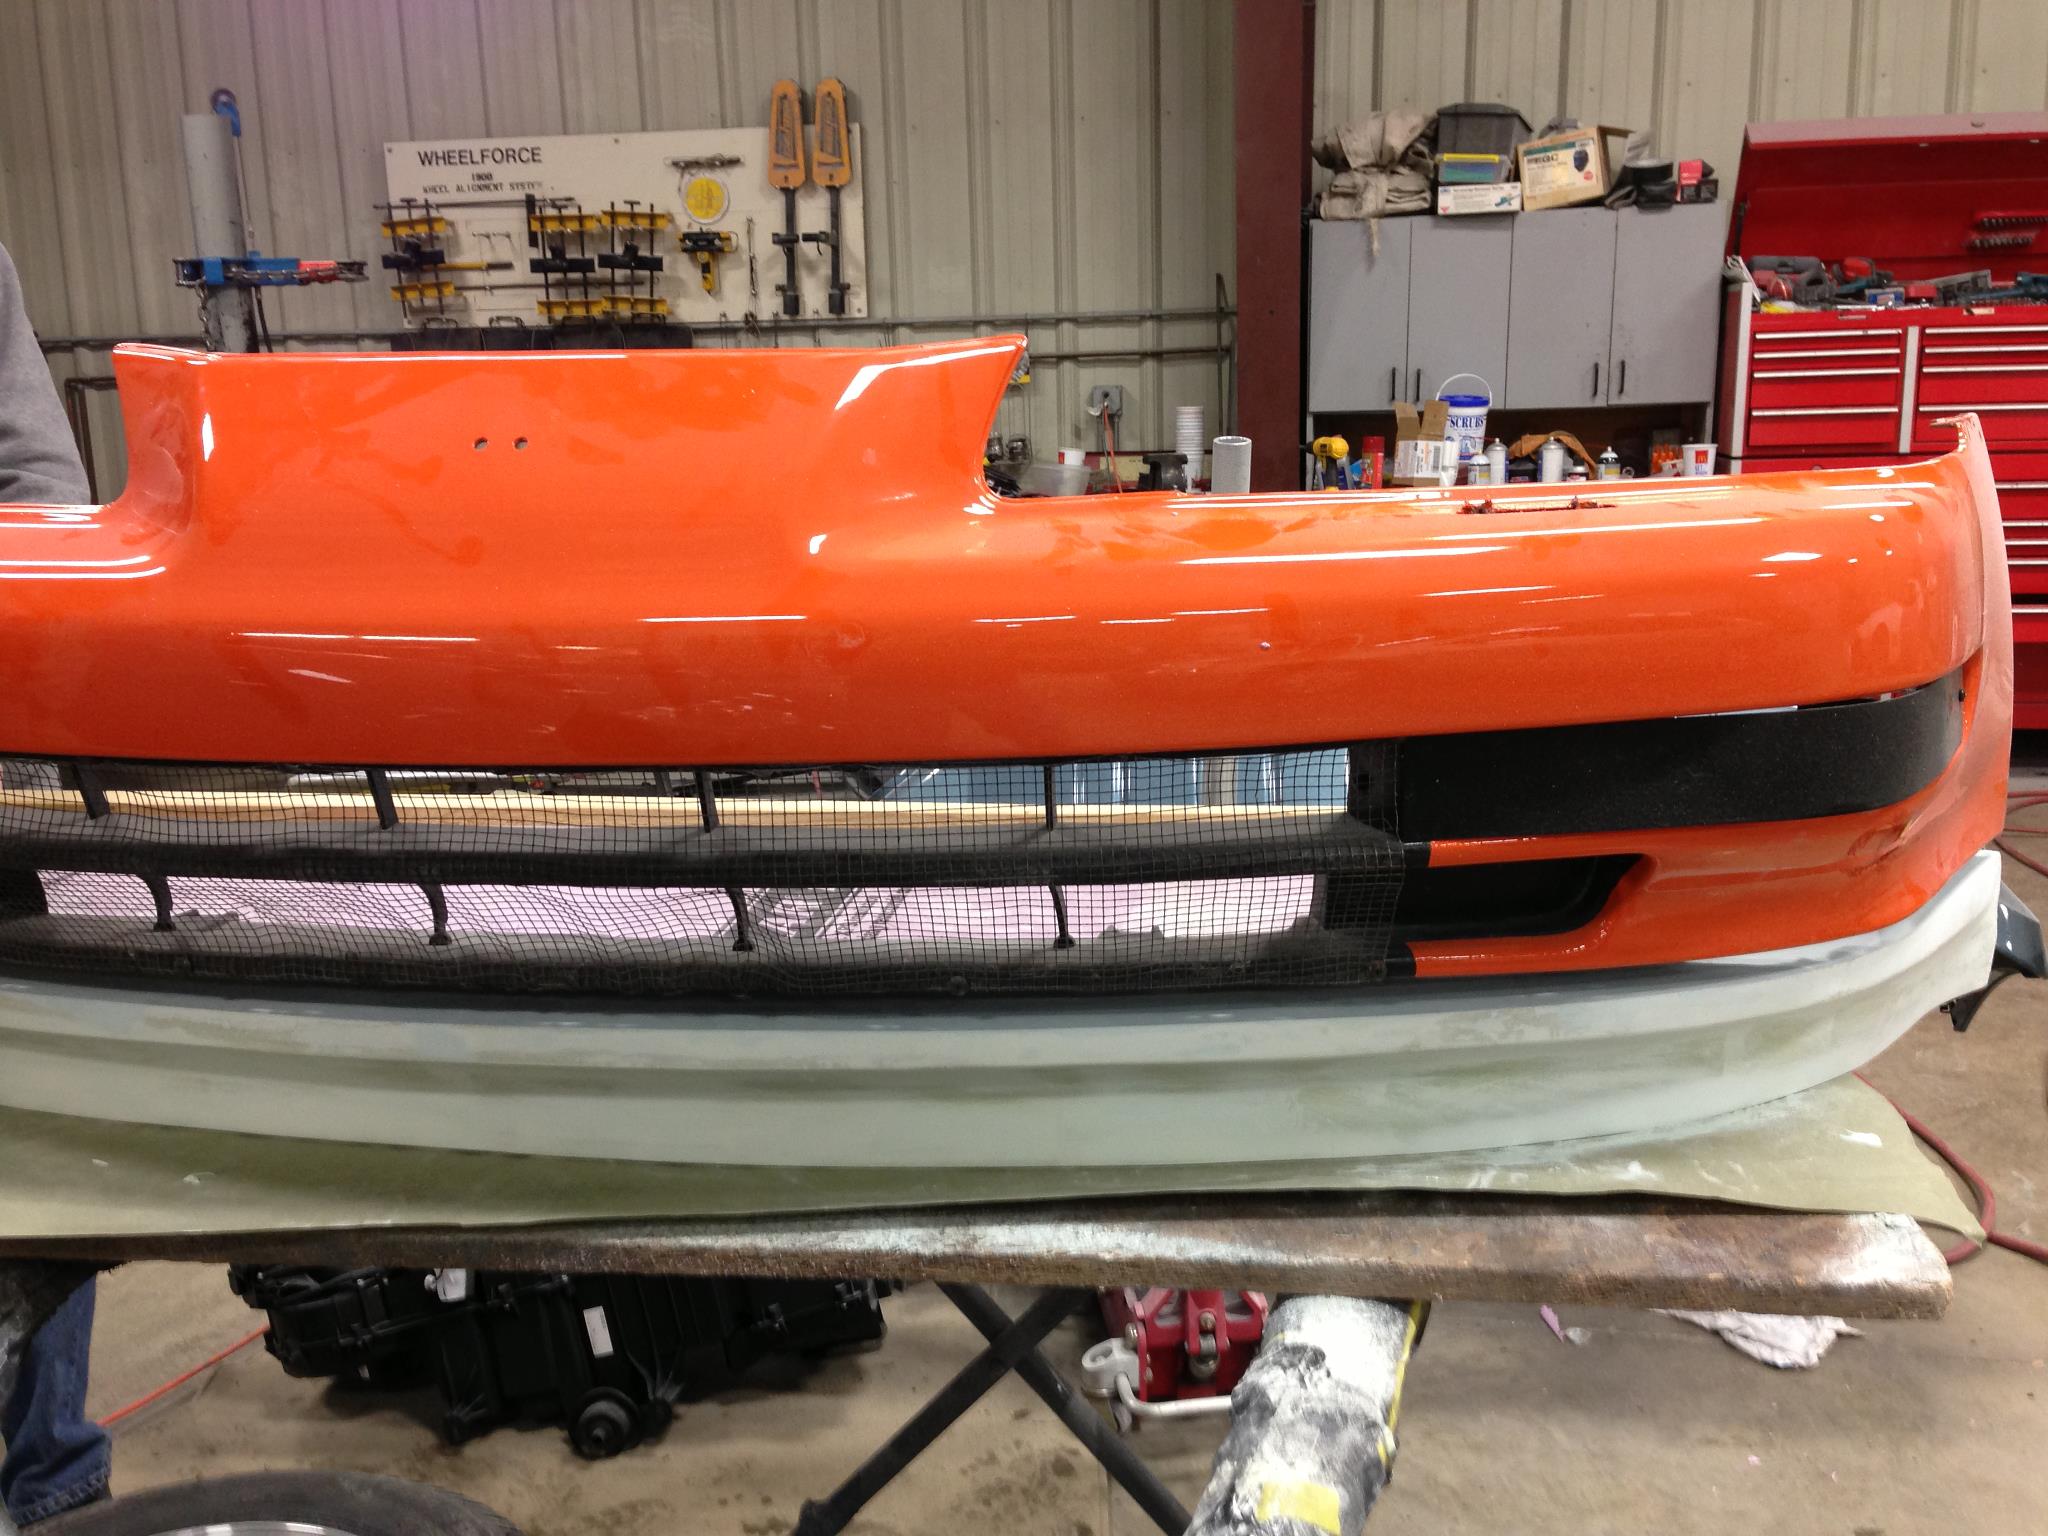
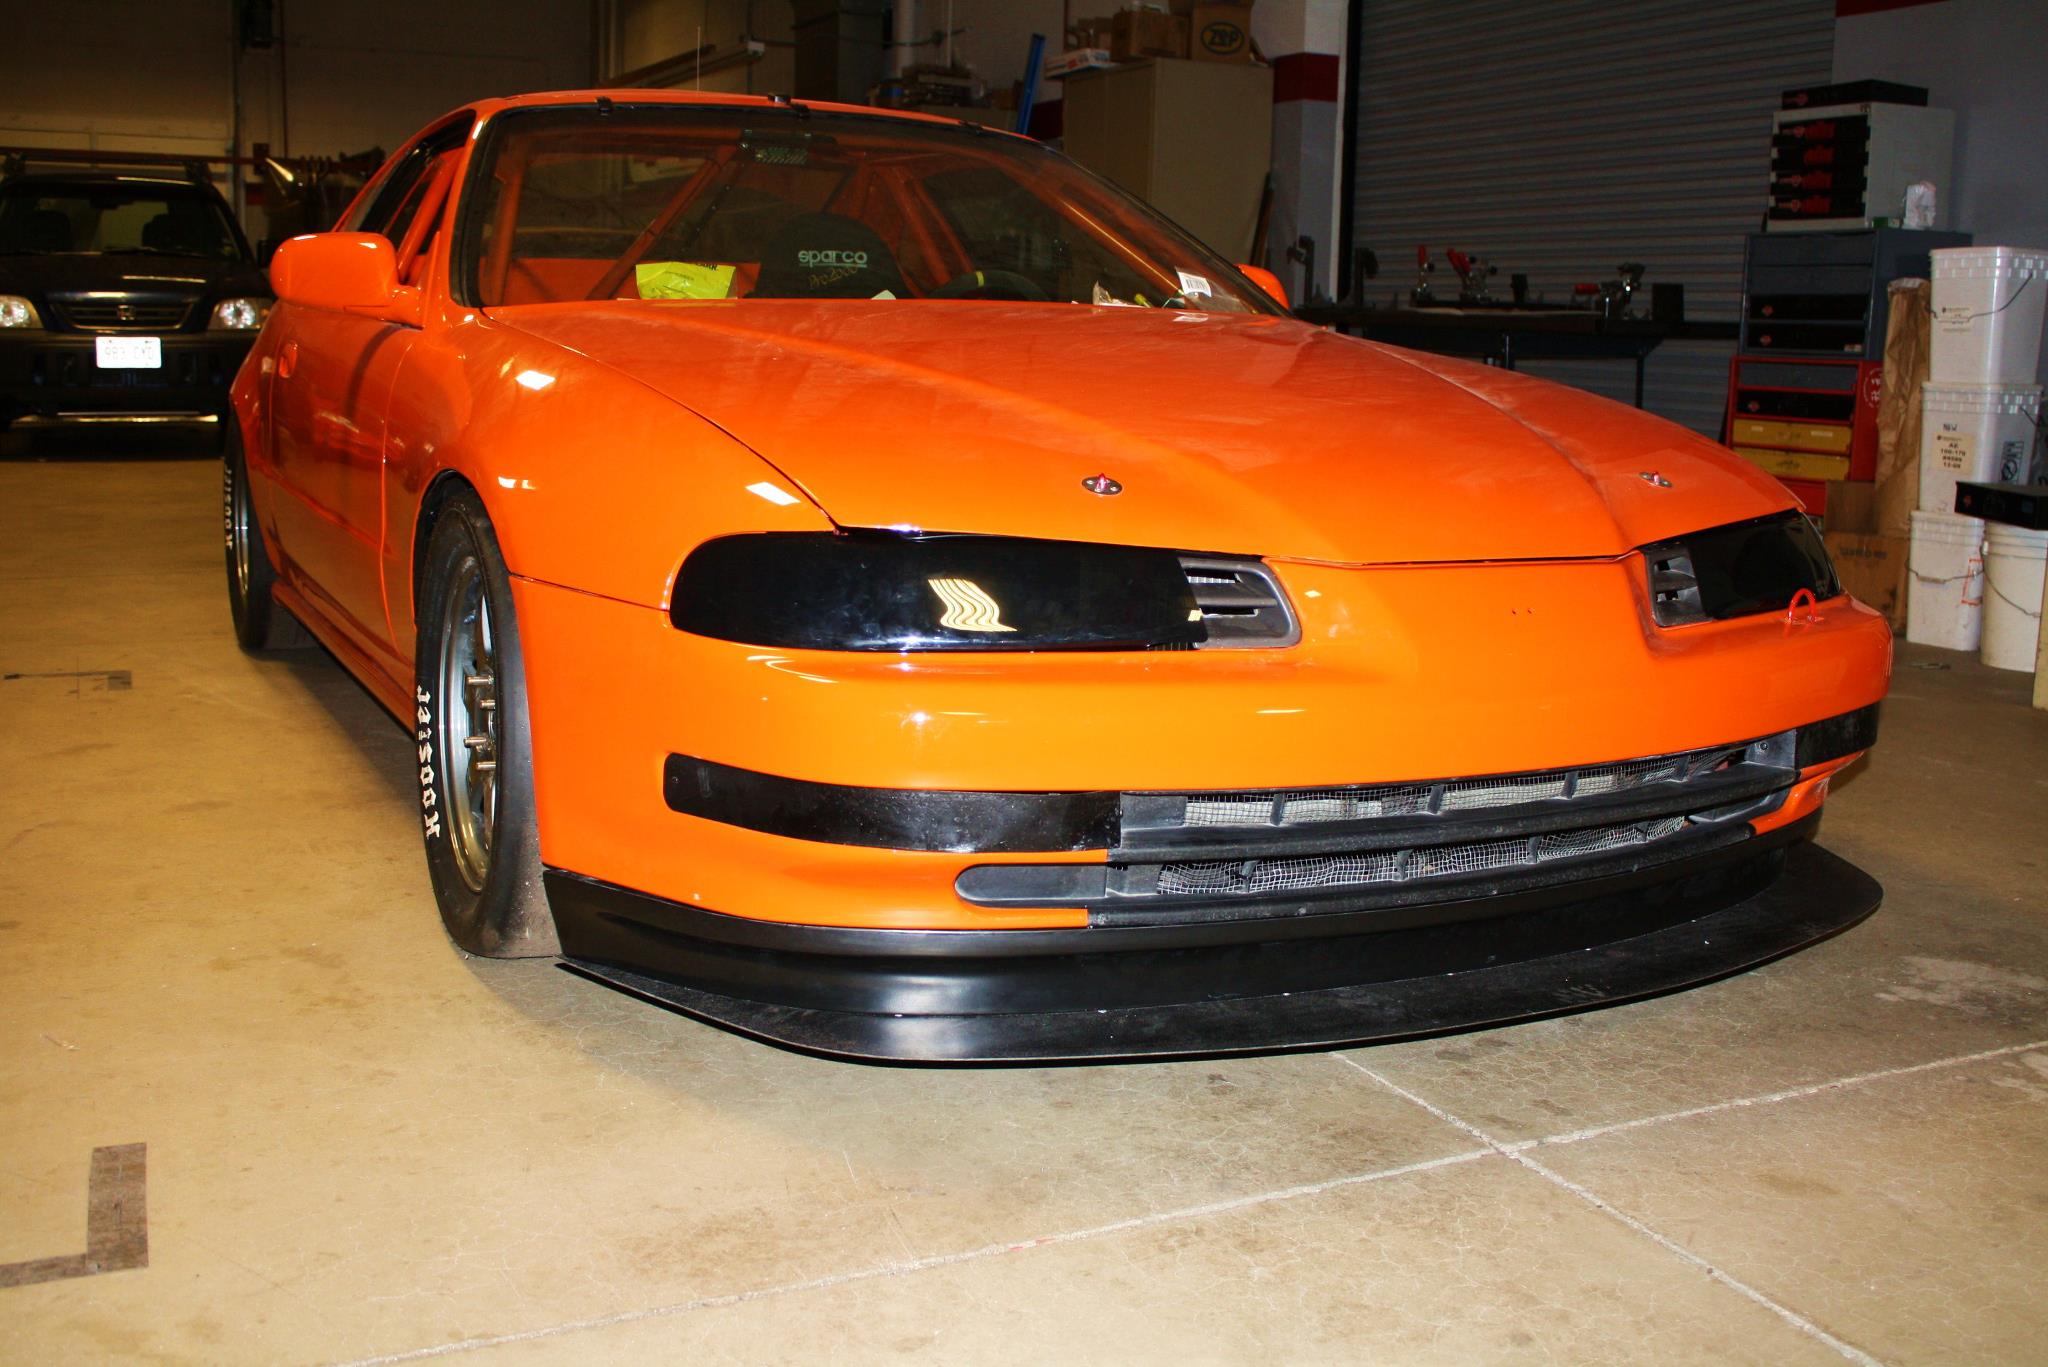
The front splitter/airdam is now complete and mounted. Next up building shrouding for the radiator, brake ducts and an airbox...


Update 4/3/2013:

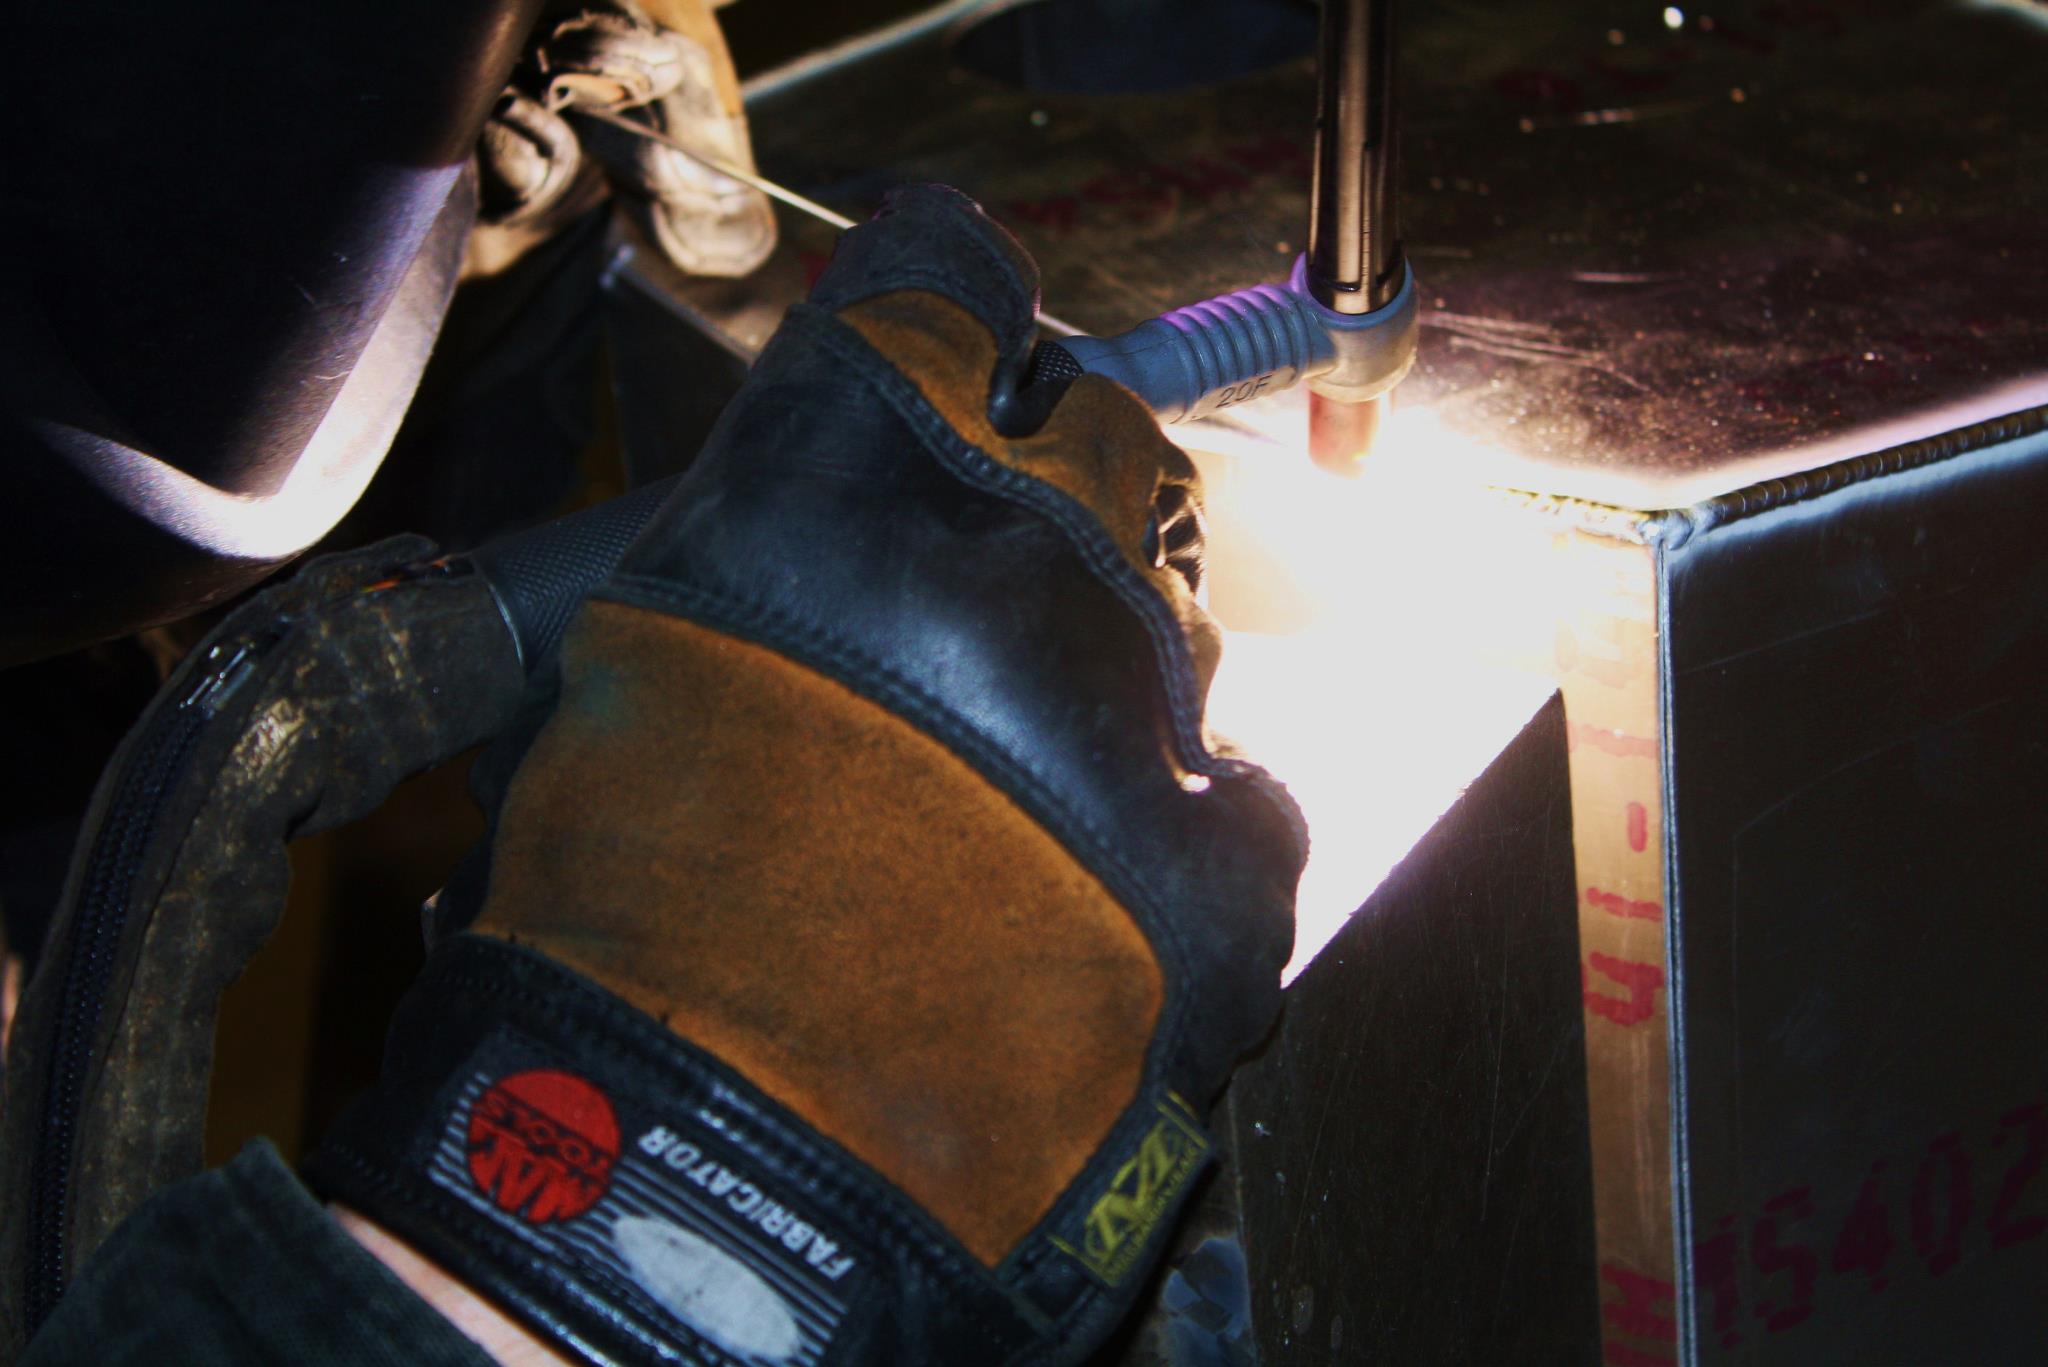
In the shop today: TIG welding the aluminum airbox for San Pedro.


Update 4/4/2013:

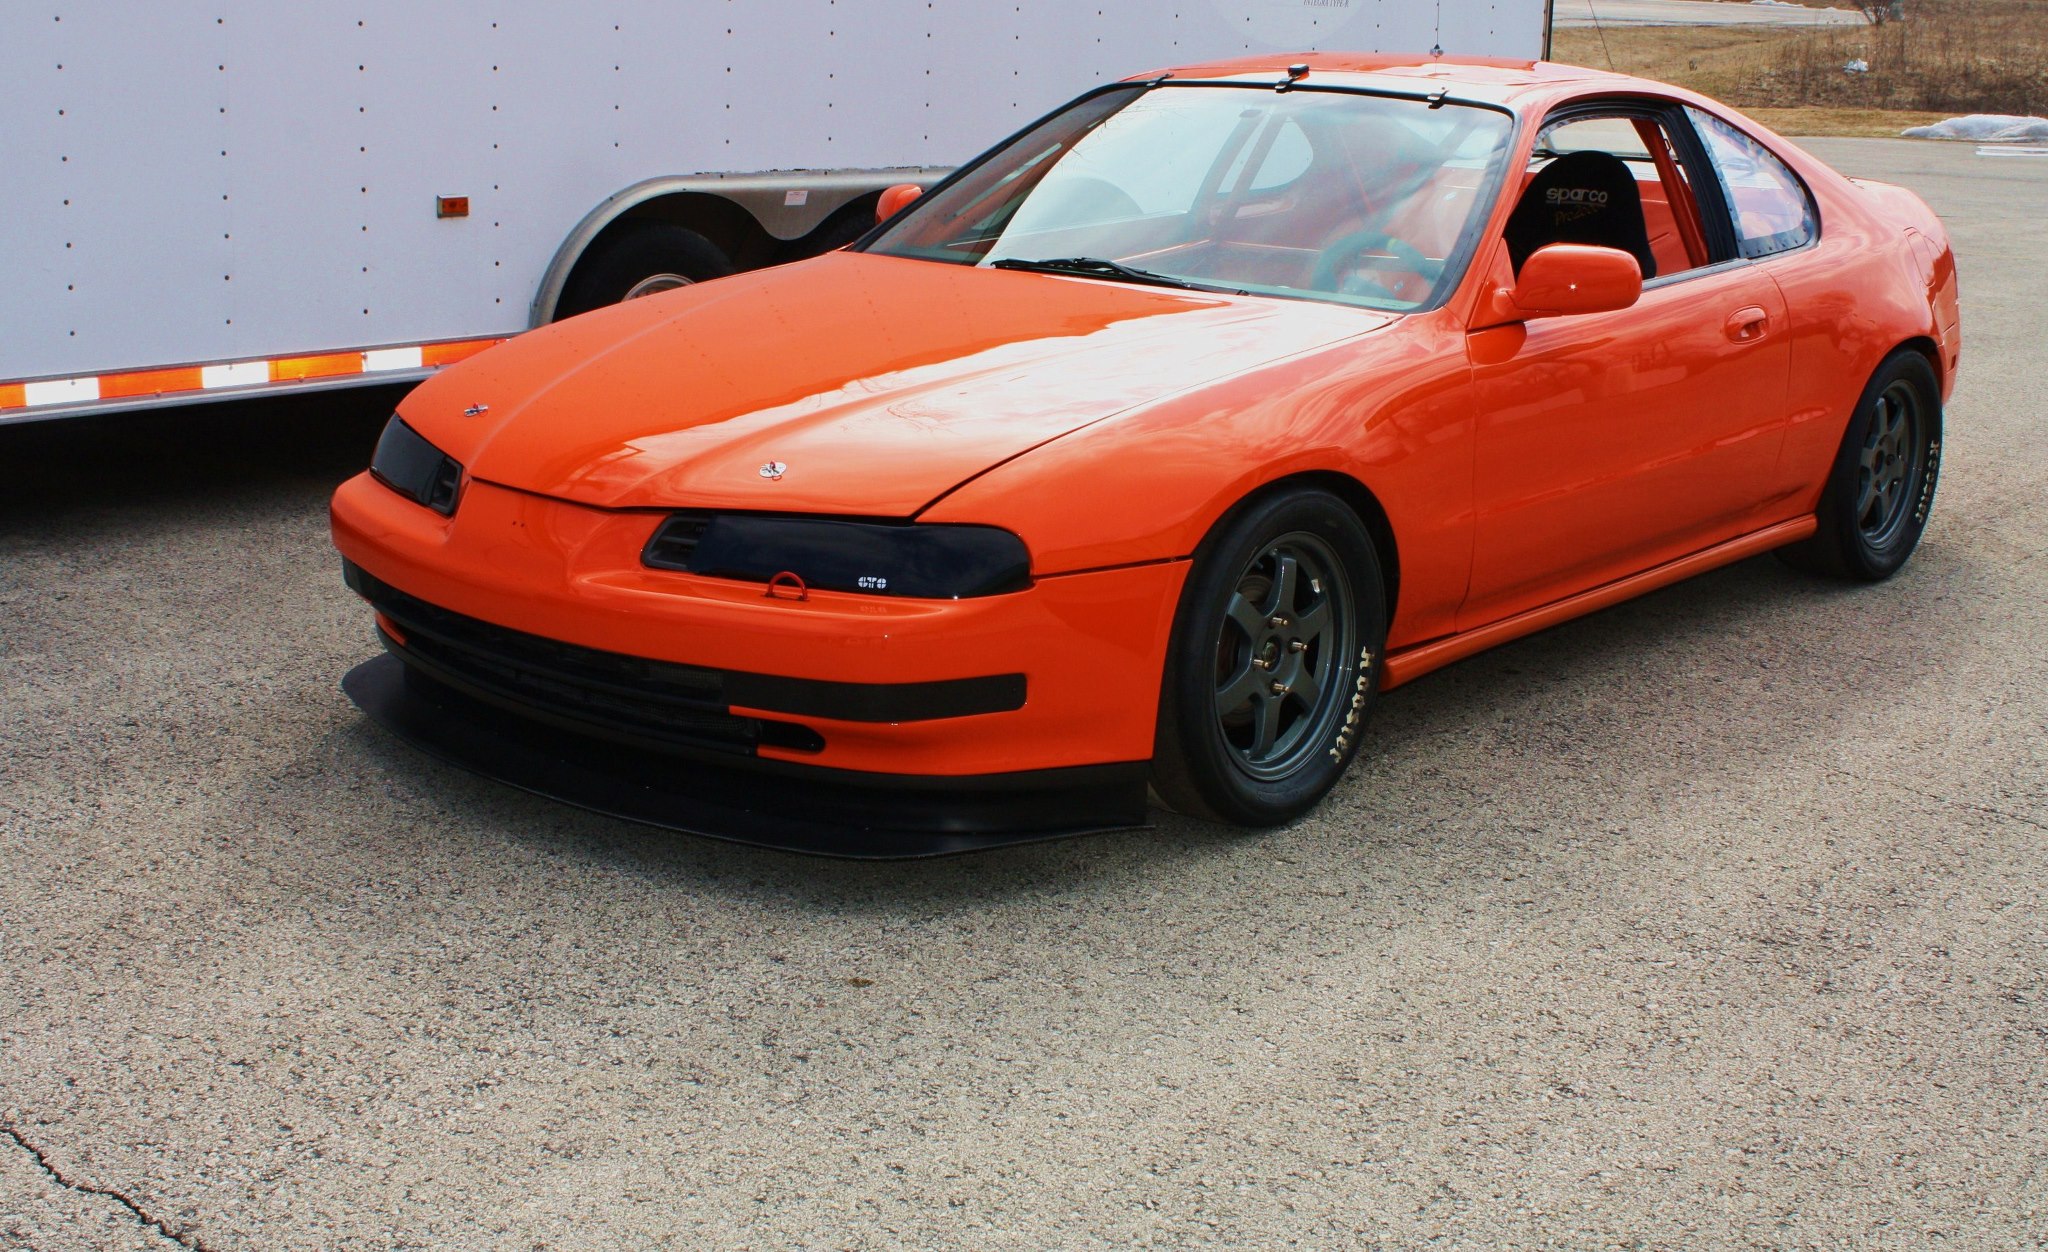
Yesterday we bid a fond farewell to San Pedro. Next week we'll be testing San Pedro at an "unidentified" race track working various chassis setups. Here are a few photos before San Pedro was loaded up to head to its new home.


San Pedro basking in the sunlight after a winter makeover...


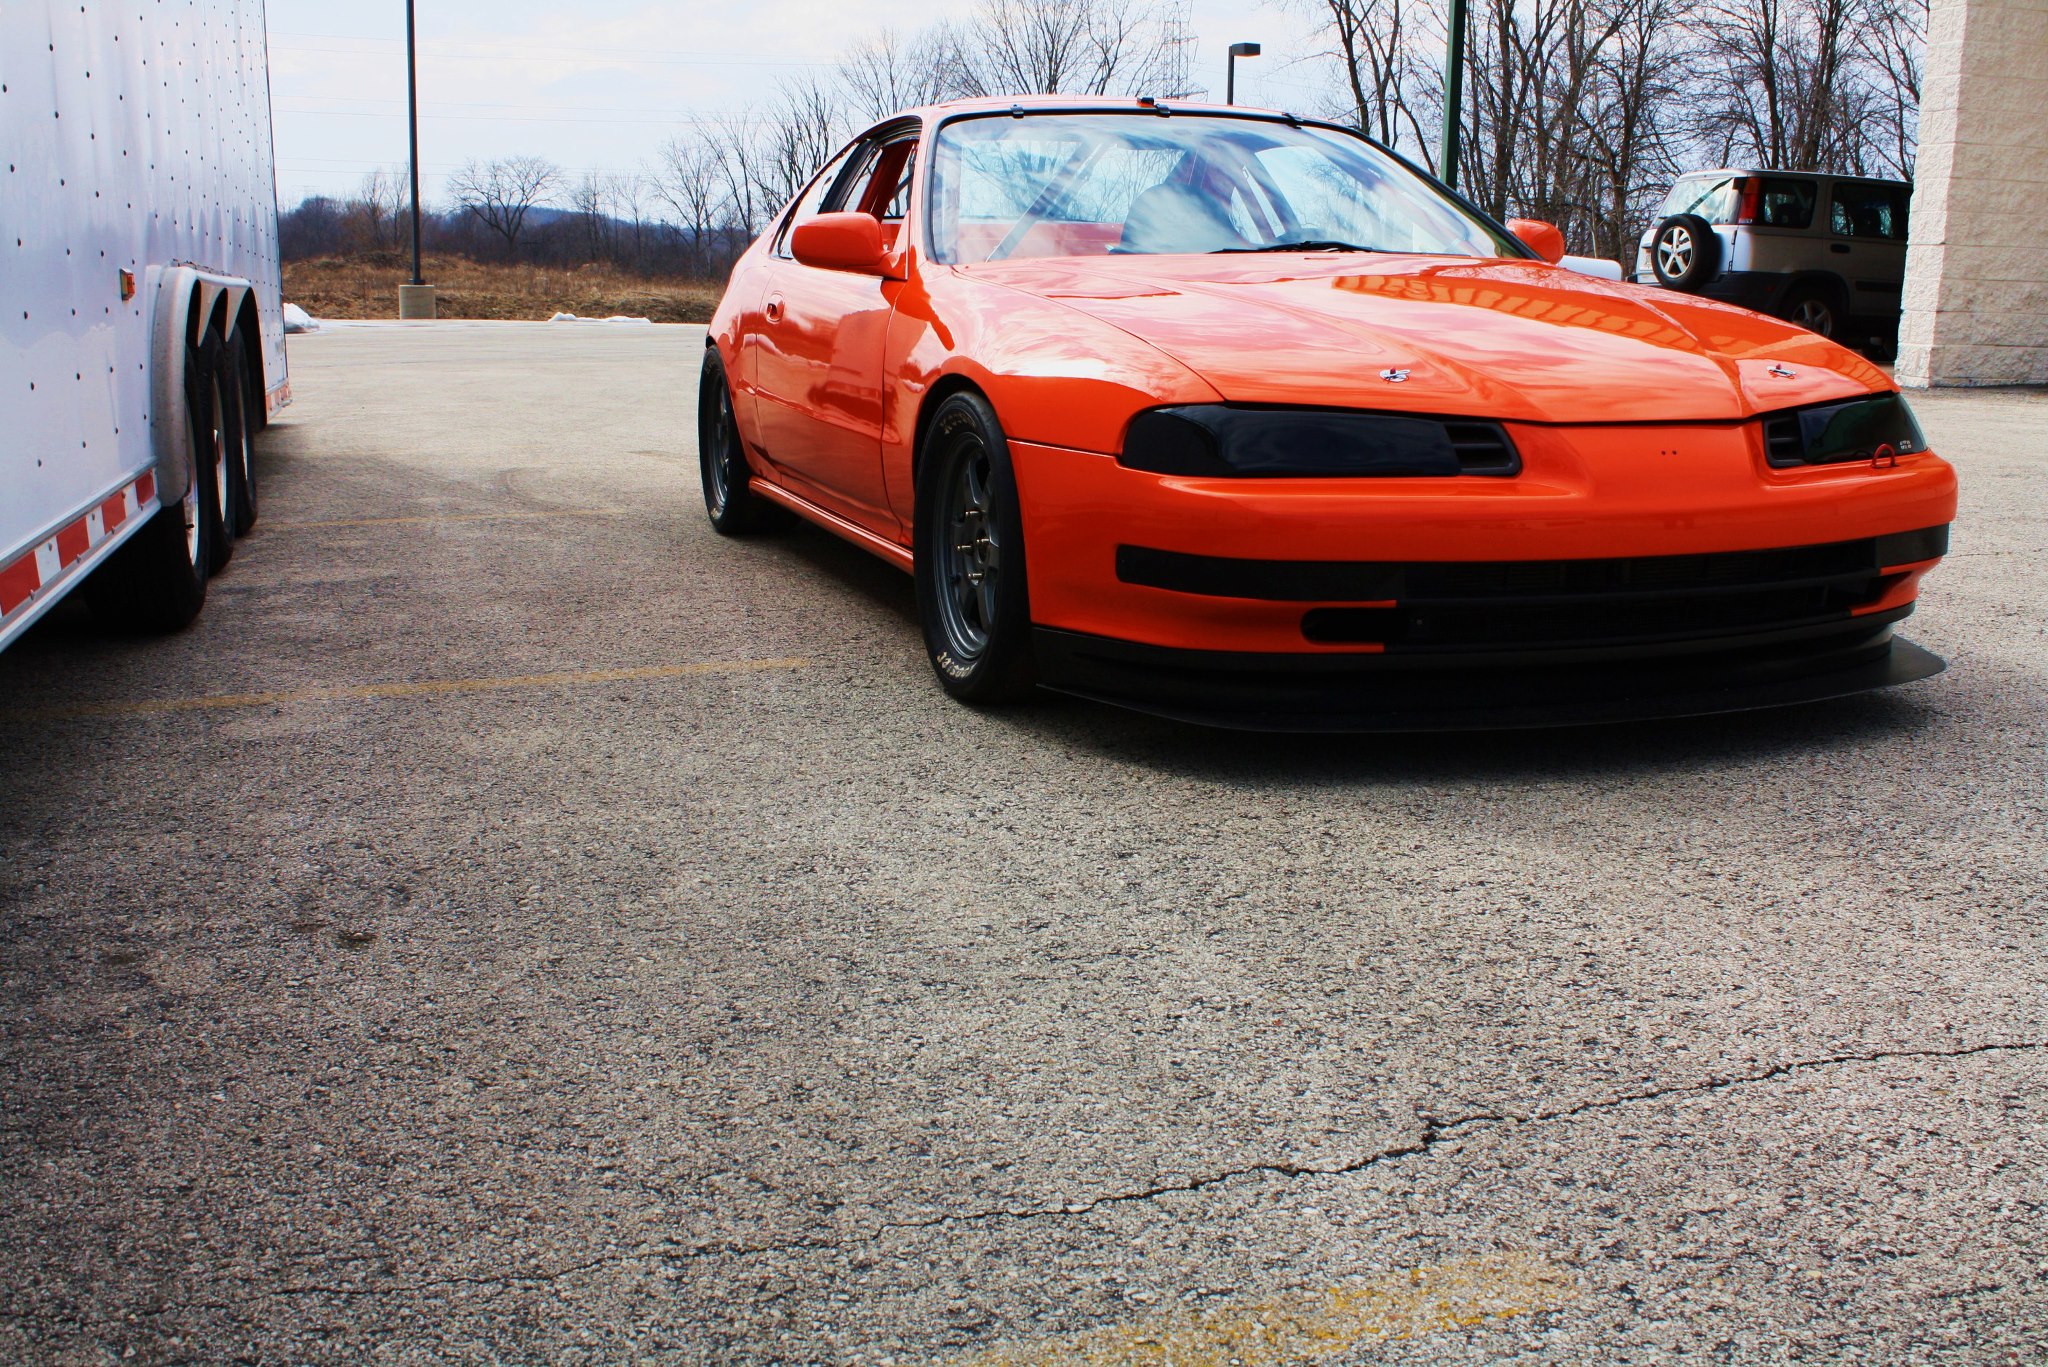
Detail shot of the front airdam/splitter profile. Lot's of downforce to be expected. How much? We shall soon see :)


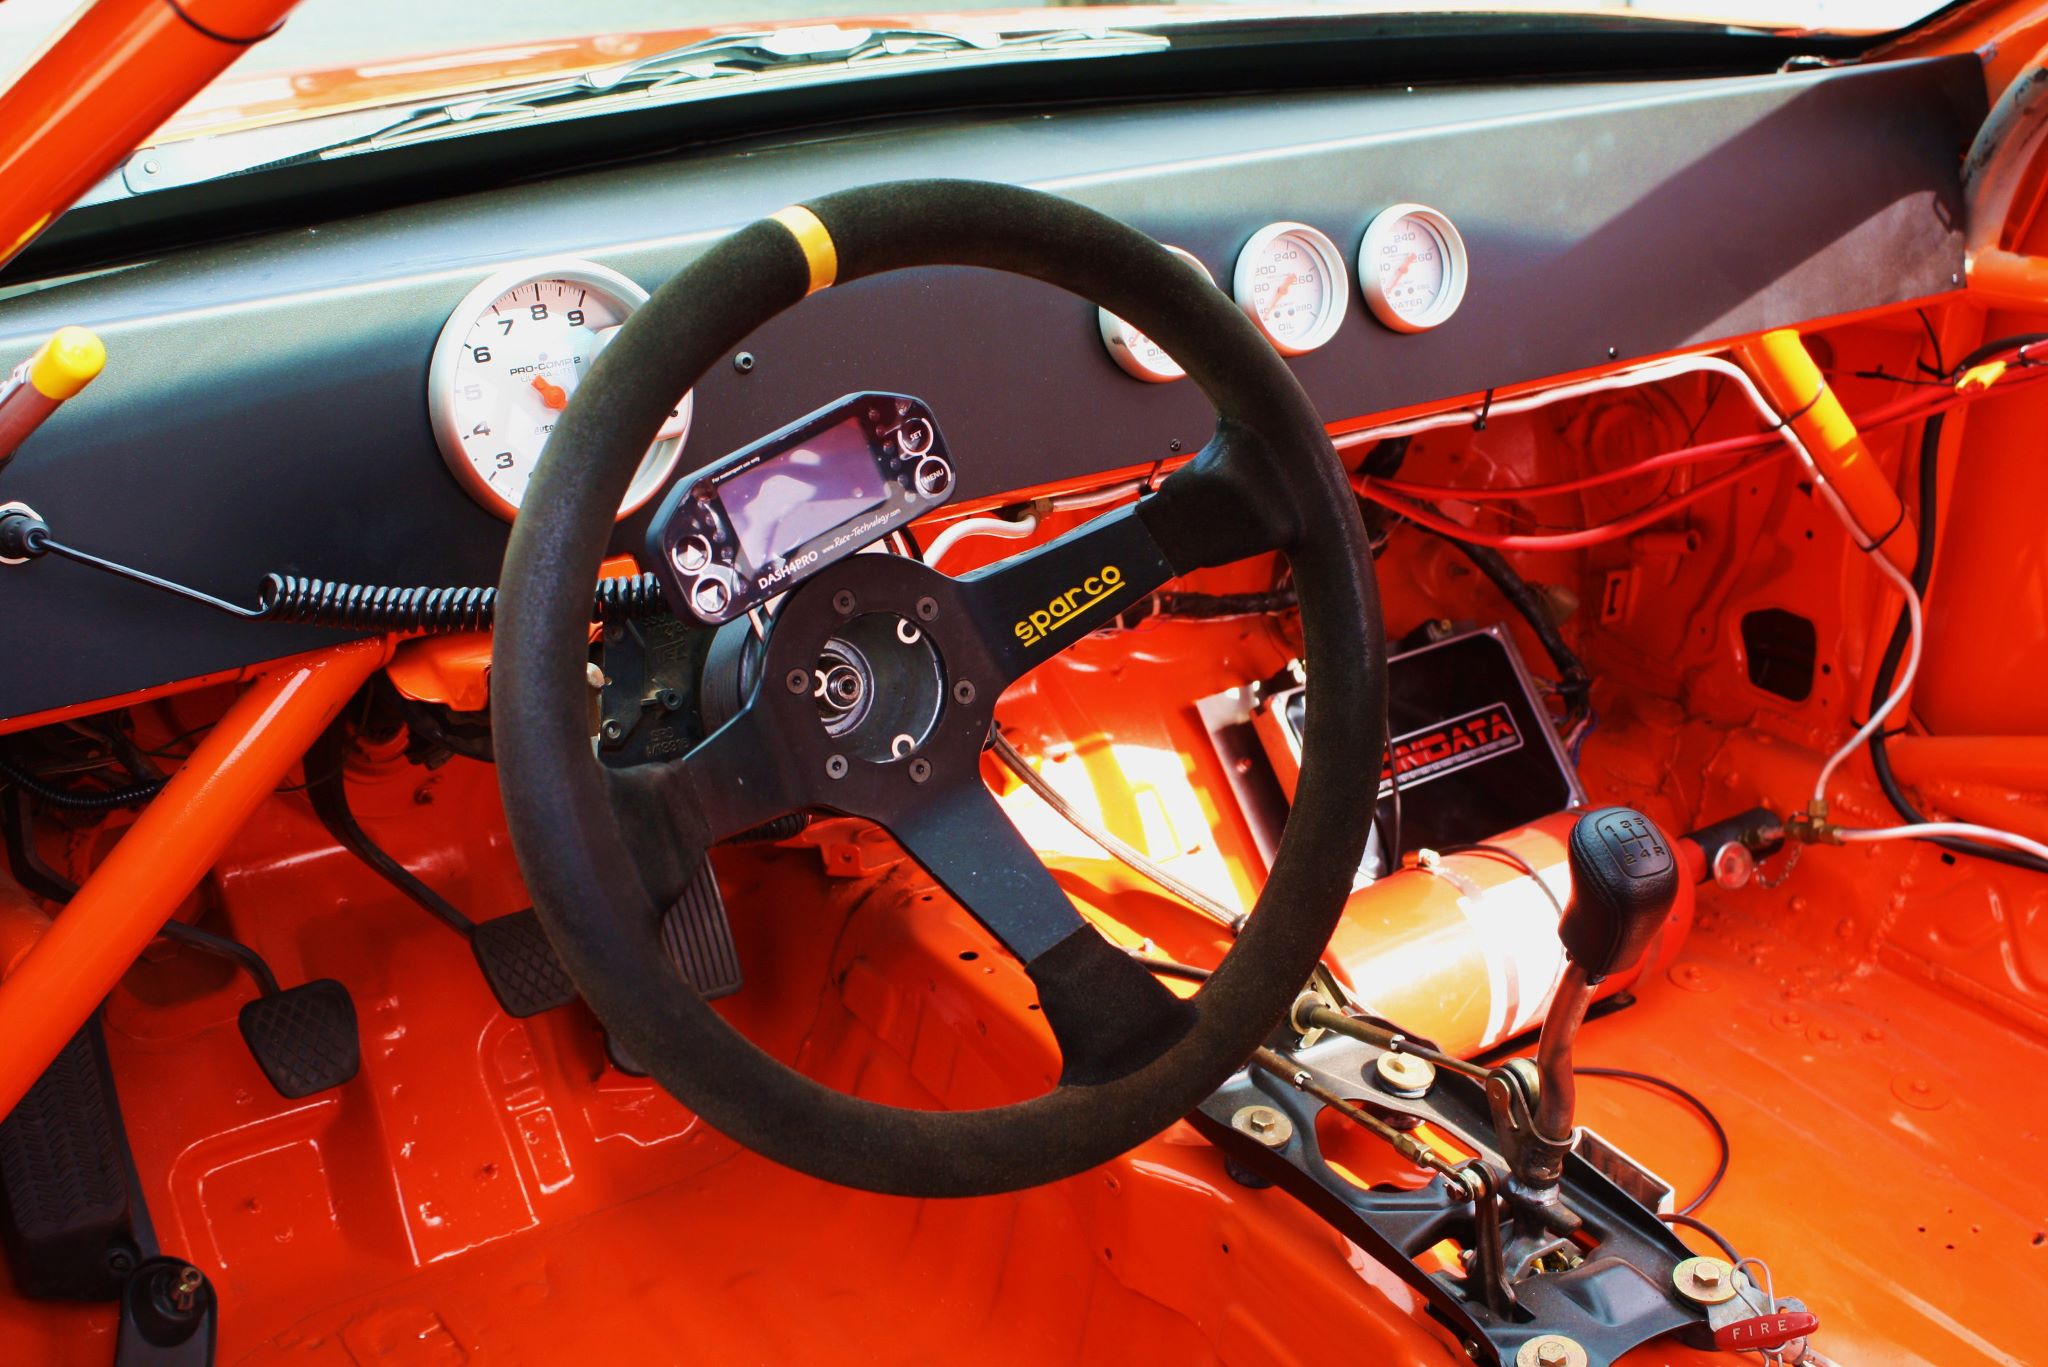
All that's needed is the spacer between the seat and steering wheel :)


King Motorsports: Engine Builds (Updated)

King Motorsports is a leader in building Honda engines that balance power and reliability, and we've been doing it for nearly 30 years!


Read our staff interviews with Mike Lindquist and Chad LeBeau for a glimpse into the care we put into builds.


Here are some of the motors we've been working on recently...


This is a B Series cylinder head we are putting the finishing touches on. We're doing a King Motorsports Ultra cylinder head prep which will be shipped out to its new home in Brazil shortly!


This is a 85 x 89 KMS B Series Turbo engine just finished up for a customer. Ready to install!


Here's another angle for the newly-completed King Motorsports Turbo B. Note the KMS valve cover venting with fresh powder coating.


The finishing touch on every King Motorsports prepared engine is this uniquely-numbered authentication tag. All engines we prep are serialized and all build specs achieved.


Here is an unclothed 87.2 x 81.5 B Series turbo build in the engine room waiting for final dressing:


The Turbo B Series long block build ... now fully dressed and awaiting installation.


Update 2/14/2013:

This week on our Flow Bench we are dialing in a customer's cylinder head. There is no substitute for real world numbers-- no guesswork here....

http://www.kingmotorsports.com/c-231-cnc-heads-valve-jobs-head-porting-milling.aspx


King Motorsports factoid: In the over 30+ years we've been building engines, we have found the majority of advertised piston dome values to be off. The only way to calculate true compression is to CC the cylinder head and measure the piston dome volume as shown below. This is important step is part of EVERY engine build we do at King Motorsports.

http://www.kingmotorsports.com/c-206-engine-building.aspx


Here we are CC'ing a cylinder head. Once we have the volume of the combustion chamber, combined with the volume of the piston dome plus a little math- we arrive at our compression ratio. Oh- and don't forget to measure the valve to piston clearance, but that's another chapter :)

http://www.kingmotorsports.com/c-231-cnc-heads-valve-jobs-head-porting-milling.aspx


Just finished up the D series race engine. Next up some header and exhaust development on the dyno, then off to hopefully win another SCCA championship :)

http://www.kingmotorsports.com/c-194-engine.aspx


Update 2/21/2013:

Full Race Turbo AP1 S2000 project just burst to life in the shop! Checking vitals then on to the dyno for tuning.....

http://www.kingmotorsports.com/c-173-dyno-tuning.aspx


Making sweet AP1 turbo noise on the dyno.....


Update: 2/28/2013

This morning in the engine room we are checking piston to valve clearance on a set of Kelford Stage 2 cams on a K20A bottom engine. We use a cutway cylinder head so we can actually see and measure the clearances.

http://www.kingmotorsports.com/engine_building.aspx


Here's a look at what you can see with the cutaway cylinder head..


The stock K20 VTC cam gear gives 50 degrees of advance. When installing a higher lift camshaft set there can be piston to valve clearance issues at maximum advance. Previously the only way to limit the VTC advance was to use a TSX VTC gear which is 25 degrees. Through our dyno development program on the K20 engine we saw 25 degrees advance is not enough to make optimum low/mid range power. Using this knowledge we designed a new King Motorsports VTC cam gear that limits the advance to 30, 35 or 40 degrees. Now you can have the not only great top end power with a solid mid range to match!

http://www.kingmotorsports.com/p-4294-kms-k-series-adjustable-cam-gears.aspx


One of the current projects in the shop is this EK Turbo coupe. We just finished up the engine, now are working on the fabricating the intercooler, intercooler piping, air filter setup, dump tube and exhaust system- then onto the dyno for some tuning!

http://www.kingmotorsports.com/c-173-dyno-tuning.aspx


Update: 3/3/2013

After mapping out where we are running the intercooler piping, etc., we are hard at work fabricating a battery box for a lightweight battery on the our Turbo EK Civic Coupe project.

http://www.kingmotorsports.com/c-242-fabrication.aspx


Work continues on the Turbo EK Coupe project in the shop. Here we begin wiring the Hondata Coil on Plug retrofit kit.

http://www.kingmotorsports.com/p-4122-hondata-coil-packcoil-on-plug-retrofit.aspx


In the fab shop today- just finishing up a King Motorsports prepped B series intake for a client.

http://www.kingmotorsports.com/p-4048-king-porting-service-edelbrock-performer-x-intake-manifold-b-series.aspx


Update 4/5/2013:

In the shop this morning- fabricating intercooler tanks for a B series turbo build.

http://www.kingmotorsports.com/c-242-fabrication.aspx


We just completed this H22 build. King Motorsports cylinder head prep, sleeved 13:1 with Skunk Pro 3 cams and a Euro R intake. Installation and dyno work next!

http://www.kingmotorsports.com/c-194-engine.aspx


UK S2000 Exhaust Mod

We'd like to share some of the performance work going on the shop today -- the UK S2000 exhaust mod. This mods diverts a portion of the exhaust flow past the first part of the twin-loop muffler for a more pleasing exhaust note without the typical droning of common aftermarket exhausts for the S2000. We use a 1" stainless U bend and cut to fit. Here is a picture of the tube held up for fitment check.


Work begins on the UK S2000 exhaust mod. Cutting the stock exhaust for the stainless bypass tube.


Next the we grind the opening for exact fitment.


TIG welding the stainless bypass pipe completes the UK S2000 exhaust mod.


Complete UK S2000 exhaust mod. Ready to test on the dyno!

http://www.kingmotorsports.com/c-173-dyno-tuning.aspx


We've had lots of requests for dyno results after the UK S2000 exhaust mod- so here ya go. The customer AP2 S2000 is equipped with a header and test pipe and tuned using a Hondata K-Pro. Blue line is with the stock AP2 exhaust, the red line is the UK mod AP2 exhaust. A slight increase in power with the UK mod, but most importantly the exhaust note has improved dramatically. Nice and mellow without any harshness building to a pleasing wail at 9000 rpm- just what the customer wanted...


Project Archives: Mugen-equipped S2000

Some of you may remember this black beauty that King Motorsports built out and equipped with quite a few Mugen goodies!

See more pictures of this S2000 in our Facebook gallery.


ENGINE
Mugen Stainless Steel Header
Mugen Stainless/Titanium Cat-Back Exhaust
Mugen Carbon Fiber Airbox
Mugen ECU
Mugen Hi-Pressure Radiator Cap
Mugen Low-Temp Thermostat
Mugen HP Clutch Pressure Plate


SUSPENSION
Moton Double Adjustable Shocks w/ Remote Reservoirs
Hypercoil Spring Set
Mugen 31.8 mm Front Stabilizer Bar
King Motorsports Bumpsteer Kit
Mugen MF-10 Wheels: 17x7.5 & 17x8.5
Bridgestone S0-3 Tires: 215/45 ZR17 & 245/40 ZR17


AERODYNAMICS
Mugen Carbon Fiber Hardtop
Mugen Rear Spoiler
Mugen Front Half Bumper Spoiler and Undertray


See more of our performance parts for the S2000 at our online store:
http://www.kingmotorsports.com/s-94-s2000.aspx