Interview: The Clevelend Connection - Chris & Alyssa (8th Gen Civics)


Enthusiasts drive out from near and far for our annual Dyno Day in Wisconsin. We love meeting Honda owners and talking about their cars and the attention they've put into them. At Dyno Day 2012 we met Chris and Alyssa, who drove over 400 miles from Cleveland in their color-coordinated & tuned 8th Gen Civics. They joined us again in 2013-- so eager for Dyno Day that they actually arrived a day early and visited our facilities to say hello!

Here are Chris and Alyssa with Mugen rep Onuma-San at Dyno Day 2013 -- betcha you've never seen a pink Mugen t-shirt before!:


We caught up with them recently to talk about their builds...


Q: How did you meet?


Alyssa: Chris and I met in the summer of 2008. I actually initiated it after I spotted his car parked behind a store as I was driving by. It was the first Mugen Si I had seen in person and was a very active member on 8thcivic.com at the time. I turned around and placed an 8thCivic business card on his car with my username on it. A few days later he contacted me and we chatted for a while through Private Message and such and decided to meet to get to know each other and go for a drive. In doing so it evolved a friendship and later a relationship.

Alyssa drives: 2007 Civic Si Coupe - All motor build (using as many OEM parts from other Hondas as possible)

Chris drives: 2008 Civic Si Mugen - Comptech Stage 2 Supercharged

Both cars get stored in the winter but are pretty much daily driven in the few summer months we have here in Ohio.


Q: I like what you said about using as many OEM parts as possible -- the OEM+ approach is popular. Do you guys have other shared functional or cosmetic philosophies?

Alyssa: I think we are both into very similar things when it comes to cosmetic and functional ideas. We both feel a good car is all in the details, especially when modding a Honda since it is usually a very common platform. You have to do things that set yours apart from the rest whether it is a rare JDM build or something made for big power, it isn't really our style to go with what everyone else is doing. I am a pretty big wheel guru and am always taking notice of what set up everyone is going with and how a nice set of wheels and tires can really set the car off.


Q: How about things that you both agree you would NEVER do to your cars?

Alyssa: The top of that list would be anything knockoff. We both say that a certain pride is taken in owning the real thing no matter the product.

Chris: Stickers! They never make your car faster.


Q: I've personally seen stickers add +5WHP at the dyno. (Not really.) Would you ever trade cars? :)

Alyssa: We both get to drive each others from time to time and realize how different they really are. I don't think a trade is in the works any time soon but you never know.


Q: What parts or goals are next for each of you in your builds?

Alyssa: I am continuing with the all-motor build and am looking to have a set of TSX cams, TL Brembo brakes, and eventually am planning some ITB's.

Chris: Dyno Tune by King Motorsports!


Q: How did you decide to make the long trek out for Dyno Day? How was the trip?

Alyssa: We decided on a whim in 2012 to get away after I lost my father to cancer, we needed a weekend of something fun and that was it. After having such a great time last year and gaining even more respect for the guys at King, we decided to do it again this year. It was great, we love the small town feel of the organization and how down to earth everyone was. We brought both cars the first year and decided this year to just bring the Mugen, but in 2014, both cars will be back.

Chris: The trip was great and it really paid off because I actually won a Comp Clutch kit with one of the $1 raffle tickets.


Q: While you were at King you picked up a Mugen umbrella. Do you have any other favorite Mugen bits?

Alyssa: My Mugen GP's are my pride and joy and get babied as much as the car does even when they are in storage.

Chris: My Mugen Blanket with the big kanji letters has been in the back seat of the car since 2009. Anything Mugen like the Reservoir covers, key chains, etc...


Q: What about favorite Mugen parts?

Alyssa: Mugen GP's and Quick Shift Kit.

Chris: My Mugen Exhaust and Suspension.


** Build lists **

Alyssa:
2007 Civic Si Coupe:
~TODA Ported and Polished RRC Manifold
~Import DPS Intake Heatwrapped
~J35 Throttle Body
~Mugen Quickshifter
~Corsport Shifter Cable Bushings
~Invidia Race Header
~Invidia Q300
~Black FD2 Dipstick
~RDX Injectors
~Hybrid Racing Fuel Rail and Gauge
~Hybrid Racing Hoses
~Custom Battery Tray
~ARC Spark Plug Cover
~Pulstar Plugs
~Mugen GP gunmetal Powdercoated Valve Cover
~Mugen Reservoir Covers
~Mugen Black Oil Cap
~Mugen Radiator Cap
~Hondata Flash Pro
~BC BR Coilovers
~SPC Camber Kit
~18" Mugen GP's
~Mugen Heptagon Lug Nuts
~215/40/18 Yokohama Parada Spec 2's
~HFP Brake Kit
~CT-Engineering Rear Sway Bar
~HFP Front Lip
~HFP Rear Lip
~HFP Sides
~GRFXP Taillight Tint
~50%/30% Window Tint
~Mini H1 5000K Retrofit
~OEM fogs w/ 6000K HID's
~08 Si Shift Boot
~Mugen Si Shift Knob
~Strutking Dead Pedal
~Honda Trunk Tray

Chris:
2008 Mugen Si
~CT-e Supercharger
~CT-e 560cc Injectors
~Walbro 255 lph Fuel Pump
~CT-e 3.15" Pulley
~Hondata Flashpro
~AEM Uego
~Skunk2 Megapower Race Header Heatwrapped
~Custom 3.5 Intake Heatwrapped
~J35 Throttle Body
~Boomba Motor Mounts
~Custom Battery Tray
~NGK Iridium 2 Step Colder Plugs
~Wrinkle Red Valve Cover
~Mugen Reservoir Covers
~Mugen Oil Cap
~Mugen Radiator Cap
~Mugen Quickshifter
~Corsport Cable Bushings
~Corsport Base Bushings
~Excelerate Gauge Pod
~Honda Trunk Tray
~CT-e Lowering Springs
~Mugen Visors
~Mugen Heptagon Lug Nuts
~Seibon Carbon Fiber OEM Style Hood
~30%/50% Window Tint
~6000K HID Kit


Alyssa adds this: We would like to thank Bill Turk @ Rick Case Honda for being there from the beginning and parts hookup whenever we need anything, Rick @ Import DPS for building such great products and involvement in the Honda community and last but not least the all the guys at King for doing everything they do!

Here are a few more pictures of their Civics!


Visit the King Motorsports online store for performance & aero parts for the 8th Gen Civic Si!

EP3 Mini-Meet in Washington State


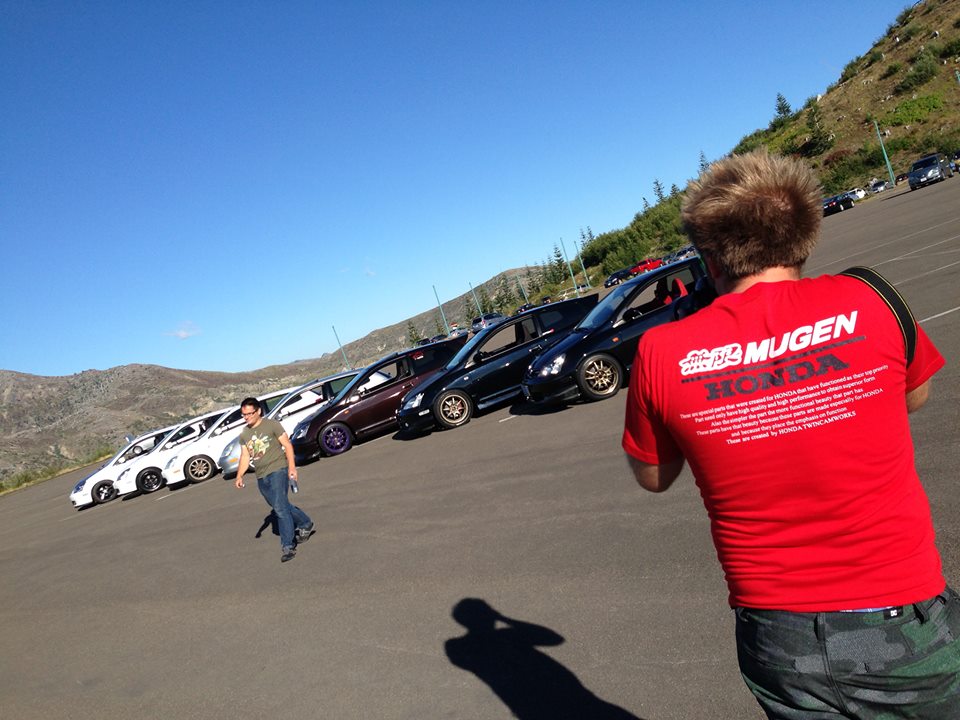
This past Labor Day we gathered a few EP3 Civics together for a Pacific Northwest mini-meet.


Seven EP3 owners from the Portland and Tacoma/Seattle areas met in Castle Rock, WA for grub. Bellies full of pizza, we headed up WA-504 for the 52 mile trip to the Johnston Ridge Observatory overlooking Mt. St. Helens.


Those of us with gray hair will remember Mt. St. Helens as the active stratovolcano that blew its top in May of 1980. The eruption scorched 230 square miles of forest and was the deadliest and most economically destructive volcanic event in all of US history. 30 years later, Mt. St. Helens looks downright other-worldly; it's clear something massive, dangerous and powerful happened here. The landscape just looks wrong -- yet it makes a natural sense all its own. It is rare to see so much landscape changed in such a short time.


If I was a better writer I would make some kind of deeply insightful comparison linking the shifting modifications of this landscape to the changes we've seen to our own EP3s over the years. Or to the reputation of the EP3s, or of Honda... but I'll spare you!


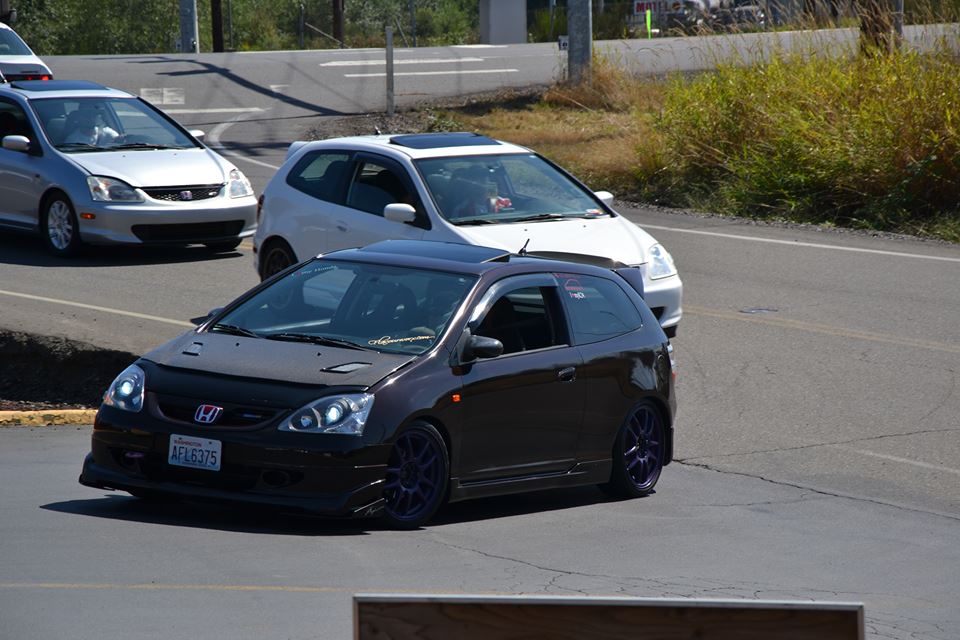
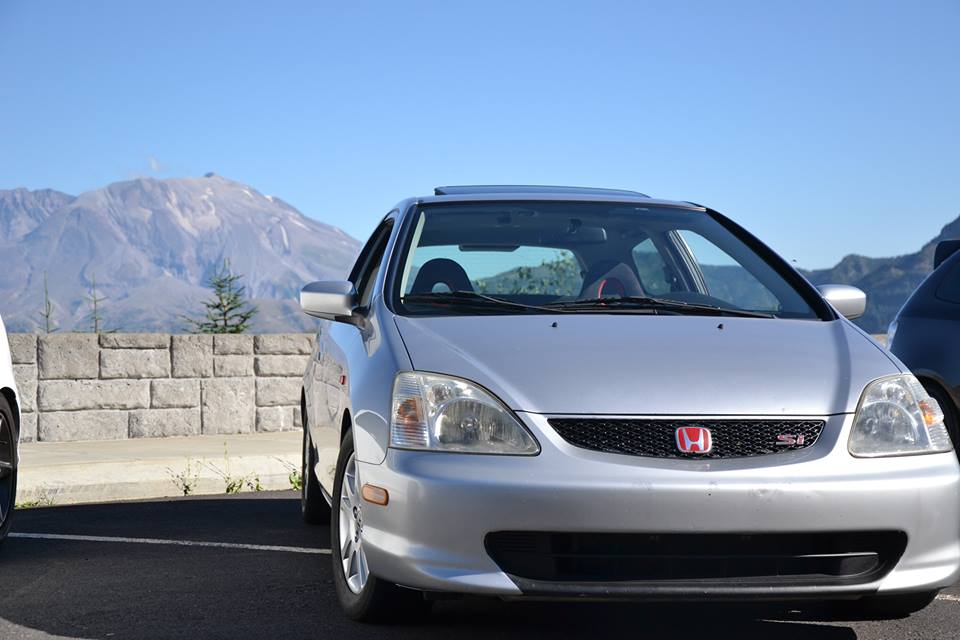
The Tacoma/Seattle guys roll up to our meeting point in Castle Rock. Julio leads the way, followed by Rick. John in the silver EP had intentionally popped the hood latch to give his motor a bit more cool air.


This is the 52-mile route we took from Castle Rock to the Johnston Ridge Observatory overlooking Mt. St. Helens.


We made up a nice caravan of seven as we headed up the hill. Here is a great shot Dave somehow took out of his sunroof, while driving. He managed to get all seven of us in one shot!
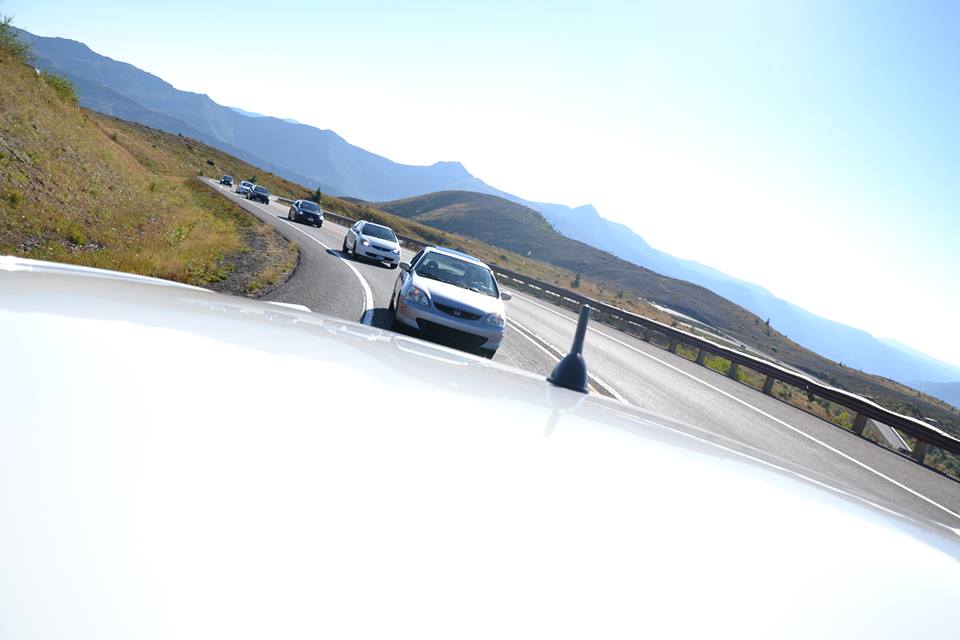


Dave led up the pack in his Taffeta White Si, setting a good pace on his Buddy Club N+ coilovers and black-coated RSX rims. His HKS exhaust roars ahead on the road that will take us up the mountain past shaded valleys, expansive bridges and wide-open, forested vistas.


Behind him was John -- an OG EP owner in a Satin Silver Metallic sleeper he's owned since it had 25 miles on the odometer. He hasn't stopped driving it since. On the way to today's meet he clicks over to 214,000 miles. John has the rare privilege to pick between an EP3 and an Apex Blue Pearl S2000 Club Racer (CR) in his garage -- and tells us that of all the dozen or so Hondas he's owned, he will never be able to part ways with his EP3. He just loves it too much.


Next was Todd, a Portlander who has quietly modded his white EP for years and has only recently been meeting up with other EP owners. He's a lurker on the forums that we finally got to come out and play. I met him when I purchased his Mr. Alex front strut bar from him in a Target parking lot last year. He's holding his own as we dive into the corners.


Behind him was Julio, driving our most modified EP of the day. Julio's ride has a custom metallic purple (root beer) paint job with genuine Mugen lip & grille on a JDM front end -- and a swapped motor. Actually I'm not sure how many motors he's had in this car. Maybe Julio has lost count too. His car has seen generous iterations of motors, suspensions, aero ... and survived an ordeal involving a turbo setup gone wrong. It's awesome to see that he stuck it out and has kept on modding.


Behind him is Brian, driving a Nighthawk Black Pearl EP on bronze 16" Konig rims with a Greddy exhaust. Springs drop it to an aggressive height. The car itself actually belongs to Dave's twin brother Andy (Yep, twin brothers with modded EP3s. That's how we do it in the PNW). The car is on loan for the day to Brian, who normally drives an S2000. Today he's driving Andy's EP so the car can join us for the drive, even if its owner couldn't.


Nearing the end of the caravan is Rick, with a white EP on bronze wheels with Mugen Sport Suspension. He's sporting a Volvo lip that looks amazing on his front bumper, giving it a nice chin that means business. A small German flag swings from his rear view mirror, a signal of his Bavarian lineage.


Bringing up the rear is me, in my black EP. I'm lamenting having left my Buddy Club suspension set on the softer side, but enjoying this chance to stretch my hatch's legs in a pack like this. It's a fun challenge to be the caboose in a seven-car line. I didn't realize just how much more information I would have to process, since I had a clear view of most of the caravan; Just as the leaders might be speeding up, others might be slowing down in a turn. Some might be tapping brakes to adjust following speed. My solution was to just hang back, to not follow too closely. It was like being the tail on an undulating Slinky, stretching and compressing in waves. I'd say I had one of the best views of the group -- not only did I get to enjoy the amazing scenery but also got to see all these clean EPs winding up these beautiful roads.


In a total coincidence, we actually passed a bone-stock, black EP3 headed the other direction. The driver didn't seem to know he had just passed seven of his biggest fans. Clearly not a fellow enthusiast!


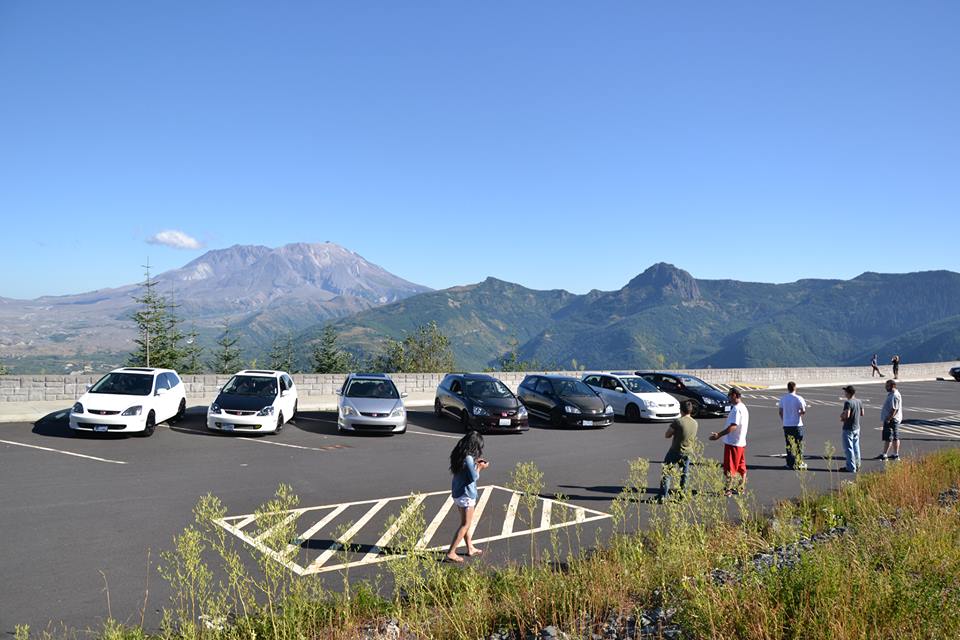
Here we are at a scenic lookout point mid-way up the mountain. Mt. St. Helens is in the background.


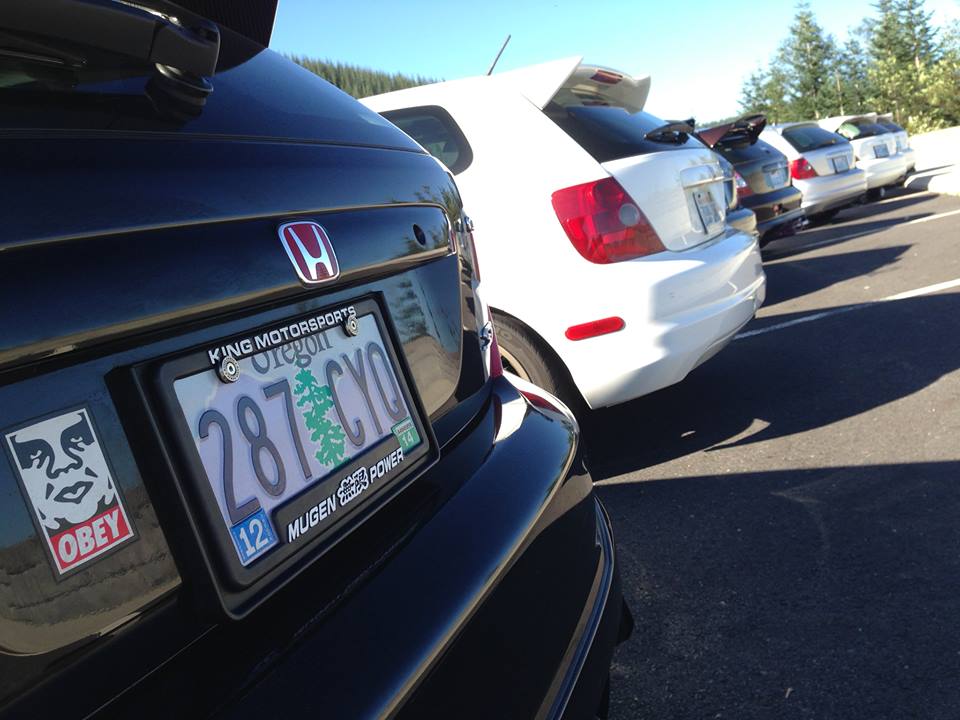
Sportin' the license plate frame of champions!


John's EP3, rocking the OEM 15" stockies and experimental plasti-dipped lower chin:


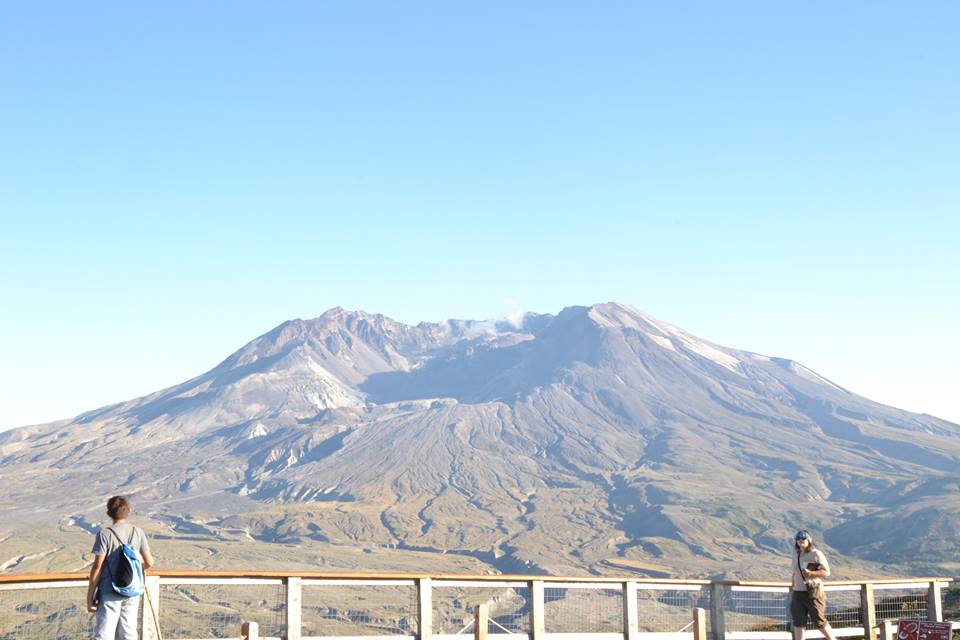
Reaching the observatory, we are treated to this alien landscape transformed by the dome-less Mt. St. Helens. Dave says the mountain lost 1000 feet of height in the eruption. The earth is already starting to push up a new mound in the crater that will one day be a new peak.


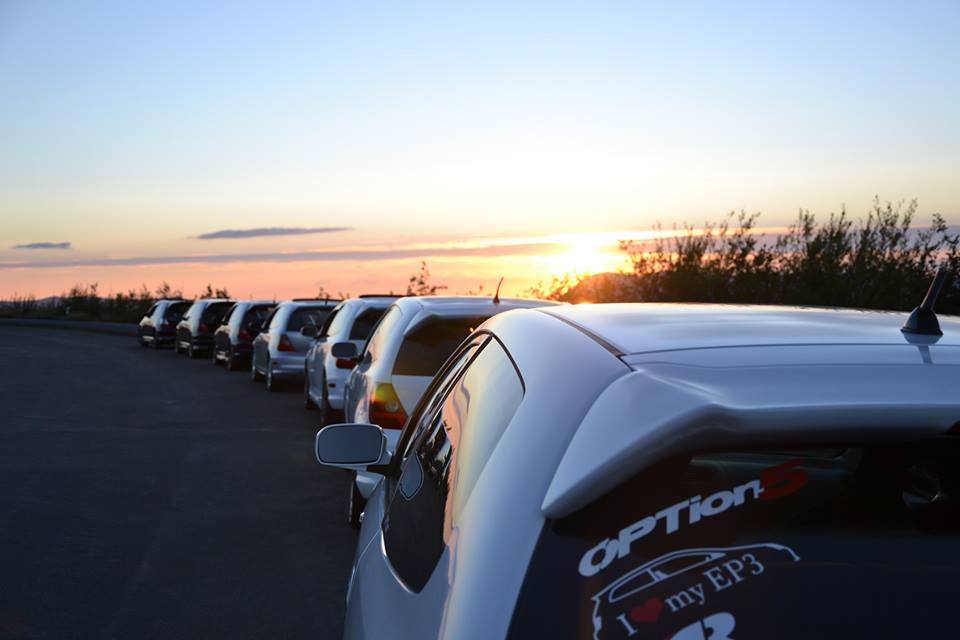
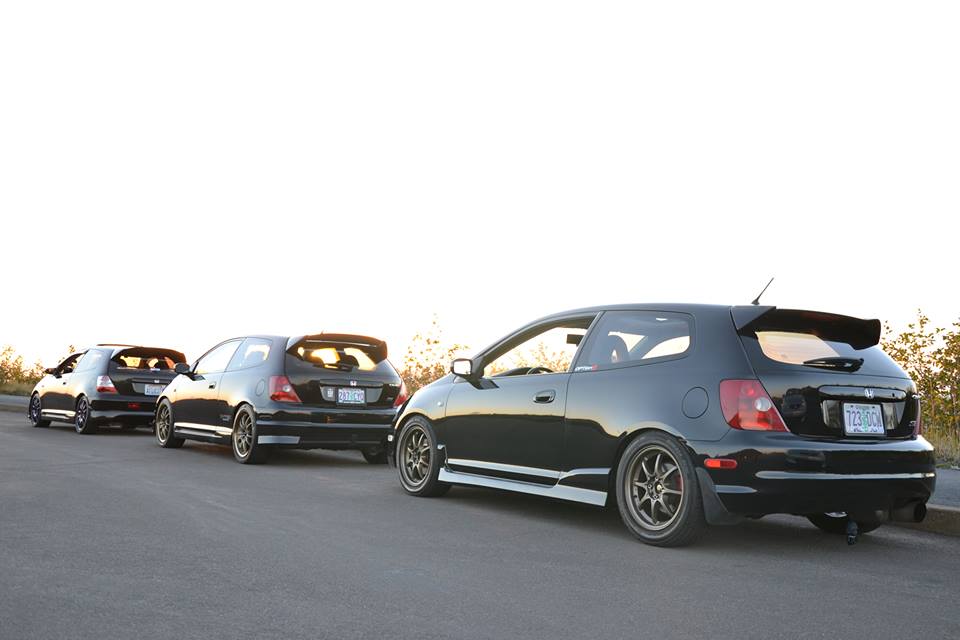
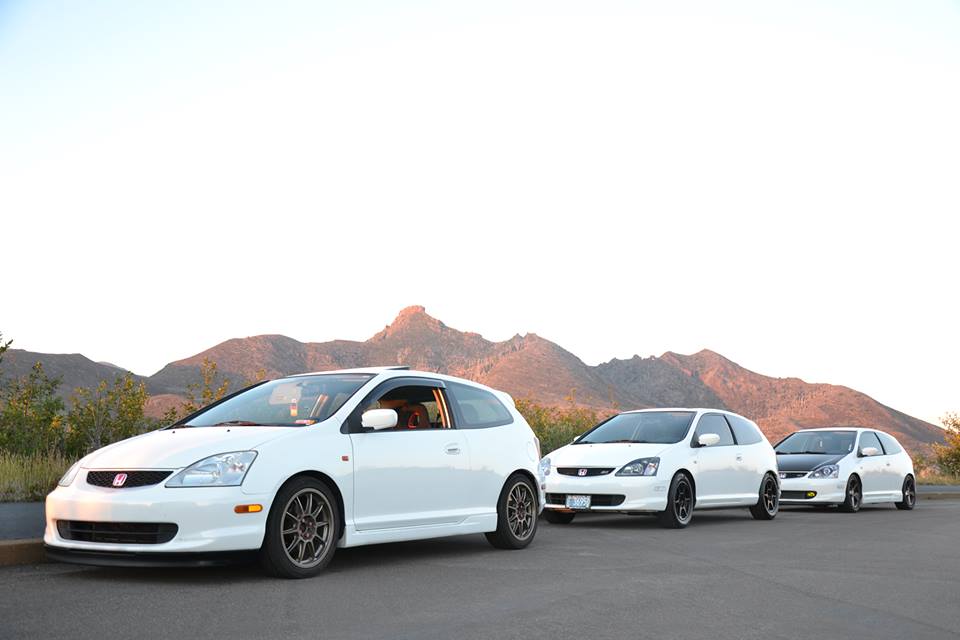
As the sun begins to set, we line our cars up for a final photo opp.


Below from left to right: Julio, Perry, Andy.


Below from left to right: Rick, Todd, Dave.


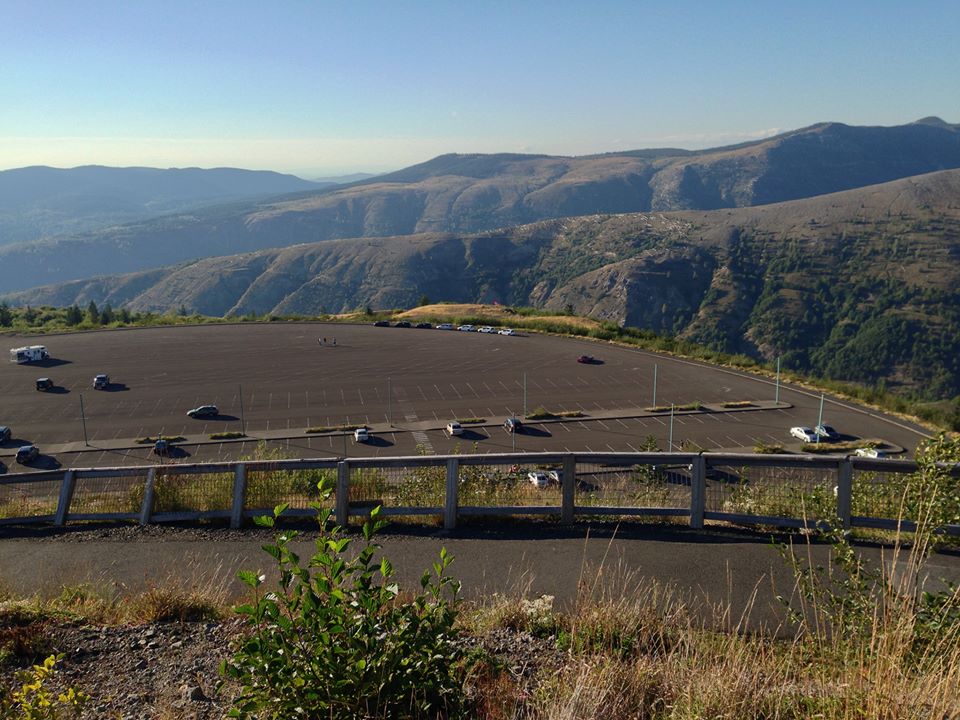
The parking lot for the observatory is massive. Our cars are lined up at the far end of the lot.


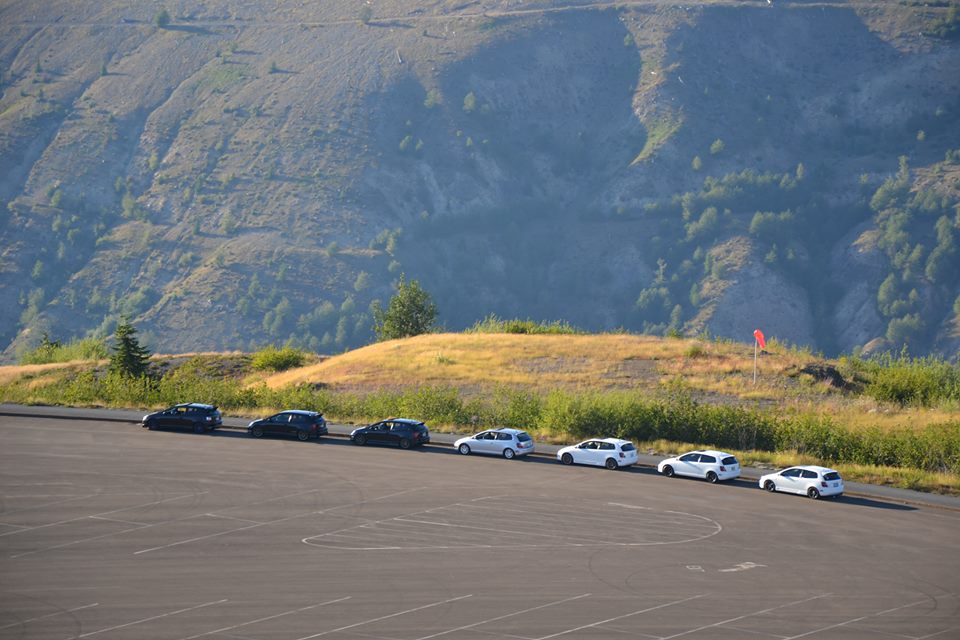
A closer look... can you spot the Prius in this lineup? Just kidding!


We decide to let the sun go down so it wouldn't blind us on the drive back.


The 2002-2005 Honda Civic Si hatchback never quite lived up to its overseas, beloved Type-R brothers. Out of the box it looked a bit like an egg, or perhaps a squat version of the Odyssey minivan. Pre-facelift, the car had tiny 15" rims. Despite these quirks, the EP3 provides ample opportunity for customization and dramatic improvements. The Recaro-made OEM seats, rally-style dash-mounted shifter and torque-blessed K-series are still a killer package that is hard to leave behind once you've driven an EP3. This last Stateside Si hatchback has just turned eleven years old and is being discovered and enjoyed by a new generation of Honda enthusiasts.


I'm looking forward to what the next decade of changes will bring for our EPs!


Photo credits: Dave O. and Perry W.


** Build Lists **


Dave's EP3
2004 Taffeta White
185,300 miles, owned since 2009
BuddyClub N+ suspension
HKS Hi-Power exhaust
DC Sports shorty header
BuddyClub Short Shifter
Tanabe strut bar
Neuspeed lower x-brace
HFP wing
Seibon CF hood
RSX wheels coated black - Dunlop Z1 Star Spec

Todd's EP3
2002 Taffeta White
87,000 miles, owned since 2003
AEM V2 intake
DC Sports shorty header
JP Performance mid-pipe
Neuspeed short shifter
Metal shifter bushings
15” Kosei K1s powder coated black
Bridgestone Potenzas RE960 205/60/15
Eibach Pro-kit
JDM rear sway bar with Energy Suspension bushings
HFP wing
DIY black headlight housings
Red/Black carbon fiber dash kit

Julio's EP3 (this is just a partial list!)
2004 Honda Rootbeer Metallic
84,200 miles, owned since 2006
K24A4
Hasport I/M Adapter Plate
Hondata I/M Gasket
RSX-S Injectors
K-Pro
DC Sport Shorty
HKS Hi-Power exhaust
C/F Spark Plug Cover and I/M Cover
Corsport Aluminum Shifter Cable Bushings
Corsports Aluminum Shifter Base Bushings
J's Racing Engine Torque Dampener
Buddy Club Short Shifter
JDM 04-05 Projectors w/ 8K HID kit
JDM 04-05 Taillights
JDM Front Bumper
Authentic 04-05 Mugen Lip
Authentic 04-05 Mugen Grille
ARC EK9 Splitters
JDM Rear Bumper and Lip
Benen Rear Tow Hook
Burnt Titanium Mugen Emblems
C/F Mugen Replica Hood
C/F Hatch
C/F Mugen Replica Wing
C/F Spoon Replica Mirrors
OEM Hood Bra
JDM Rear Rebar Mod
EDM DC2 Rear Foglight
Work Emotions CR-KAI (17x7)
Toyo Proxes 4 (205-40-17)
H&R 2" Lowering Springs
KYB Shocks
Corsport C-Pillar Bar
Corsport Rear Strut Bar
Corsport Adjustable Sway Bar Links
Omni Rear LCA's
Hardrace RCA's
Beaks Lower Tie Bar
DC-5 Rear Sway Bar
EM2 Front Sway Bar

Andy's EP3
2003 Nighthawk Black Pearl
92,500 miles, owned since 2006
Tokiko Blues with Neuspeed springs
Greddy EVO 2 exhaust
Injen short ram air intake
DC Sports Titanium strut bar
Neuspeed lower x-brace
HFP wing
HFP Side skirts
Fiber Images CF hood
Konig Helium wheels - Dunlop DZ101

Rick's EP3
2002 Taffeta White
130,000 miles, owned since 2008
17" Rota Tarmac II
Mugen Showa Sports Suspension
04-05 OEM side skirts
OEM JDM Type-R window visors
OEM hood bra (recently stolen but being replaced)
Custom catback exhaust
Short ram intake
OEM JDM RSX side markers (wired into parking lights)
HFP wing
Volvo front valance retrofit front lip

Perry's EP3
2002 Nighthawk Black Pearl
52,000 miles, original owner
BuddyClub N+ suspension
5-lug conversion (from 2003 RSX Type-S)
Mugen MF-10 17x7.5
AEM V2 intake
Greddy EVO 2 exhaust
Seats from JDM Integra Type-R DC5
EDM Type-R headlights with Morimoto projectors
Mugen grill
Replica carbon fiber Mugen wing
Carbon fiber front lip spoiler (Type-R style)
HFP rear lip


** Visit the King Motorsports store for parts for the EP3, including genuine Mugen bits **


In the Shop: DC2 Roll Cage Overhaul (updated)

On the fabrication side of the shop: Roll cage construction progresses on Ian G.'s DC2/K20 road race car. Ian purchased this race car out of the Pacific North West and upon delivery was quite shocked by the (lack of) quality of the roll cage. Ian sawed out the original cage and brought the car to us for a proper NASA/SCCA-legal cage that will provide a much higher level of protection and chassis stiffness.

First step is an ugly one: grind out all the remnants of the original cage. Not for the faint of heart but when complete, you have a clean sheet to work from!


Now that the remnants of the original cage are history we can begin by fabricating the mounting plates for the main hoop. We use 1/8" cold rolled steel plate in this instance. We will MIG weld the side plates to the floor first. A hole will be drilled into the floor so we can drop the main hoop down far enough to TIG weld ALL THE WAY AROUND all tubes welded to the main hoop. Once they are welded, the bottom mounting plate is slid under the main hoop and welded into place.


More about King Motorsports roll cage design, fabrication and installation:
http://www.kingmotorsports.com/c-248-roll-cages.aspx

Update 8/30/2013: NASCAR door bar fabrication. Nearing completion of Ian G.'s DC2 race car safety makeover!

Suki the CRX: Brian B's Clean 2nd Gen Build


This weekend I stopped by my local Autozone to return some parts. As I pulled into the parking lot, this red beauty was the only car in front of the store. I swear there was a golden beam of God-light piercing through the Pacific Northwest cloud cover, shining directly on to this JDM wonder. I heard angels singing; somewhere in the world, blind people were seeing for the first time. It was an Autozone Miracle.


I found the owner inside -- his name is Brian B. and he was more than happy to talk about his ride. I knew immediately he had a story behind this very clean second gen CRX which he affectionately calls "Suki."


Brian was more than happy to share -- and it's clear there was a lot of love put into this CRX. Love, combined with a few rear-ender heartaches that he persisted through. Here's his story in his own words:


****


My dad first got a CRX when I was 6 years old. I remember fond times of him taking me around town and on long road trips in that car. Since then, I wanted a CRX of my own.


My dad called me up early 2006 and told me he had a friend that had an abandoned one located on his property. I inquired the story about the car, what year it was (since I wanted a second gen) and what color it was. He told me he had no idea about the details on the car, except for the fact that the previous owner drove it out on to his friends property and got out of the car and killed himself. I was reluctant to pick it up after hearing such a horrific story. He decided to pick it up and possibly flip the car after he did the maintenance work. He sent me photos of the car after he received it and I became very interested. A Rio Red 1988 Honda CRX DX.


I purchased it from him for $1,000, which is cheaper than any of the mods I later did to the car. At first I drove it around as a daily driver, just enjoying having a car I have longed for. After a year's time, I became bored with the stock d15b2. I had the itch for more horsepower. I started saving as much money as I could while still attending college. After a year and a half of owning the car, I had the money ready to start my motor swap and my first set of suspension parts. I decided on the B16a because I felt it fit the chassis and style I was going for since it came that way from Japan. I mistakenly cheaped out on suspension and went with Megan Racing coilovers and KYB AGX. This was reversed years later.


I spent a month swapping the motor in along with a minor wire tuck. The big hurdle was modifying the stock Japanese harness from the B16a to work with the stock DX harness, since the old harness was tired and brittle. I wanted most of the Japanese harness to look untouched. I tucked the fuse box to right above the ECU on the passenger's side and tucked both headlight harnesses. I was starting to make some progress with the car.


One advantage to being a poor college student with a car project is funds are limited. Now that might sound odd, but it makes you think multiple times before you hastily make a purchase on a part for style or performance. This gave me time to figure out all I wanted to do to the car, without making it look over the top or so similar to the rest.


My uncle (a frame puller at a body shop in Kennewick, WA) offer to paint my Rio Pink / faded car as long as I helped pay for supplies. I would be stupid not to agree. It was really easy to get it started and place the primer on, but the downside was is getting the time for him to finish up the car. Especially since I lived in Boise, Idaho at the time. The car stayed in its primer state for one whole year before going under the gun.


Two weeks before heading up to my uncle's for the paint, I was rear ended by a semi at a traffic light. His excuse was that he couldn't see me and forgot I was there. This is after he hit my rear bumper 5 times before stopping.


Luckily, this is what my Uncle did for a living, so it was no big deal to pull it out.

Car was then painted and all of the pieces put back together:


I had the itch to make it look as OEM/USDM as possible...


A few weeks away was a local car show called Shakotan Matsuri (Lowered Car Festival). I felt I was all ready for it, and then I was rear ended by my roommate's sister.


I spent another year waiting for insurance money and the time to get this damaged fixed. I also picked up a new set of wheels, which still happen to be my current wheels. These were originally going to be a temporary solution until I could afford a rebuilt set of BBS RSs or a real set of Work Equip 03, but then ended up staying with the car a lot longer than I wanted them to be.


One of my buddies gave me this old (but now very popular) 5 panel Wink mirror back in 2008. I like to think I was on the cusp of everyone and their moms' owning one.


Once I finally got the the rear end fixed again, I decided to upgrade the tail lights to the 90-91 EDM tail lights with the EDM center piece with fog light. This means the fog light is on the driver's side, rather than the passenger side like the JDM fogs.


Mind you this project car was also my daily driver throughout all of this.


Finally got around to purchasing the Koni Yellows + Ground Control sleeves with top hats.


Went out with my friend and his Fit for a photo shoot.


Coming up to the more recent mods, I decided that the stock bushings were old and tired as well with over 220,000 miles on them, so I spent the winter of 2010 replacing everything.

I finally got the car to a nice spot. It was the perfect blend of daily driver and tough machine that I always wanted. Since 2011, not much has changed on the car. I went back to a Broadway convex mirror because I was tired of seeing the Wink 5 panels everywhere. Future long-term plans include Hondata tuning, more aggressive cams, REAL wheels, Bride racing seat and harness bar, and a Nardi Racing woodgrain steering wheel with quick release hub.


More of this shoot here: http://www.flickr.com/photos/nateshrum/sets/72157628388718047/

Parts List:

B16a from Hmotorsonline
Prelude LMAs
Si steering rack
Hasport Motor Mounts
Hasport Shift Linkage
2.5 inch cat back with magnaflow exhaust and dual tip
Koni Yellows + Ground Control sleeves and Ground Control top hats
Complete bushing overhaul
ODB1 conversion (With Ostrich chip emulator)
Si interior
EDM flush wing
EDM tail lights and center fog light
GT Styling Solarwing II
DA Integra Front and Rear disc brake swap
OEM VW MK3 VR6 Euro lip


****


** Thanks Brian for sharing this awesome build and pictures with us!! **


You can find a full range of parts for the first and second gen CRX at the King Motorsports store!

https://www.kingmotorsports.com/s-86-crx.aspx

Dyno Day 2013 Recap

This year's Dyno Day got an early start as attendees took our advice and showed up on time. :) In fact we had people arrive an hour early to chill with their friends as we set up the check-in booth. We had 224 registration goodie bags to hand out -- and we had nearly as many cars. Dyno runs ran through the day in the shop, with live video feeds piped into our showroom. In the showroom we had a rare and one-of-a-kind display of Mugen and King nostalgia prepared especially for Dyno Day. Some of these items have never been publicly displayed.

Deletah was once again on hand to fill the deepest parts of your ears and hearts, and Andy Noggle was on hand as our event photographer. Boy Scout Troop 93 served up BBQ chow as raffles and nice sponsor prizes were given out throughout the day.

Rounding out the event were show awards for Farthest Distance Traveled (William Wang from New Hampshire), King of the Dyno (556 HP daily driven Supra), Staff Pick (red EF Civic hatch), People's Choice (black 499 HP turbo S2000) and Lowest Pull (CR-Z at 122 HP).

During the day we offered 10% off all in-stock items and had a few garage sale items for sale -- including the motor out of the King Motorsports RSX Challenge Car.

We caught a nice break in the weather too. The sun was out just enough to bring out the shine on some amazing rides.

Thank you to all our many sponsors, attendees and volunteers who helped make the event so memorable! We're already at work planning the 2014 Dyno Day!


Jon L. sent us this awesome video recap of Dyno Day featuring a few camera techniques we've never seen before!

http://www.youtube.com/watch?v=NeYFXUXHGMo


You can see dozens of official event photos on our new GALLERY page.

And here are a few pictures from NoggsPhotography:


San Pedro: Debut Race! (Updated w/ Vid)

Our Prelude race car project known as San Pedro recently had a great day of testing at Gingerman Raceway. Once back at the shop we did some fine tuning and adjustments based on what we learned.


We prepped spare noses/airdams and splitters in anticipation of San Pedro's debut race at Michigan International Speedway in two weeks.


5/25/2013: San Pedro wins its first National SCCA EP race from the pole of the 2013 race season at Michigan International Speedway today complete with a new lap record! Congrats to Moser Racing - awesome result!


5/26/2013: Day 2 at Michigan International Speedway. San Pedro wins the qualifying race by 39 seconds! Way to go Moser Racing!


Day 2 at Michigan International Speedway and another flag to flag win for San Pedro and the Moser Racing team! Way to go guys!!!!


San Pedro captures the pole in its very first SCCA EP National race of the 2013 race season- pumped!! Go Joe Moser!!!


Fun San Pedro factoid- Top speed at Michigan International Speedway on the banking was 144 mph. Entry speed into Turn 1 off the banking was 62 mph. San Pedro brakes from 144 mph to 62 mph in 63 feet!!!!


The Mosers have posted the video on Youtube!

Engine build: EV 1.3 HF

In the King shop last week! We finished up an old school EV 1.3 HF build. This engine will soon be installed in a beautifully restored 1985 HF.


The tricky part of an old school engine build like this EV 1.3 HF is a shortage of OEM rebuild parts- they are getting very scare.


Because 1st. over bore pistons are no longer available, we commissioned Wiseco to build a forged piston with the exact dimensions of the factory piston with the bore size we needed. We stress relieved and deburred the factory connecting rods and the whole rotating assembly was balanced to our specifications.


The EV 1.3 HF cylinder head ready for final assembly. Valve seats were carefully blended and just a touch bowl work to increase efficiency. Will 50+ mpg be a reality using yestertech?


We also got this info & picture from Yawsport:

"Captured fresh out of the paint booth over 1 year ago, this champagne Honda Civic 1300 Hatchback (affectionately named "Champ") will adorn the fully blueprinted EV1 engine currently being finished up by King Motorsports. It's been a long road to find some of the engine internals needed to complete this detailed build, but it will definitely be worth the wait. Stay tuned for the full write up of this project as well as some custom suspension goodness."


The EV 1.3 HF engine is almost buttoned up and looking terrific!


http://www.kingmotorsports.com/engine_building.aspx

Chris K.'s Mugen Del Sol

Return of an old friend! Yesterday, long-time King Motorsports customer Chris K. brought in his Del Sol that has been in storage for many years.


We are in charge of bringing it back to life. Years ago we installed a Mugen B16B N1 crate engine and well as a cool set of Mugen MF-10L mirror face wheels. Since then, Chris has collected all the Mugen aero parts as well as some other really cool period Mugen bits. Once complete it will be a stunner!


Awakening the beast after many years of storage. Chris K's Del Sol equipped with a Mugen B16B N1 crate engine, Mugen valve cover, Mugen header and plenty of other rare Mugen bits.


See more performance parts for the Honda Del Sol on our online store!

San Pedro: Unleashed for Testing


We put our Prelude race car project known as "San Pedro" through the paces for testing at Gingerman Raceway this week, and the results were fantastic!


San Pedro's driver's office. Easy to read analog gauges, GPS based data aq and adjustable brake bias. Uncomplicated and clean!


Testing going well. First set of Hoosiers are now history.... :)


Starting to use some brakes.... Huge brake ducts and trick race pads. This is way they should look when you use them hard!


The driver says there was a balance problem. The crew refers to this as driver running out of talent :)

For the record, we are extremely happy the driver wants to push the boundaries of adhesion. Sometimes that means going over the limit to find exactly where that limit is. That's precisely why we go testing! We have plenty more splitters where this one came from (it helps that we made our own).


That's a wrap from Gingerman Raceway! We learned what the car likes and finished up 2 seconds under the lap record. A very good day!


Want to ride  along? Watch the San Pedro test video now posted on YouTube!


Re-inventing "San Pedro" Part 2 (Updated)


We've had so many pictures to share of our 4th gen Honda Prelude race car project (dubbed "San Pedro") that we've decided it's high time to start a new blog post! Welcome to "Re-inventing 'San Pedro' Part 2"!


Update 1/18/2013:


This week we have been working on building the plug from which the mold for the front air dam will be made. The airdam will provide a platform to mount the front splitter once completed. Here we are roughing out the foam core to the basic shape we are looking for.


Once the basic shape has been roughed out, Bondo is applied and sanded into a finished shape. This is a very time consuming process as the entire air dam has to be symmetric -- with a perfect surface finish. Up next, building the mold from this plug and making finished pieces out of carbon fiber! Stay tuned.....


Update 1/24/2013:


Work continues on the front airdam plug. After numerous coats of Bondo and shaping, we are getting close to a finalized shape. Next step is several applications of high build primer and sanding to make the surface of the airdam plug absolutely perfect with no pin holes or sanding marks. This is roughly what the airdam it will look like when attached to the front bumper.


Update 1/30/2013:


We have now completed the plug for the front airdam mold. Before the mold is made from this plug, it will be liberally coated with wax and then with a mold release agent so the fiberglass used in making the mold does not stick to the plug.


Here is an example of what the final mold looks like. The molds are designed to have great strength so there is no potential for any dimension of the final part to change during the lay up process.


The next step in producing the airdam for San Pedro is vacuum bag moulding.

Vacuum bag moulding uses a flexible film to enclose the part and seal it from outside air. A vacuum is then drawn on the vacuum bag and atmospheric pressure compresses the part during the cure process. Vacuum bag material is available in a tube shape or a sheet of material. When a tube shaped bag is used, the entire part can be enclosed within the bag. When using sheet bagging materials, the edges of the vacuum bag are sealed against the edges of the mould surface to enclose the part against an air-tight mould. When bagged in this way, the lower mold is a rigid structure and the upper surface of the part is formed by the flexible membrane vacuum bag. The flexible membrane can be a reusable silicone material or an extruded polymer film. After sealing the part inside the vacuum bag, a vacuum is drawn on the part (and held) during cure. This process can be performed at either ambient or elevated temperature with ambient atmospheric pressure acting upon the vacuum bag. A vacuum pump is typically used to draw a vacuum. An economical method of drawing a vacuum is with a venturi vacuum and air compressor.

A vacuum bag is a bag made of strong rubber-coated fabric or a polymer film used to compress the part during a cure or hardening process. In some applications the bag encloses the entire material, or in other applications a mold is used to form one face of the laminate with the bag being a single layer to seal to the outer edge of the mold face. When using a tube shaped bag, the ends of the bag are sealed and the air is drawn out of the bag through a nipple using a vacuum pump. As a result, uniform pressure approaching one atmosphere is applied to the surfaces of the object inside the bag, holding parts together while the adhesive cures. The entire bag may be placed in a temperature-controlled oven, oil bath or water bath and gently heated to accelerate curing.


Here are rolls of carbon fiber material that will be used to make the final airdam.


Daytona Red race cars have taken over the shop today!


Update 2/26/2013:

San Pedro update! The mold for the front air dam has been completed. Notice the robust construction of the mold to insure there is no chance of a core shift. Pictured is the backside of the mold. The upper and lower half are bolted together and then unbolted to release the final part.


Here is the inside of the front air dam mold for San Pedro. The surface finish has to be glass smooth as your finished part will pick up any imperfections.


A look at the first carbon fiber air dam out of the mold for San Pedro. Next up fitting to the car and measuring for the splitter plank....


Update 3/26/2013:

The front splitter/airdam is now complete and mounted. Next up building shrouding for the radiator, brake ducts and an airbox...


Update 4/3/2013:

In the shop today: TIG welding the aluminum airbox for San Pedro.


Update 4/4/2013:

Yesterday we bid a fond farewell to San Pedro. Next week we'll be testing San Pedro at an "unidentified" race track working various chassis setups. Here are a few photos before San Pedro was loaded up to head to its new home.


San Pedro basking in the sunlight after a winter makeover...


Detail shot of the front airdam/splitter profile. Lot's of downforce to be expected. How much? We shall soon see :)


All that's needed is the spacer between the seat and steering wheel :)