The following post comes to us courtesy of Mugen aficionado Jerimiah Styles! In this post he shares his experience cleaning up his new-to-him Mugen header. Many thanks to him for another contribution of his time and insight!
== ==
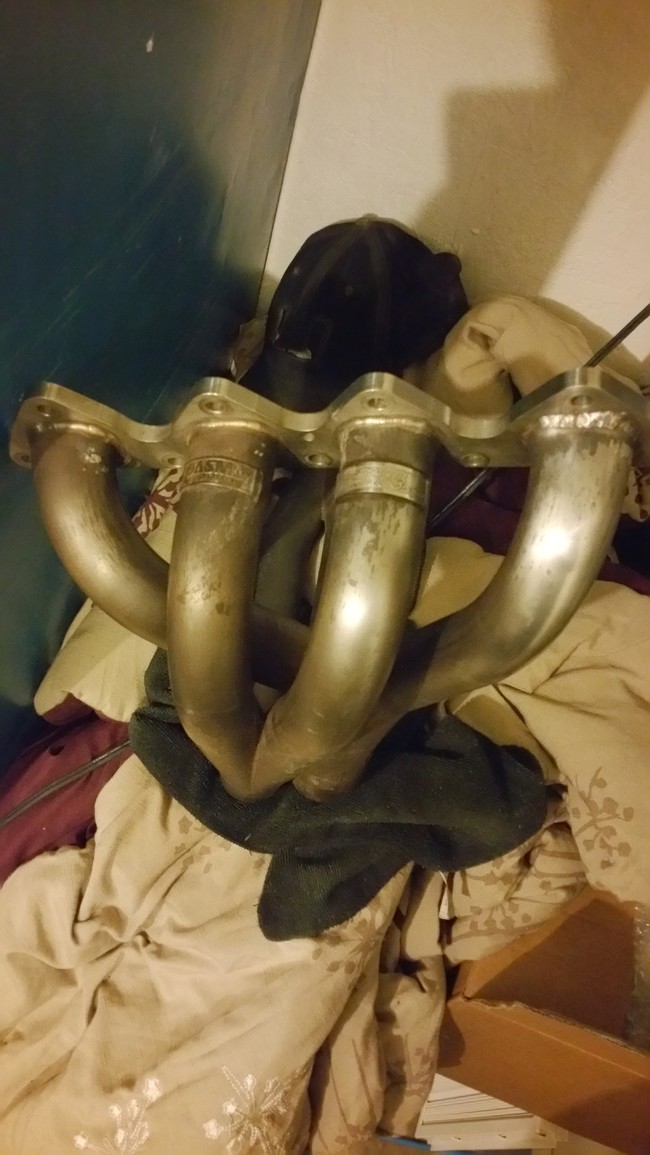
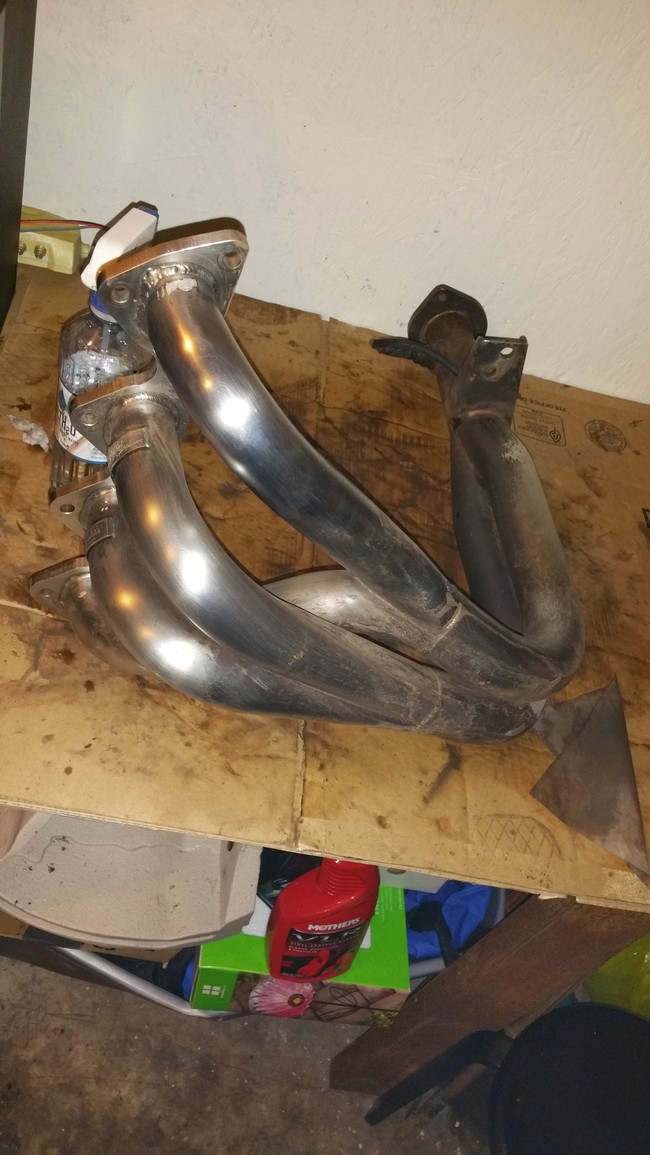
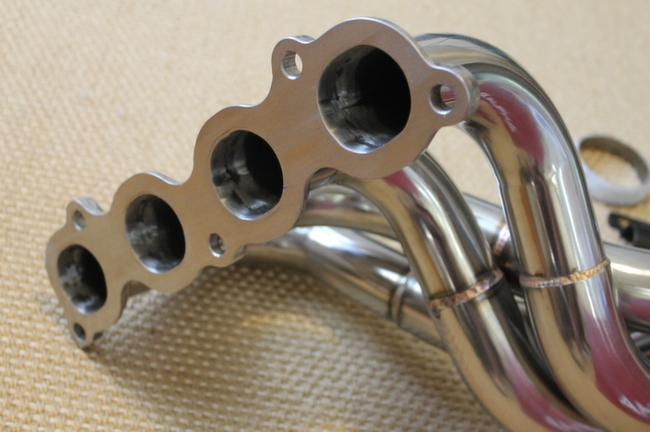
I recently picked up a pre-owned Mugen B16A 4-2-1 header from a buddy of mine. He'd offered this header to me many times, but I had until recently declined, as the header needed a little bit of work (cleaning and welding a crack on the bracket). I had always been intimidated to attempt such a project until I received this header. I did a bit of research and decided I was going to sand it up and attempt to polish it. However, I didn't want a high polished "chrome" look, I opted for the original polished raw metal route, the way this beauty came from Mugen.
Here's how it looked when I first picked it up.
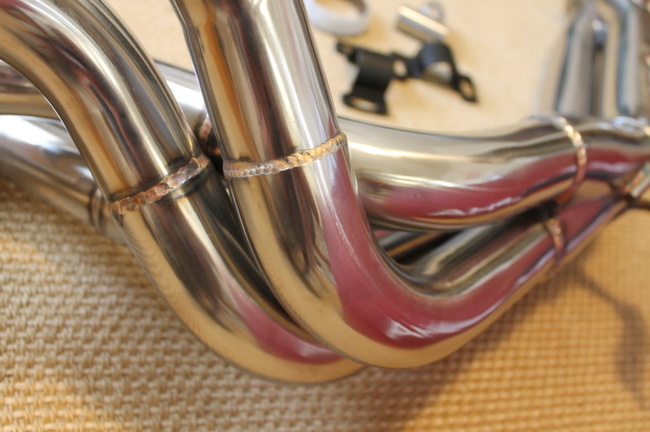
One of my good friends is a woodworker and suggested that I try synthetic sand paper. It lasts much longer than conventional sand paper and is easier to use. Unfortunately the finest grit I could find it was 350, but this is needed to really get all of the oxidization off. As you can see just seconds into wet sanding and I was already seeing results. (below)
For this project I wet sanded the entire time. Here is with the 350 grit. Make sure the residue (seen pictured) is constantly wiped down with a rag and kept clean. This not only allows you to see your results, and where you need to sand, but also assures that you aren't damaging the header by getting any pieces of dirt in there that could potentially scratch the surface of the header. (below)
I used a small spray bottle to keep the sand paper wet, and also to keep the header clean throughout the process. This is about halfway through. You can take each step as far as you would like per your own personal preference. (below)
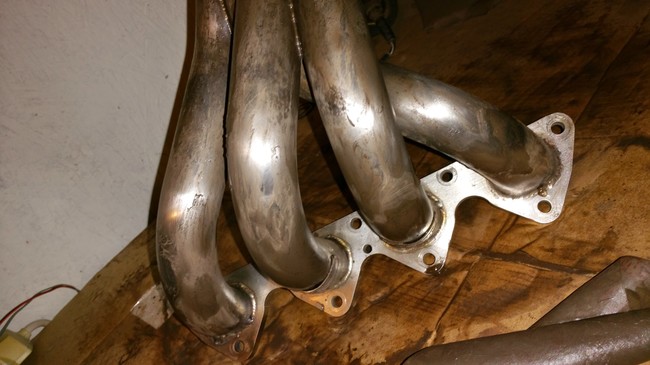
Next I switched to 1500 fine grit, again repeating the same process as above getting progressively finer with 2000, grit, and then 3000. This was as far as I wanted to take it. Again if you'd like a higher polished header go for it, and keep on sanding. After you're happy with the luster that you have achieved, you can take a metal polishing compound and add as much gleam as you'd like. (below)
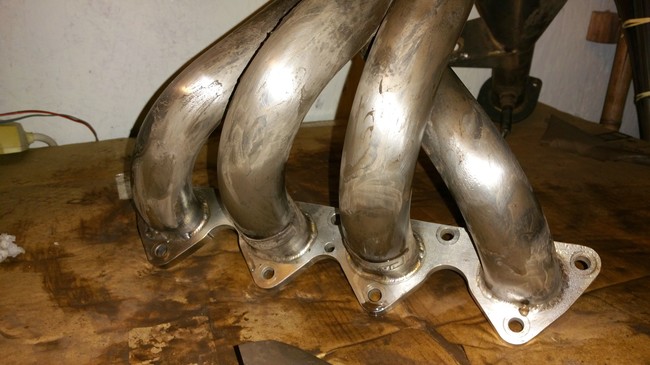
Here is after sanding. Again repeating the steps and taking each as far as you'd like, 350 fine grit, 1500, 2000, 3000 Before doing any kind of polishing.(below)
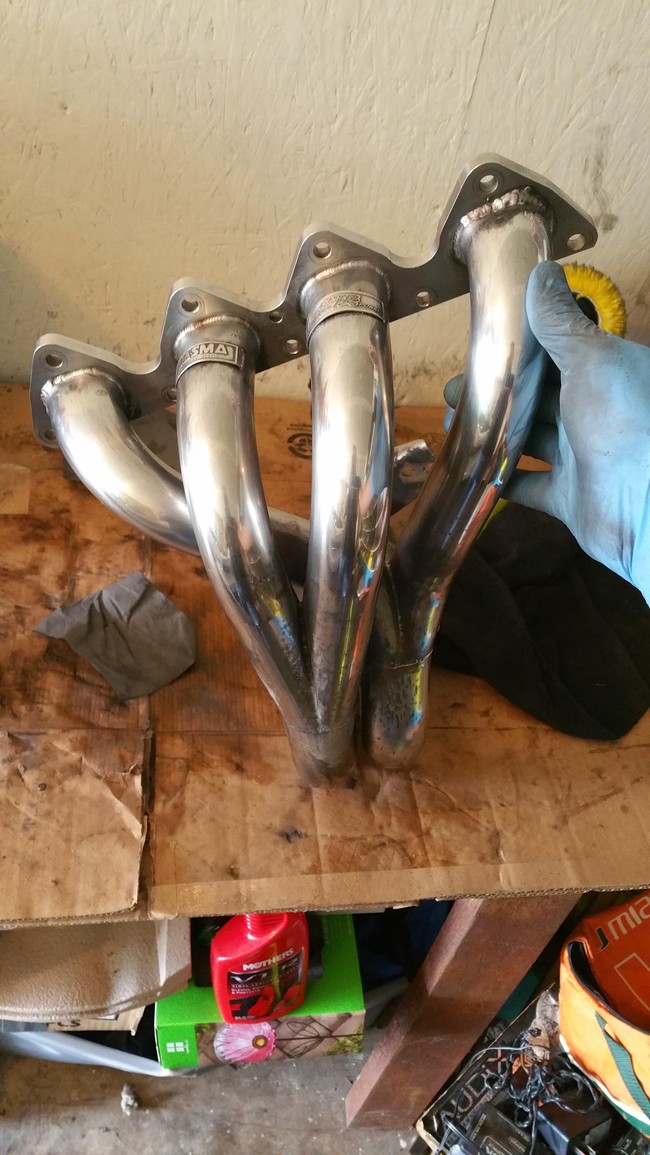
A critical step in making sure that your header turns out beautiful is to wipe it down with 99% rubbing alcohol: after polishing, after installation, and before starting your engine. This will remove any remaining polishing materials and oil from the fingers of whom ever installed it. As the header ages it takes on a gorgeous golden hue that adds a touch of Mugen class to any engine bay.
Over the years I've only added modest bolt-ons to improve the power output on my 2002 Civic Si (EP3) hatchback. My collection of bolt-ons includes a Mugen airbox, Mugen Twin Loop, RBC intake manifold and K-Pro. After a quick call with Scott at King Motorsports, I settled on his recommendation to go with the Skunk2 Racing Alpha Series header.
Scott said they've seen respectable gains from the Skunk2 header and the build quality gets his thumbs up. From what I've read online, the Alpha is essentially the same design as Skunk2's top-shelf MegaPower line, but at a lower price point thanks to some advanced manufacturing technology (and probably concessions on materials used).
General feedback I've read from owners is that people love this header. Fitment on K20A3/A2 is good, so long as it is done by a professional. Folks with a K24 swap may have to do a bit of magic with their front sway bars -- a common issue that affects all aftermarket header choices.
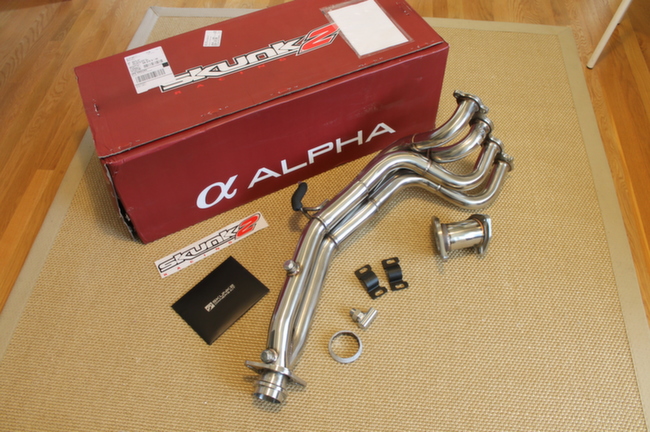
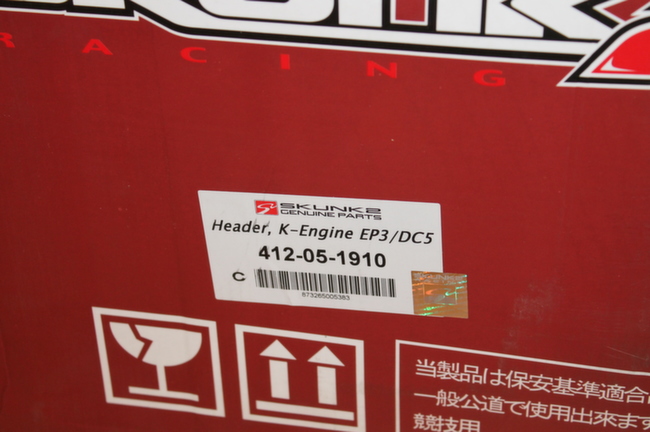
This is the first race header I've ever purchased. I had a lot of questions about what would be included out of the box, so for you fellow newbies out there, this post is for you. Keep in mind this is for the DC5/EP3 (Skunk2 part #412-05-1910) -- so your results may vary for other fitments.
The box itself is fairly sturdy and red and black graphics scream performance. This is one delivery you don't want to leave on your front porch overnight. For you married folks, this is a car part delivery that will be hard to hide, ha ha.
The header was wrapped in bubble wrap which provides reasonable protection during shipment. The entire contents of the box:
- Alpha series header
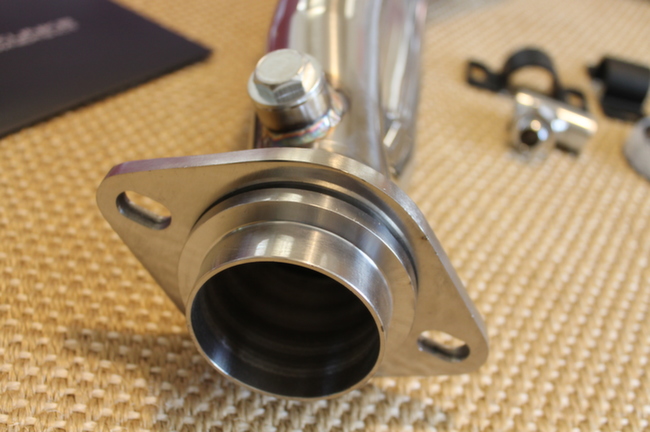
- adapter pipe
- donut gasket
- oxygen sensor defouler
- 2 front sway bar brackets - allows for side-to-side repositioning of the sway bar thanks to elongated mount openings.
- owner's kit - a black envelope that includes a Skunk2 brochure and registration card with serial number.
- Skunk2 Racing decal
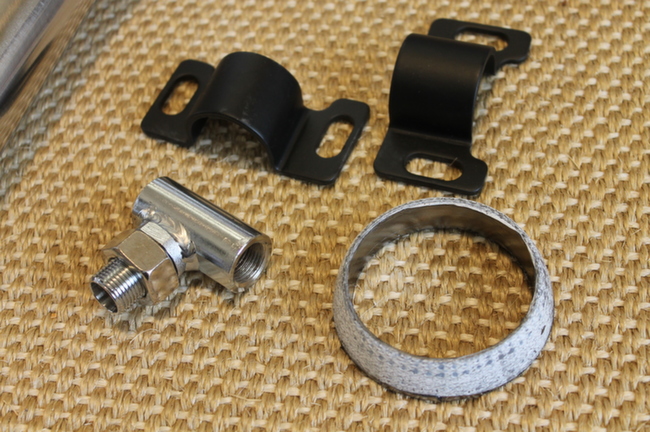
Here are the front sway bar brackets, defouler and donut gasket:
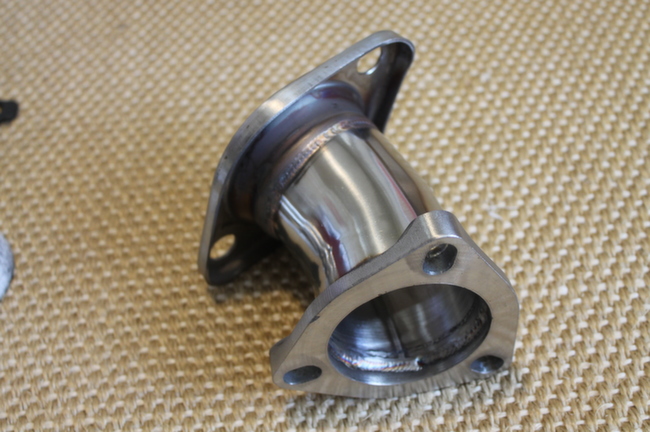
Here is the adapter pipe:
Here is one of the 2 oxygen sensor bungs. Remove this bolt to install the oxygen sensor.:
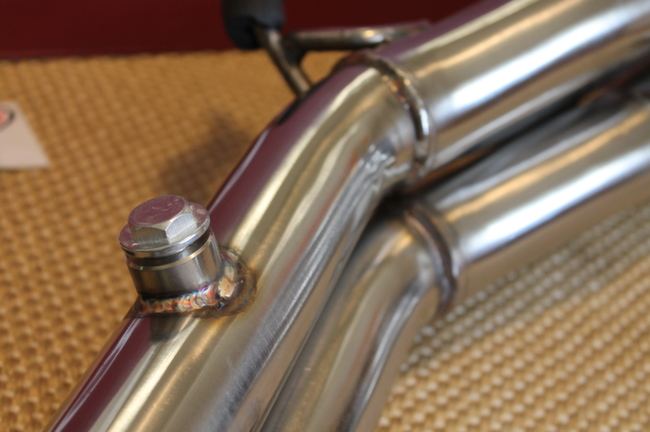
Here is the second oxygen sensor bung. Remove bolt to install oxygen sensor or defouler.:
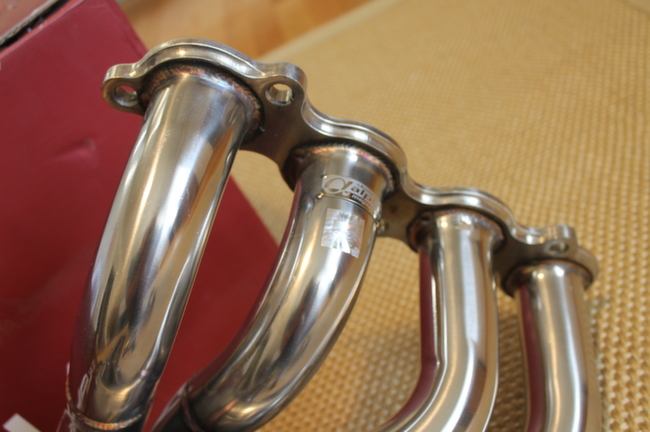
The top has an ALPHA badge and holographic sticker with serial number:
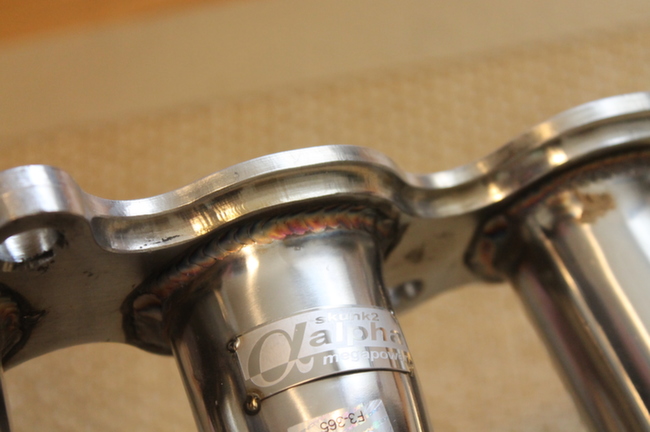
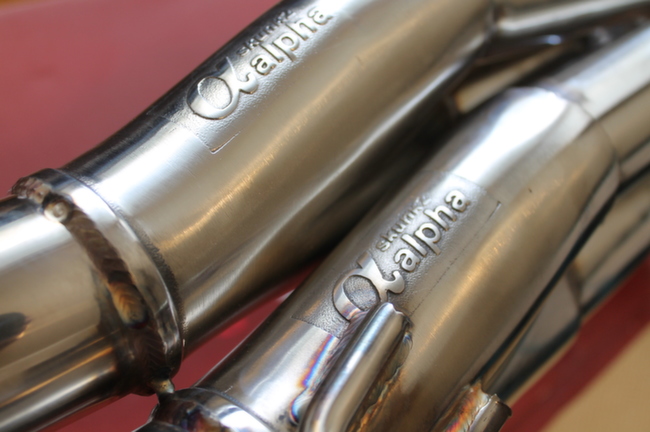
The underside has two ALPHA stamps near the hanger:
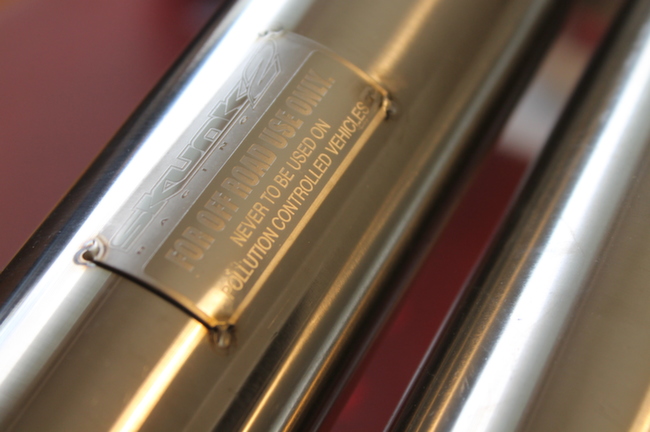
There is one more badge that says "FOR OFF ROAD USE ONLY. NEVER TO BE USED ON POLLUTION CONTROLLED VEHICLES" just downstream of the hanger:
Next up -- installation and dyno tuning!
See more Skunk2 Racing products at the King Motorsports online store!
http://www.kingmotorsports.com/m-43-skunk2-racing.aspx
Today we're taking you on a short tour of the Mugen exhaust/header fabrication shop. Located behind the main showroom in Tokyo, this ultra clean and efficient facility is where all the Mugen headers and exhausts are fabricated.

All Mugen exhausts and headers are constructed from polished T304 stainless steel, including all attachment points. T304 is considered the best steel available for corrosion resistance and all-around toughness. The flanges are cast stainless steel and use OEM gaskets and hardware for a precision fit.

Each exhaust and header is TIG welded on an extremely robust jig to ensure absolute perfect fitment.

Here a center resonator is packed with sound deadening material before being welded to the B pipe:

The finished product is racked before being packed up for shipping. This represents a typical production run of B Series headers.


You can check out the currently available Mugen exhaust components in our online store. You can also order a custom header made by King Motorsports. In the tradition of the Mugen headers, the dyno-proven King headers are hand-fabricated with T304 steel for any H, B or K Series and built for perfect fit and maximum horsepower gains.
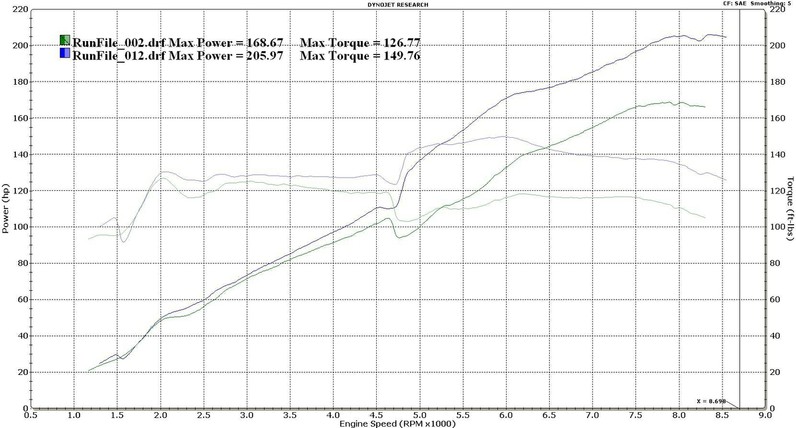
Recently a customer brought his Civic in for dyno tuning. On the first dyno run, the motor hits VTEC and goes dead rich -- but makes no horsepower.
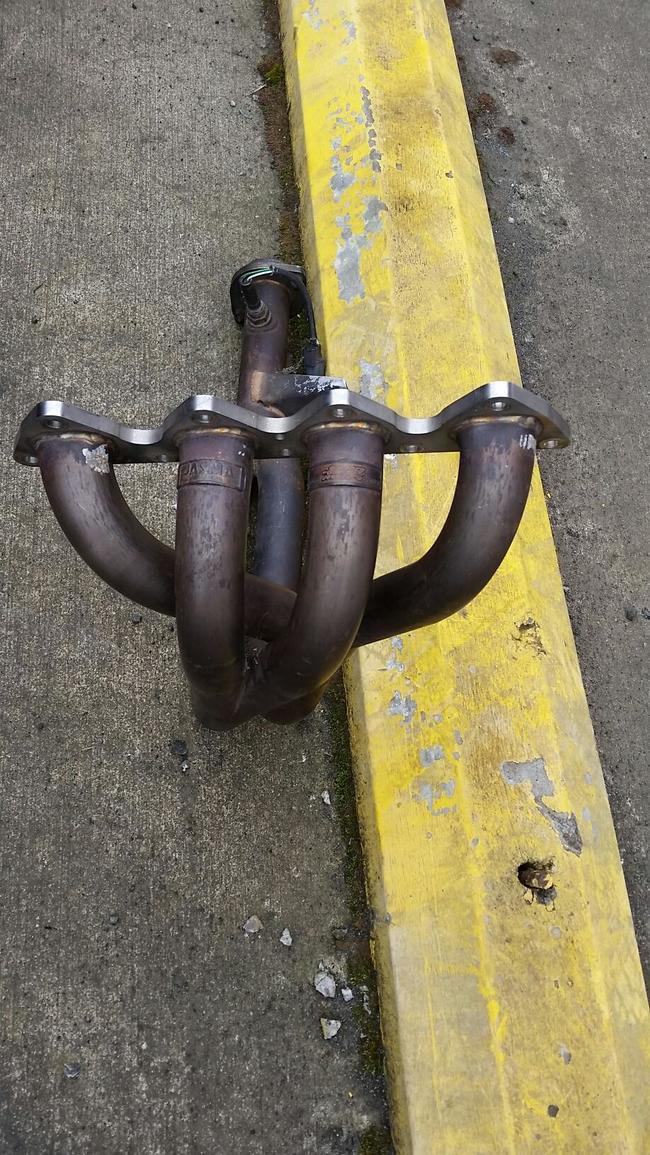
We pulled off the aftermarket header. Here's a pic:

We look inside the header -- a generic one from eBay -- and examined it more closely. What we found was shockingly poor construction yielding almost total blockage. See for yourself:

We replaced the header with a quality Skunk2 Alpha Series header. Ran it on the dyno again, and saw a *dramatic* power and torque increase.
Here's the comparison chart:
If you've read Mike's interview, you know our philosophy about buying from eBay is to use extreme caution. We're not saying every auto part on eBay is badly made or a knockoff (and eBay is trying to fight that image too), but there are still dreadful products out there that can cost you power, money and sometimes even your safety. Ebay sellers know they will probably never meet you, so their motivation to simply move product overshadows *doing the right thing for the customer*. And even if the seller does care, customer feedback doesn't always make its way back to the seller.
We do the right thing for our customers. If it won't help your build, we won't sell it to you.
And we have the dyno charts (and decades of experience) to back it up!
It really is true: "When you buy cheap, you buy twice."