We recently came across an OG customer who had all three catalogs that King created in the late 80s / early 90s. Each of these hand-assembled catalogs was called a Volume and included a carefully curated collection of Mugen parts, King parts, information about Mugen, and information about King's racecars and services. Each include thoughtful introductory letters written by King's CEO Scott and are a terrific snapshot of Honda/Acura performance culture at the time.
Because we don't spend much time looking in the rear view, we actually didn't have these Volumes anymore in our own library of literature. In fact we only printed about 1000 of each Volume. So Bill Yoon generously loaned the Volumes to us (including the price list inserts) for us to scan and make available to share with our friends!
Click an item below to download the PDF scan.
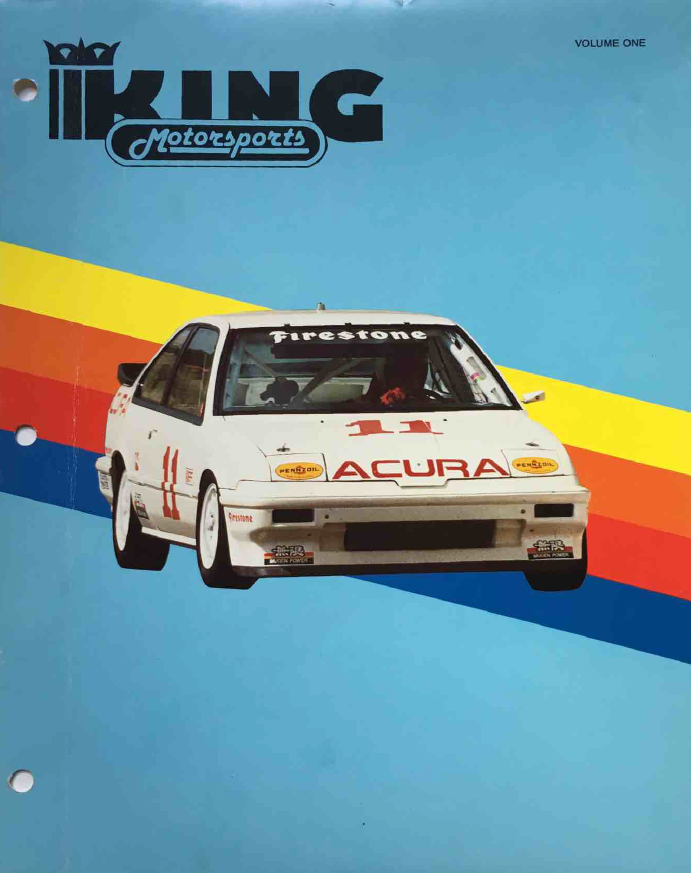
KMS Volume 1.pdf (4.43 mb), Circa 1989
KMS Volume 1 Price List.pdf (1.11 mb)
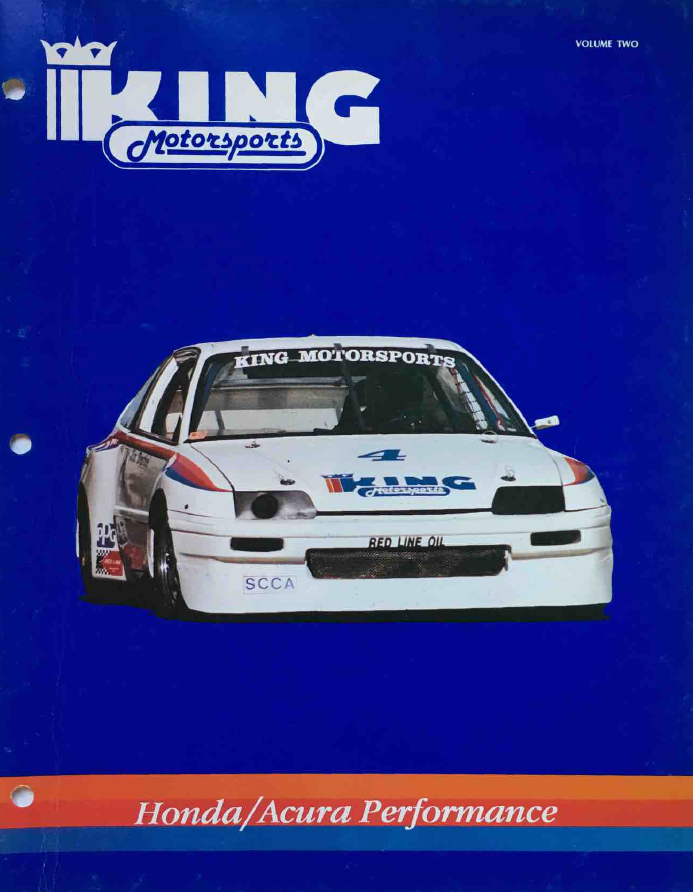
KMS Volume 2.pdf (5.24 mb), Circa 1991
KMS Volume 2 Price List.pdf (909.23 kb)
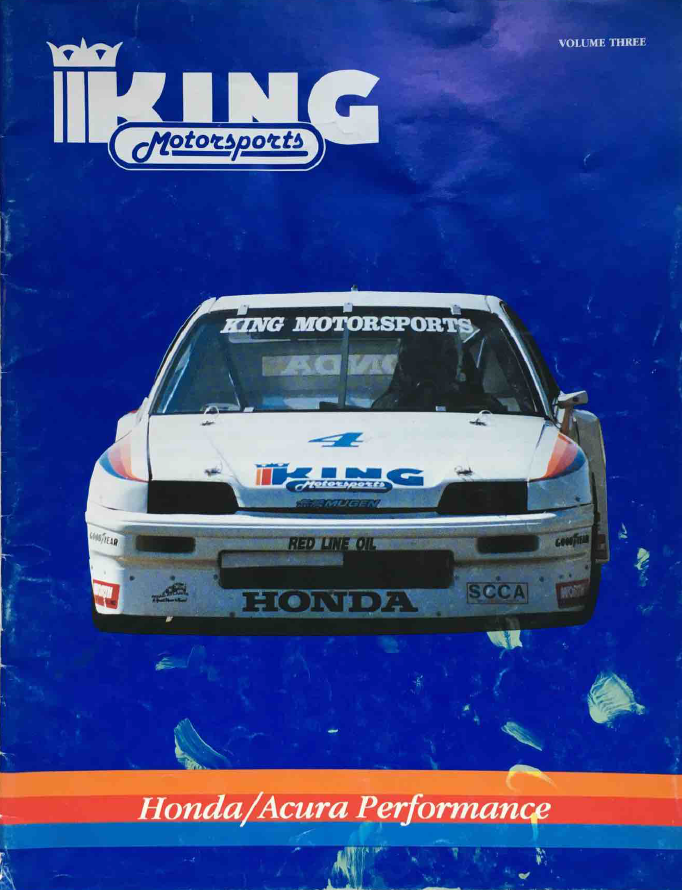
KMS Volume 3.pdf (3.79 mb), Circa 1993
KMS Volume 3 Price List.pdf (2.24 mb)
The following post comes to us courtesy of Mugen aficionado Jerimiah Styles! In this post he shares his experience cleaning up his new-to-him Mugen header. Many thanks to him for another contribution of his time and insight!
== ==
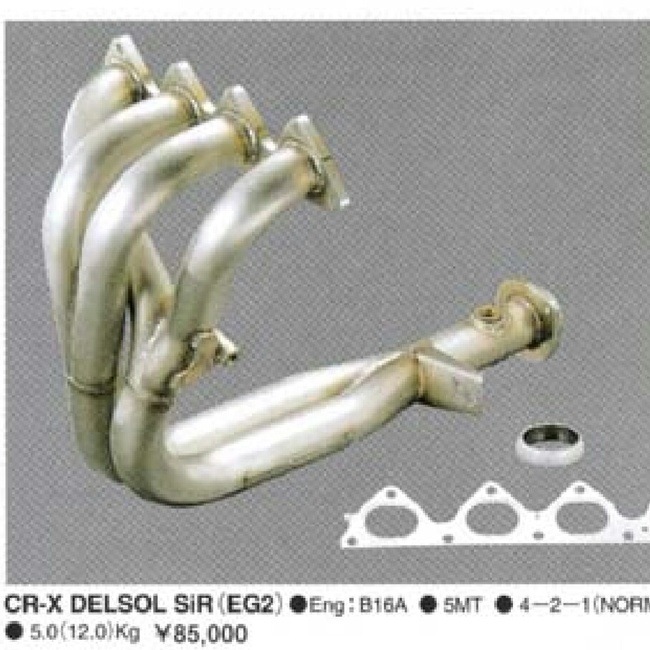
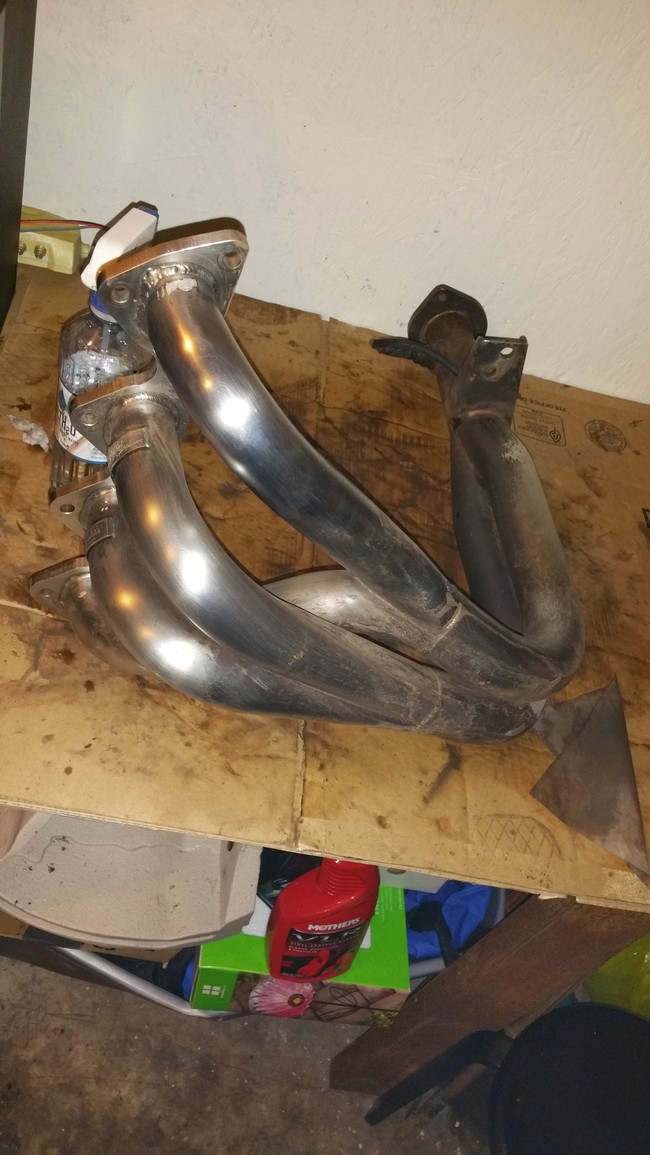
I recently picked up a pre-owned Mugen B16A 4-2-1 header from a buddy of mine. He'd offered this header to me many times, but I had until recently declined, as the header needed a little bit of work (cleaning and welding a crack on the bracket). I had always been intimidated to attempt such a project until I received this header. I did a bit of research and decided I was going to sand it up and attempt to polish it. However, I didn't want a high polished "chrome" look, I opted for the original polished raw metal route, the way this beauty came from Mugen.
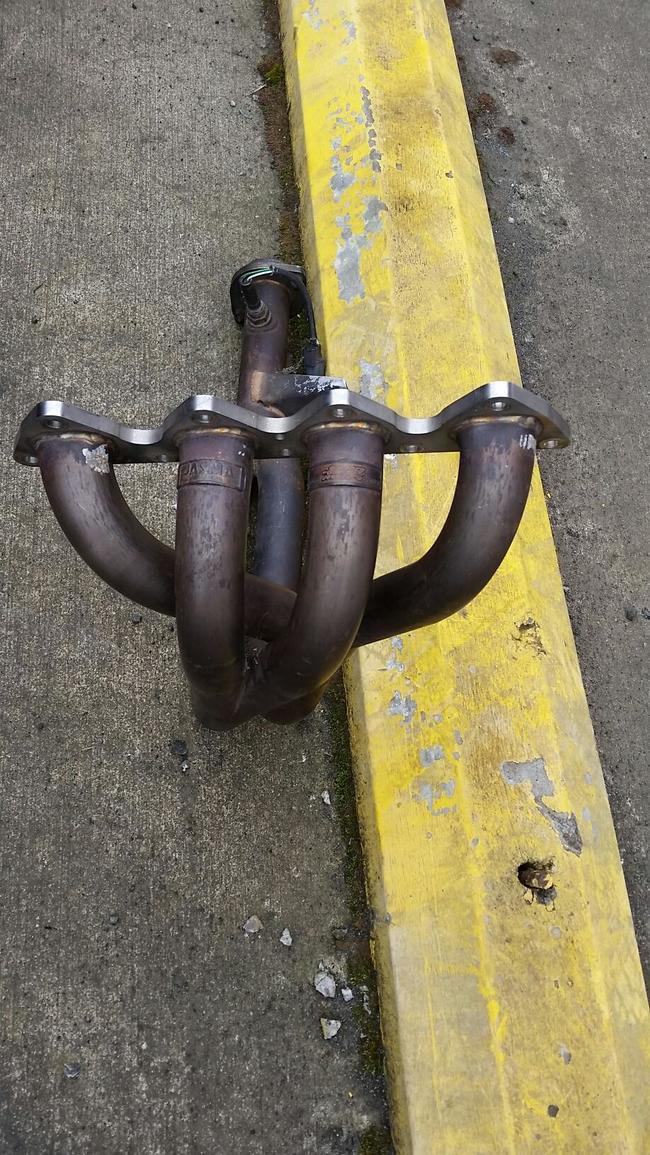
Here's how it looked when I first picked it up.
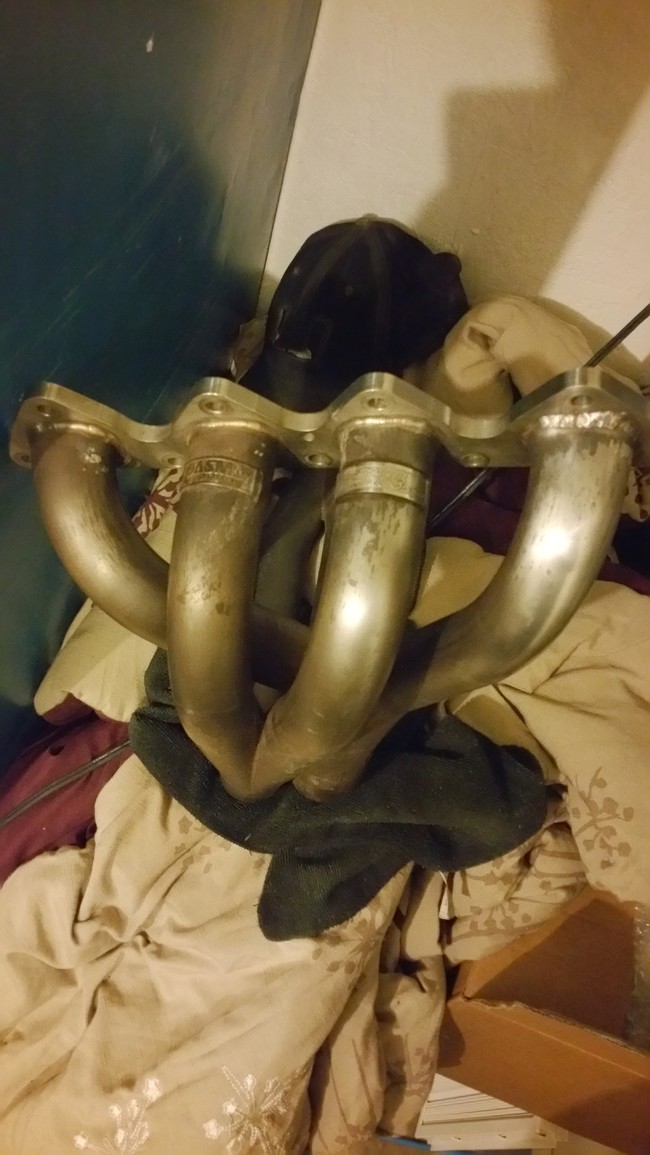
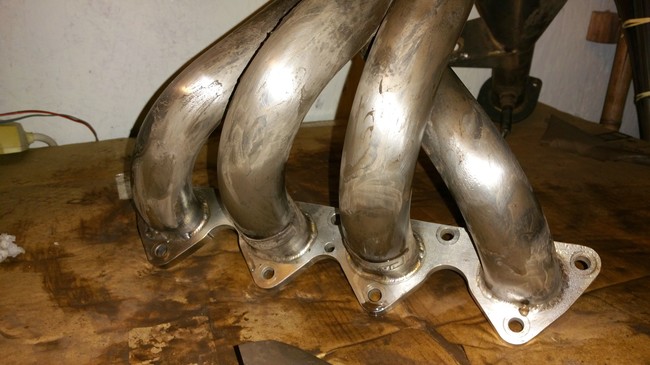
One of my good friends is a woodworker and suggested that I try synthetic sand paper. It lasts much longer than conventional sand paper and is easier to use. Unfortunately the finest grit I could find it was 350, but this is needed to really get all of the oxidization off. As you can see just seconds into wet sanding and I was already seeing results. (below)
For this project I wet sanded the entire time. Here is with the 350 grit. Make sure the residue (seen pictured) is constantly wiped down with a rag and kept clean. This not only allows you to see your results, and where you need to sand, but also assures that you aren't damaging the header by getting any pieces of dirt in there that could potentially scratch the surface of the header. (below)
I used a small spray bottle to keep the sand paper wet, and also to keep the header clean throughout the process. This is about halfway through. You can take each step as far as you would like per your own personal preference. (below)
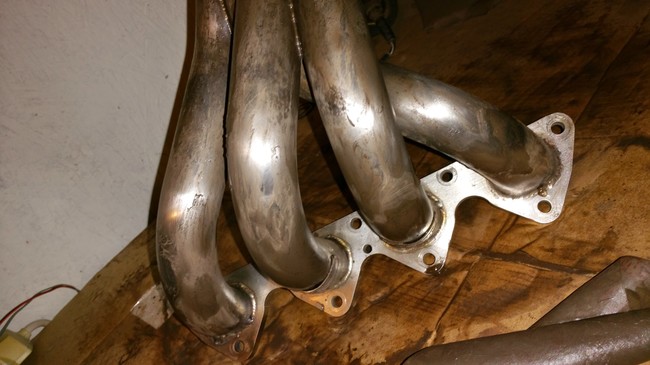
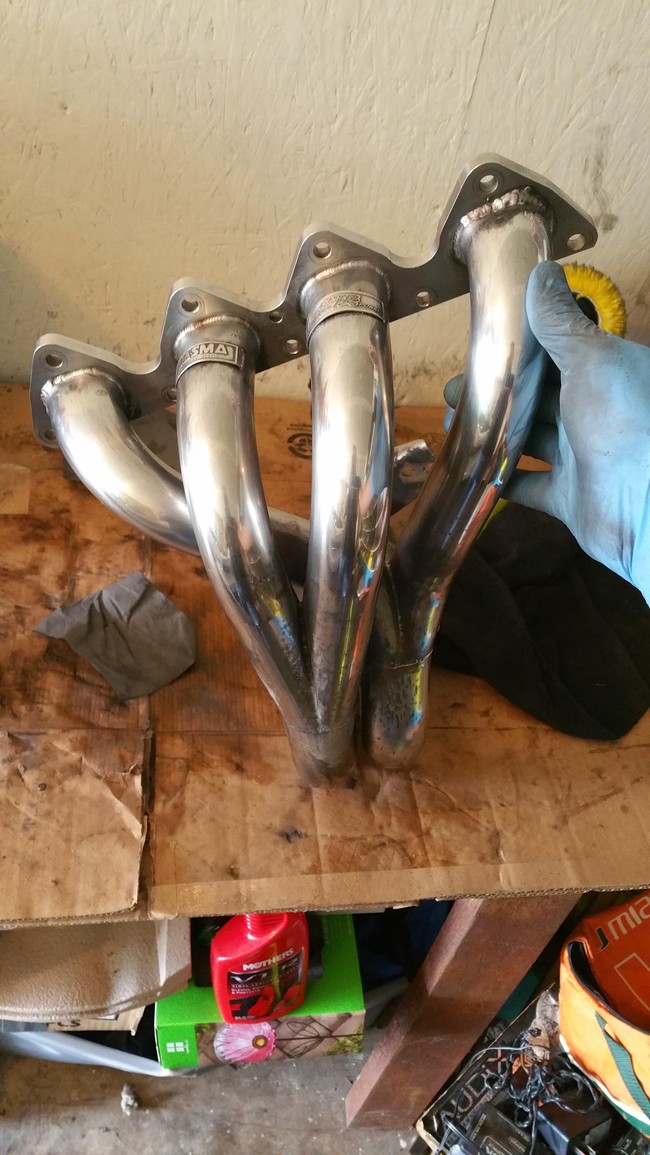
Next I switched to 1500 fine grit, again repeating the same process as above getting progressively finer with 2000, grit, and then 3000. This was as far as I wanted to take it. Again if you'd like a higher polished header go for it, and keep on sanding. After you're happy with the luster that you have achieved, you can take a metal polishing compound and add as much gleam as you'd like. (below)
Here is after sanding. Again repeating the steps and taking each as far as you'd like, 350 fine grit, 1500, 2000, 3000 Before doing any kind of polishing.(below)
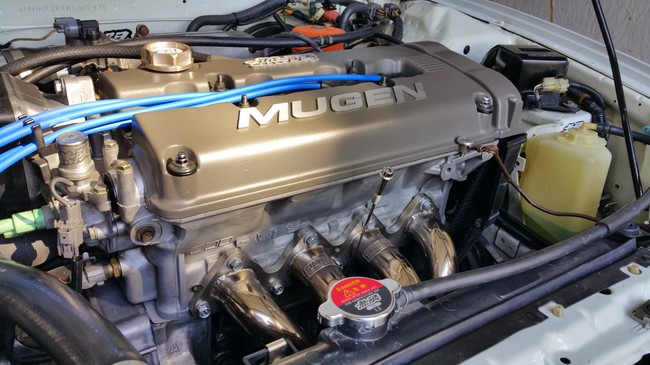
A critical step in making sure that your header turns out beautiful is to wipe it down with 99% rubbing alcohol: after polishing, after installation, and before starting your engine. This will remove any remaining polishing materials and oil from the fingers of whom ever installed it. As the header ages it takes on a gorgeous golden hue that adds a touch of Mugen class to any engine bay.
The following post comes to us courtesy of Mugen aficionado Jerimiah Styles! Many thanks to him for another contribution of his time and insight!
In this post Jerimiah covers some of the differences he's observed with the Mugen Hi-Pressure Radiator Cap. Note that there are two genuine versions of this cap:
19045-XGER-0000:
Civic (1992-1995)
Civic (1996-2000)
Civic (2001-2005)
Civic (2006-2007)
Del Sol (1993-1997)
RSX Type-S (02-04)
S2000 (2000-2003)
S2000 (2004-2008)
TSX (2004-2007)
Integra (1994-2001)
Fit (2007)
RSX Base (02-06)
RSX Type-S (05-06)
19045-XGER-0000-B2:
Civic (1988-1991)
CRX (1988-1991)
Integra (1990-1993)
Prelude (1992-1996)
Prelude (1997-2001)
(this version displays "B2" on the decal and fits Koyo radiators)
This is the way the part is described in our King Motorsports / Mugen 1999 Mugen Pricelist for Integra (19045-XGER-0000):
This radiator cap is a high-pressure type that increases the pressure inside the radiator, thus raising the coolant boiling point and increasing the cooling efficiency. The open valve pressure is 1.3 kg/cm2 compared to the normal 1.1 kg/cm2. It demonstrates its power under high-load situations such as circuit driving.
== ==
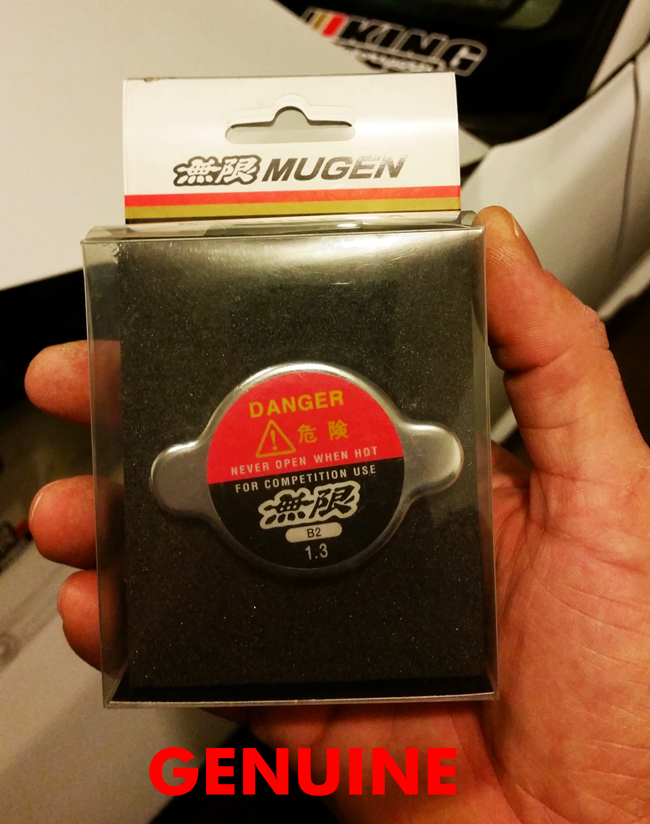
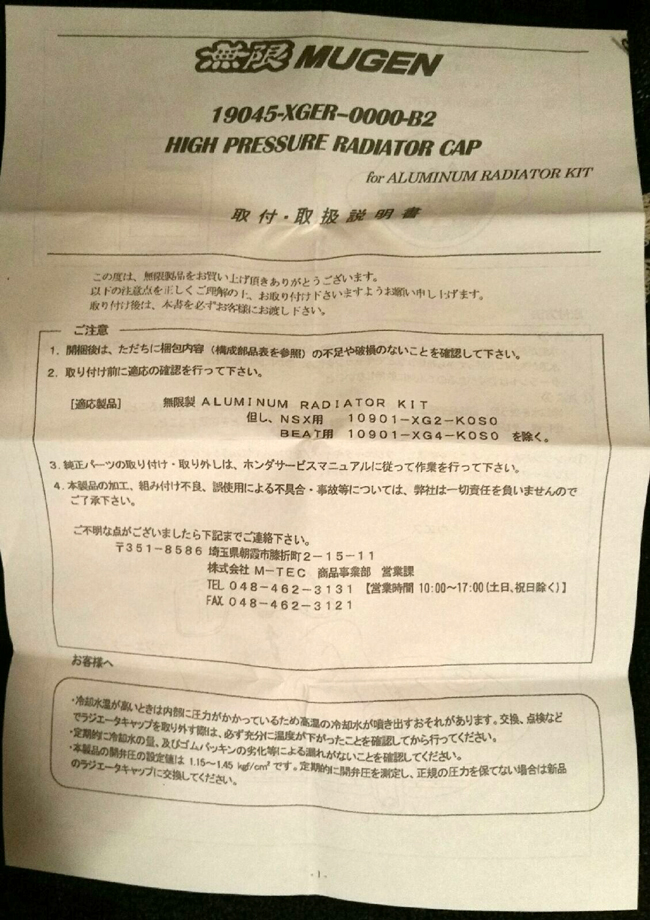
The genuine Mugen cap comes in the traditional Mugen window box with Mugen stripes across the top, and high quality foam to protect the product. Printed Japanese instructions are included.
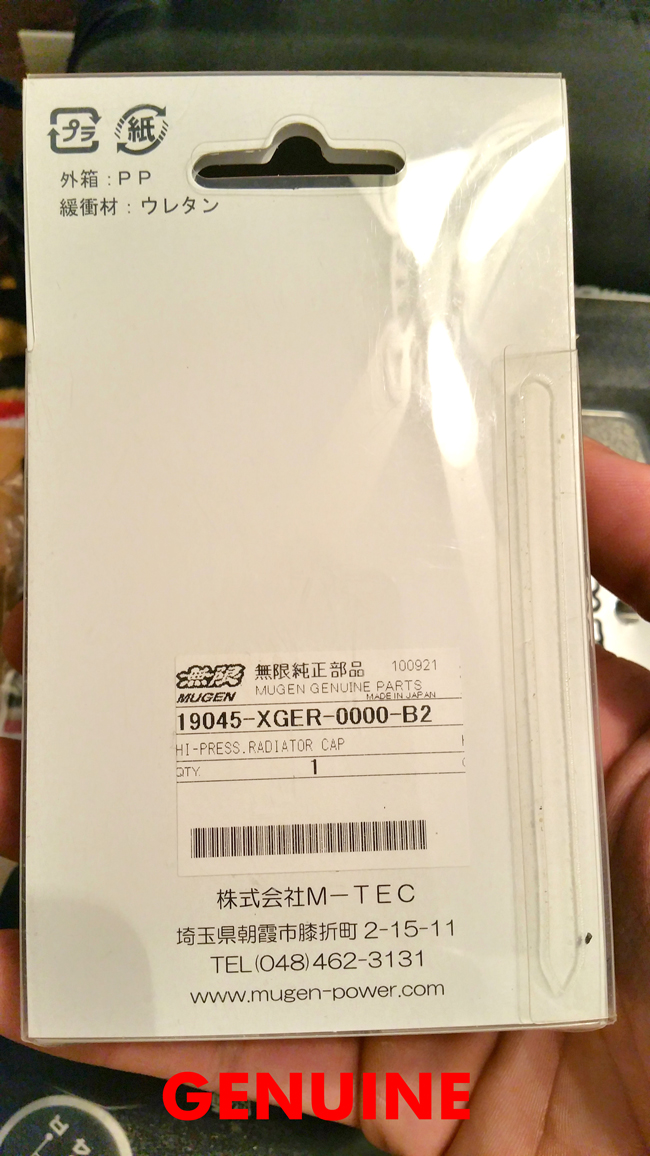
The back of the genuine part has the typical characteristics of all genuine Mugen parts, kanji in the top left corner and sticker with part number and M-Tec information.
In this below image, this fake window box is entirely different from its genuine counterpart. These knock off companies are always evolving and continually getting better at their packaging, getting closer and closer to the authentic Mugen boxes. Always look at the part itself and its distinguishing signs to discern if the part you are buying is indeed real.

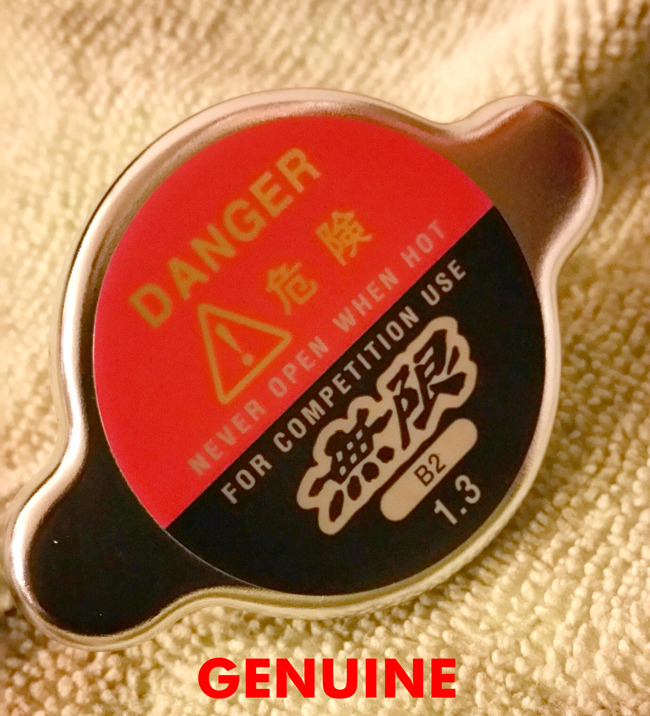
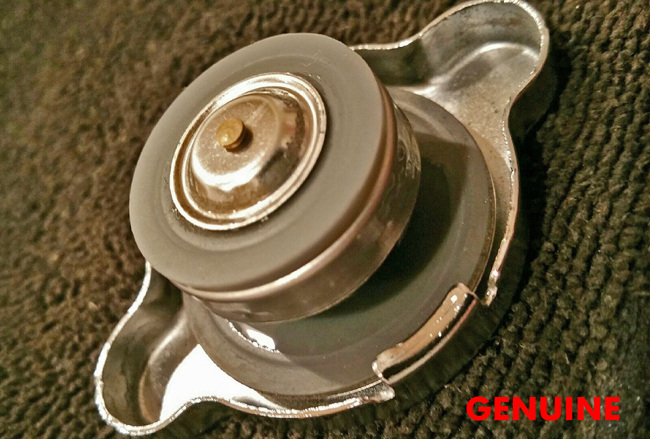
Here is a close up of the genuine cap. The authentic Mugen cap is high quality metal, nicely polished, but not a chrome finish. There are no indentations or stampings on this cap. The decal has a metallic foil quality with golden letters in the red area along with "NEVER OPEN WHEN HOT" printed in white, and a brushed metal look to the script in the black portion.
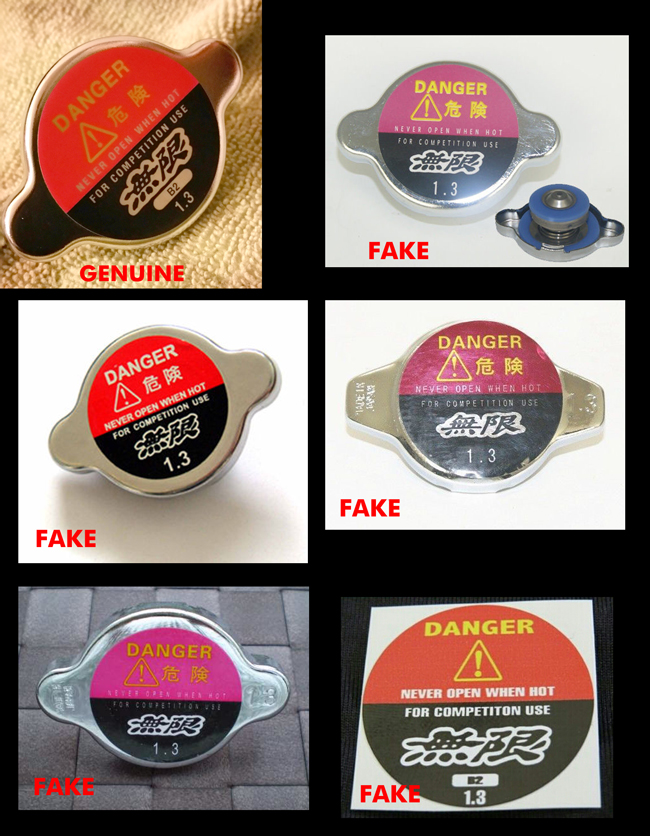
Now here are a sample of the many fakes that are out there. Fonts, font colors, printing quality, decal size, decal placement, and stamping on the metal are all indicators of a fake. We recently discovered a company on eBay selling just the decal!
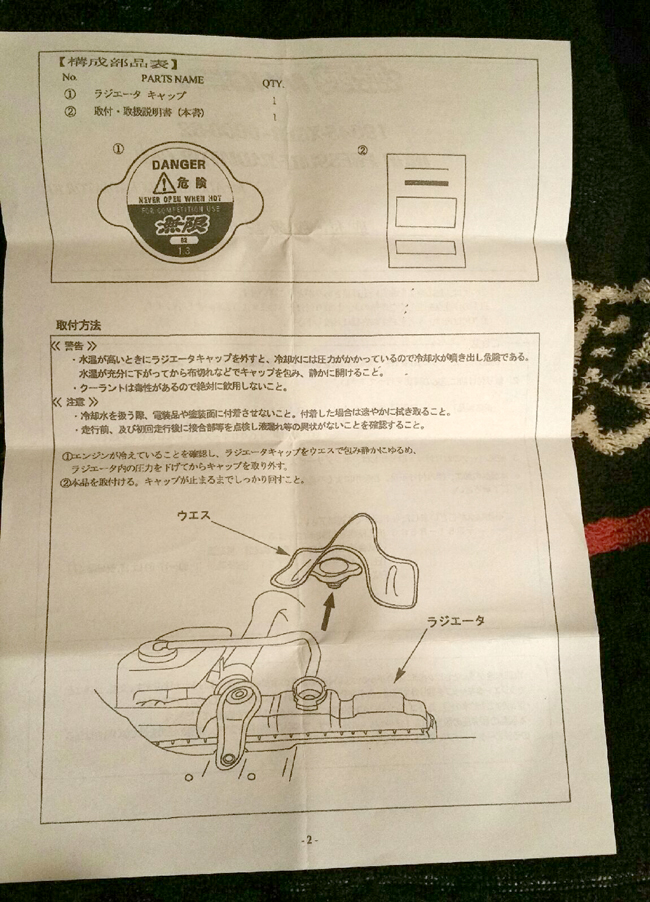
Here are a few pictures of the genuine cap's bottom and the included instruction sheet:
Why does it matter?
The Mugen Hi-Pressure Radiator Cap is more than just engine dress-up. It's a functioning part that increases your open valve pressure to a specific 1.3 kg/cm2 for performance reasons. Those that use fakes are not only missing out on performance benefits, but have no idea if the cap has even been manufactured to meet OEM standards. The open valve pressure can be too high, too low, or inconsistent. Fakes can come apart due to bad seals and assembly, causing nasty spills and other headaches.
== ==
Visit the King Motorsports store for genuine Mugen hi-pressure radiator caps!
http://www.kingmotorsports.com/p-38-mugen-radiator-cap.aspx
The following post comes to us courtesy of Mugen aficionado Jerimiah Styles! Many thanks to him for another contribution of his time and insight!
In this post Jerimiah covers some of the differences he's observed with the Mugen "Formula" Shift Knob:
54102-XG4-K0S0-BU/BL/G/S/R
This is the way the shift knob is described in our King Motorsports / Mugen 1999 Mugen Pricelist for Integra:
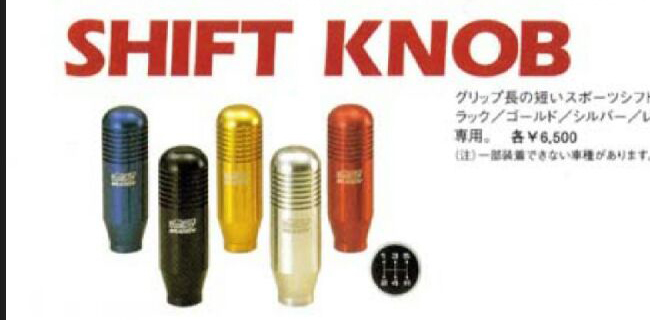
"Formula Quality" is the essence of Mugen's approach to production, since we also manufacture components for formula engines. This machined shift knob exemplifies our high manufacturing precision. Each product is machined individually from aluminum, and then given an alumite hard-coat finish before the Mugen logo is imprinted by laser. This is a sports-type shift knob for the discerning eye. Available in five colors: blue, black, gold, silver, and red. Supplied with a shift pattern plate. For five-speed manual transmission only.
== ==
The Mugen formula shift knob (discontinued) is a commonly replicated item that comes up often on Mugen part searches. While this knob was made in five colors by Mugen, I am going to stick to the black knob for this blog.
Comparing the window box package, they are basically identical from the front. One important thing to look for is the inclusion of the round shift guide badge. Fakes will not include this badge.

The back of the packaging shows more tell tale signs. While the top left corners appear identical, the bottoms are different. The Mugen package has a sticker with printed description and the fake does not. The fake is also missing the Mugen part number.

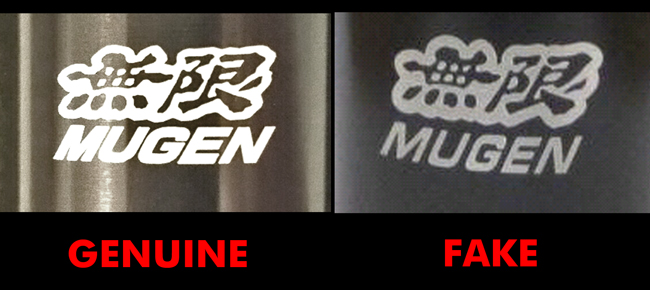
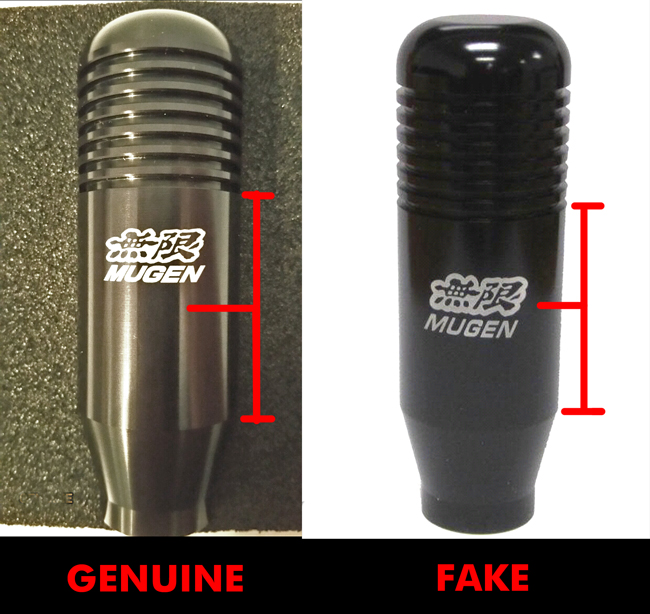
Comparing the knobs themselves, the first thing to look for is the shape at the top. The Mugen is smooth and rounded. The fake is usually flat and often shows rings from poor machine work. The hard-anodizing of the genuine Mugen part is stunning and shows a depth that the painted surface on the fake can not compare to. A closer look at the Mugen logo/kanji shows that the fake uses a thinner font for the MUGEN logotype.
The genuine shift knob's logo/kanji come in both a raw-metal engraved version ("gen 1") and in white ("gen 2"). Below is an image of two genuine shift knobs. You can see the silver knob has a raw-metal logo/kanji.

In the image below you can see how the genuine knob is domed/rounded on top, while the fake has a flat spot. Flat spot = fake.
One more thing to look for is the vertical placement of the Mugen logo/kanji. On the genuine knob, it sits higher than half way on that section of the knob. On the fake, the logo/kanji is vertically centered within that section.
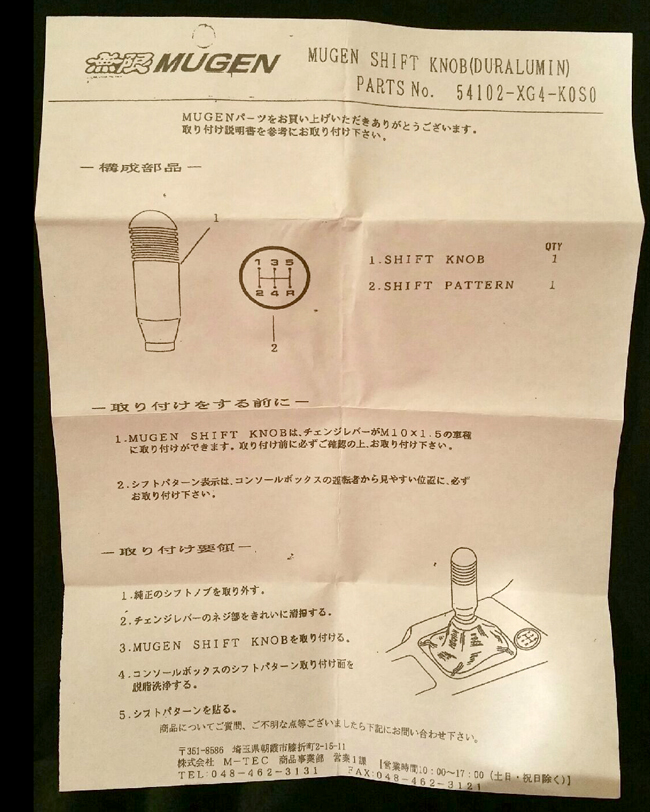
Here are instructions that are included with the genuine shift knob. Fakes do not include instructions:
Why does it matter?
Because of the slipshod manufacturing on the fakes, they are known to actually cut driver's fingers. Needless to say that's a nasty surprise. The authentic knob is far better quality that will pass the test of time and add a touch of class to any enthusiast's build. While the hard-anodized finish on the genuine knobs can unfortunately fade over time, it is another way to determine authenticity when buying a used part. The painted finish on the fake knob very easily scars, resulting in an unsightly eyesore in your interior.
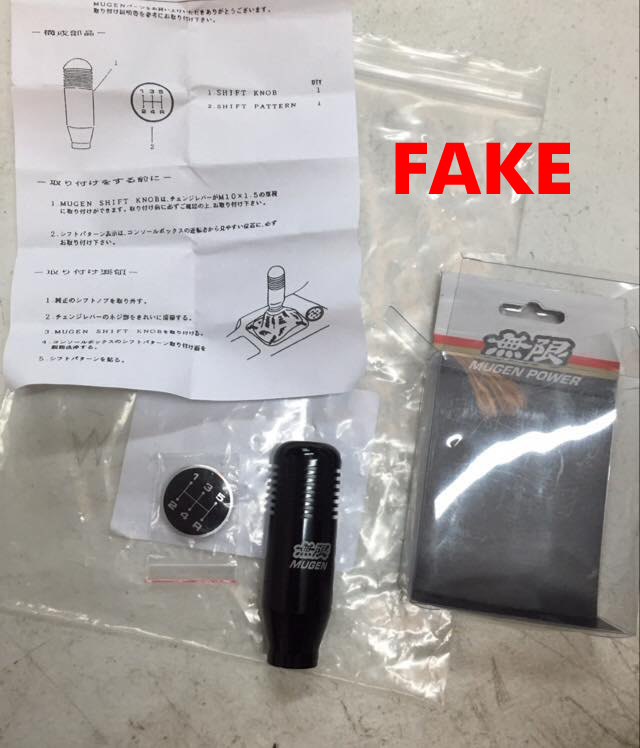
Minor update: As you might expect, even fakes have their exceptions. Vivian R. shared this fake knob and package that even includes knock off shift badge and instructions!
== ==
Visit the King Motorsports store for genuine Mugen shift knobs!
http://www.kingmotorsports.com/advsearch.aspx?ctl00%24HeaderControl%24SearchBox%24searchterm=&IsSubmit=true&SearchTerm=mugen+shift+knob&SubmitSearch=Search
The following post comes to us courtesy of Mugen aficionado Jerimiah Styles! Many thanks to him for another contribution of his time and insight!
== ==
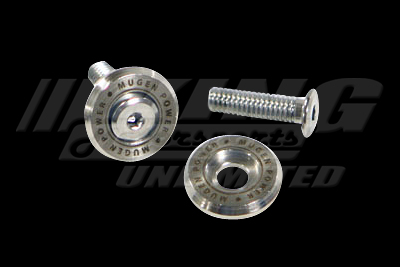
A beautiful touch to any Mugen equipped vehicle, Mugen Number Plate Bolts (75700-XG8-K0S0) combine high-quality stainless steel construction with decorative Mugen Power engraved washers. The bolts are 3mm hex head, 20mm long, and are designed to be used as a garnish for the license plate frames of your car. However, clever tuners have discovered that they can be used for enigine bay aesthetics and also fit perfectly with the Mugen K-Series Carbon Fiber Ignition Cover (12500-XK2B-K0S0). Anywhere a 3mm bolt can fit, you can decorate it with a Mugen number plate bolt.
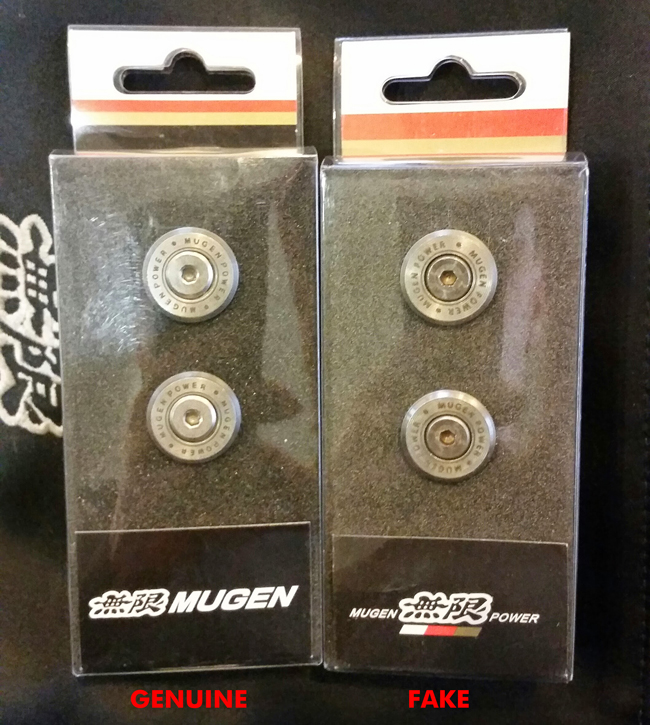
A look at the window boxes shows the extremes that these companies are going to replicate these items. The front of the boxes appear to be the same, but are they? The colored flag at the top of the box is mis-proportioned on the fake, with fatter color bands, and the Mugen logo at the bottom of the box is noticeably altered.
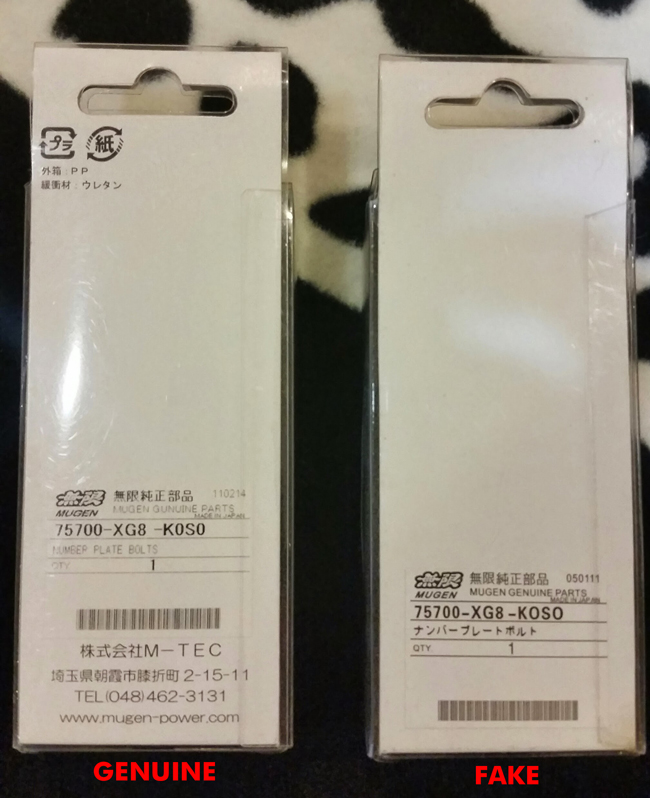
A look at the back of the boxes shows that the two products are labeled entirely different. Kanji appear at the top the genuine product and the bottom lists M-TEC contact information. The fake window box shows just a portion of the original, and the description is in Japanese (instead of English).
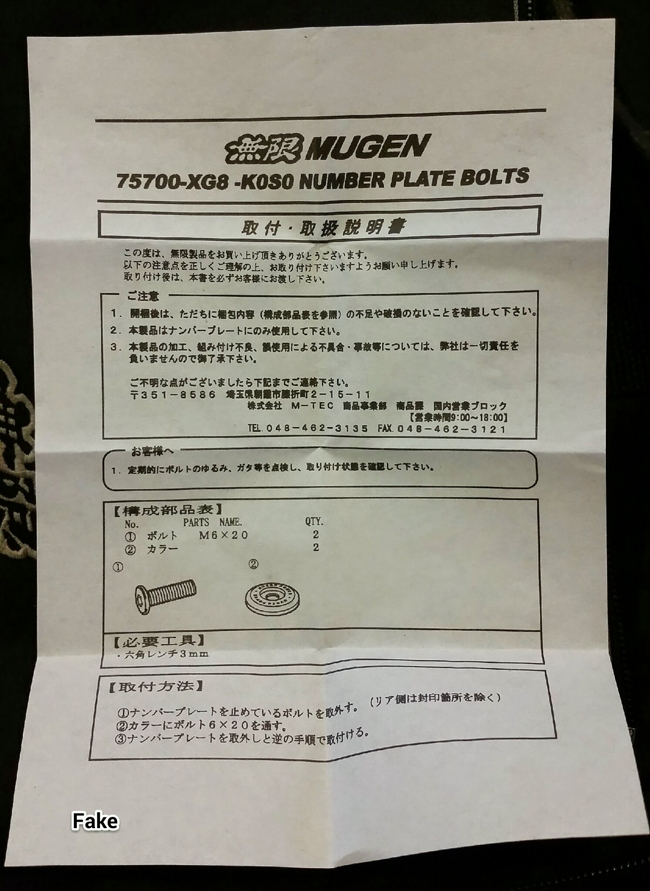
The Japanese printed instructions inside of the original Mugen number plate bolts is a gray print. The product illustrations are placed on the right of the page.
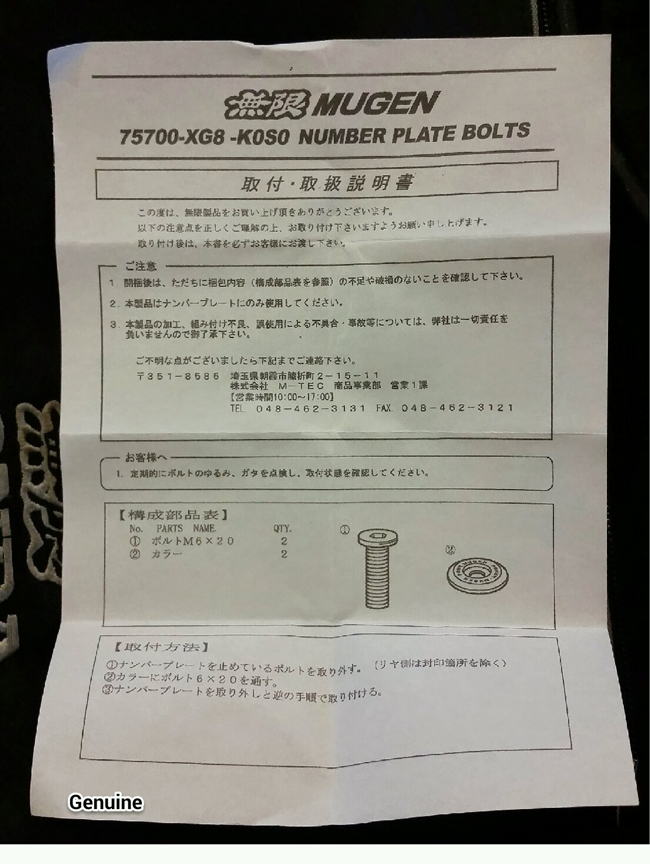
The instructions inside of the fake box are a much darker, bolder, black print and the product illustrations are placed on the left side of the page. The printed area also takes up less of the page.
A close look at the washer shows the high quality stainless steel and engraved Mugen Power logo. The hex bolt has a slight bezel around it, allowing you to tighten them down without scarring or stripping the finely detailed surface. The bolt itself sits slightly elevated from the washer with clear cut jewelery-like edges.
The fake bolt is much less refined. The logo appears to be printed or painted (not etched) and the bolt sits flush with the washer, unlike the genuine part.
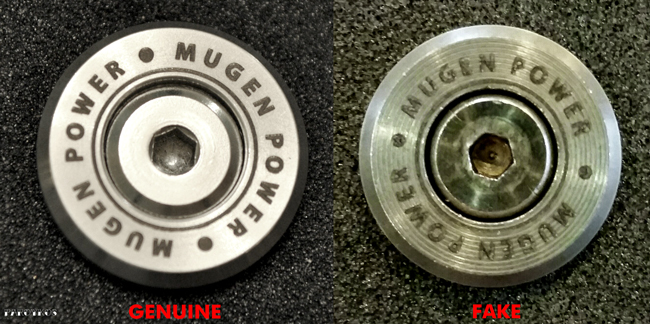
Photo courtesy of Paroykos
Why does it matter?
Replica Mugen parts built with subpar methods result in a far inferior product. In the case of the Mugen number plate bolts, an allen wrench does not fit properly into the bolt. The bolts become damaged and stripped over time, potentially seizing to wherever they have been placed.
The following post comes to us courtesy of Mugen aficionado Jerimiah Styles! Many thanks to him for another contribution of his time and insight!
== ==
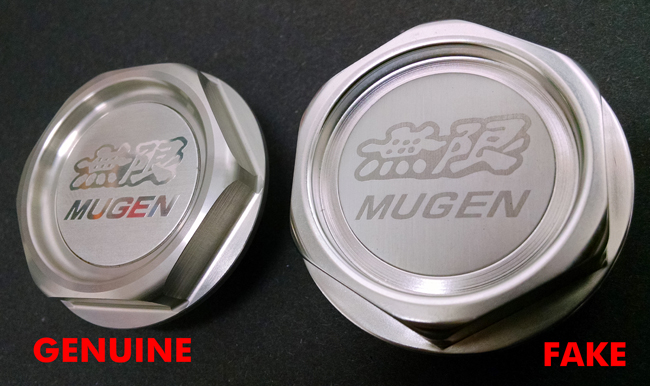
Back again for some more Fakespotting. This time we will discuss the first generation Mugen oil filler cap.
Mugen Formula engines, including those for Formula 1, naturally require components manufactured with high precision. Mugen meets such requirements by machining to exacting specifications at its factories. These oil filler caps are manufactured individually from aluminum at the same factories in the same way. "Formula Quality" is a result of the attention to detail that Mugen pays to its vehicles and products.
Upon first inspection of these caps they appear to be very similar, but a closer look tells a different story. The first thing you'll notice is the quality craftsmanship of the genuine piece. The replica is oddly shiny and lacks the brushed aluminum finish of the original.
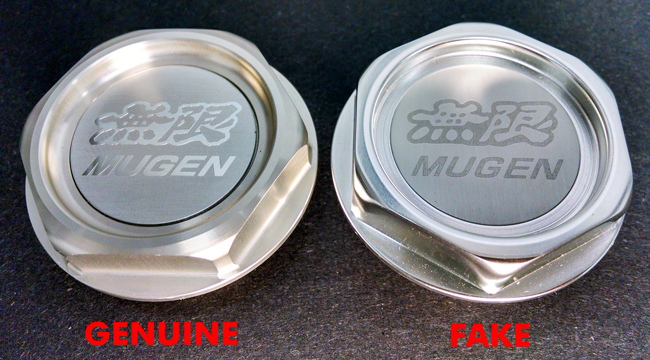
The center medallion of the genuine Mugen piece is etched aluminum. The medallion comes from Mugen Scotch-taped (not yet attached) to the oil cap. The medallion has an adhesive on the back and is to be applied by the user after the cap has been screwed into place so the Mugen logo appears straight in your engine bay.
The "medallion" of the fake cap is more of a print, and comes pre-installed from the manufacturer. So fake caps may end with crooked Mugen logos once screwed into the head cover.
The underside of the cap reveals some more secrets. The genuine cap again shows top notch machine work seen in genuine Mugen craftsmanship. The fake cap has noticeable ring marks where the inside of the cap appears to have been shaved away, far from the quality of the genuine Mugen part.
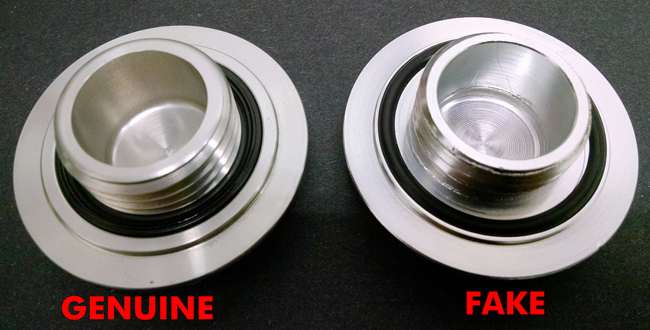
The black sealing rings around the base of the two are also noticeably different. The grooved, flat seal of the genuine cap has more surface area, creating a better seal than just the o-ring of the fake part. Also the material and heat-resistant properties of the fake o-ring are unknown. Also notice the rough edges around the threading of the fake cap as opposed to the smooth precise edges of the Mugen oil filler cap.

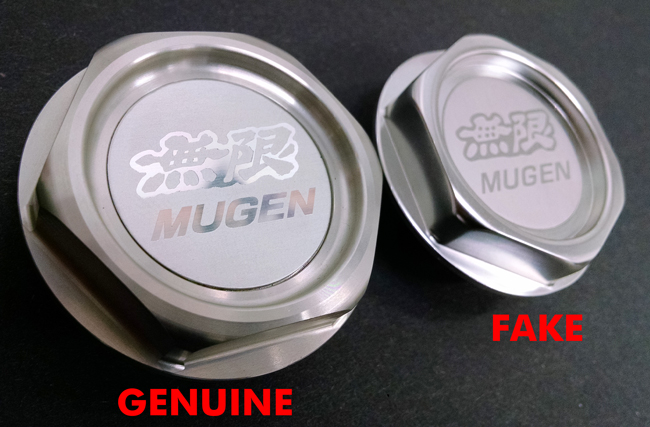
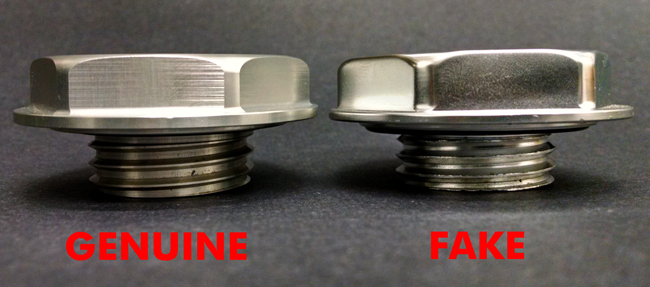
The side profiles of the two oil caps shows more of the differences in quality. The edges of the real Mugen are much more defined. The brushed look of the genuine cap is very evident in this photo as opposed to the cast look of the replica.
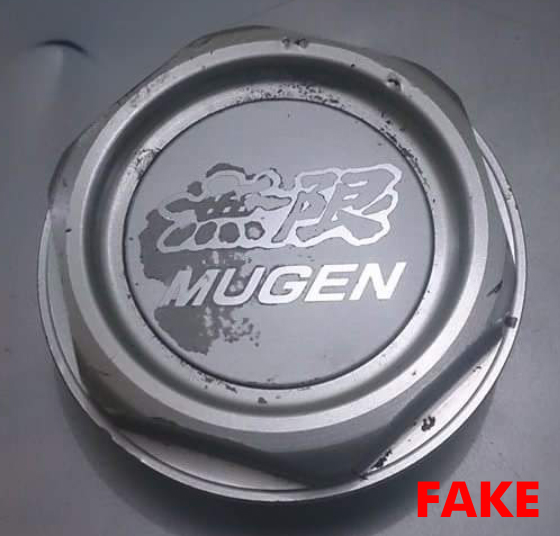
Below is another version of a replica Mugen oil filler cap that I recently saw. This one has an obvious ring around the base, suggesting that it is more than one piece. This as well as the inferior finish should be obvious signs of a fake. The high quality of the Mugen cap will not oxidize over time -- it should retain its original luster if kept after properly.
Why does it matter?
Fake parts are passed off as genuine every day, knowing how to identify real from fake could mean saving you potential headache down the road. In the case of an oil cap, an improper or inferior seal could cause oil to leak from the top of your head cover, potentially causing harm to your engine. Always buy genuine Mugen products from an authorized dealer such as King Motorsports Unlimited.
I would like to thank Roy Brantley for providing photos.
****
Visit the King Motorsports store to get your genuine Mugen oil filler cap!
http://www.kingmotorsports.com/advsearch.aspx?ctl00%24HeaderControl%24SearchBox%24searchterm=&IsSubmit=true&SearchTerm=mugen+oil+filler+cap&SubmitSearch=Search
Right-click to see this sheet at full size!
The text:
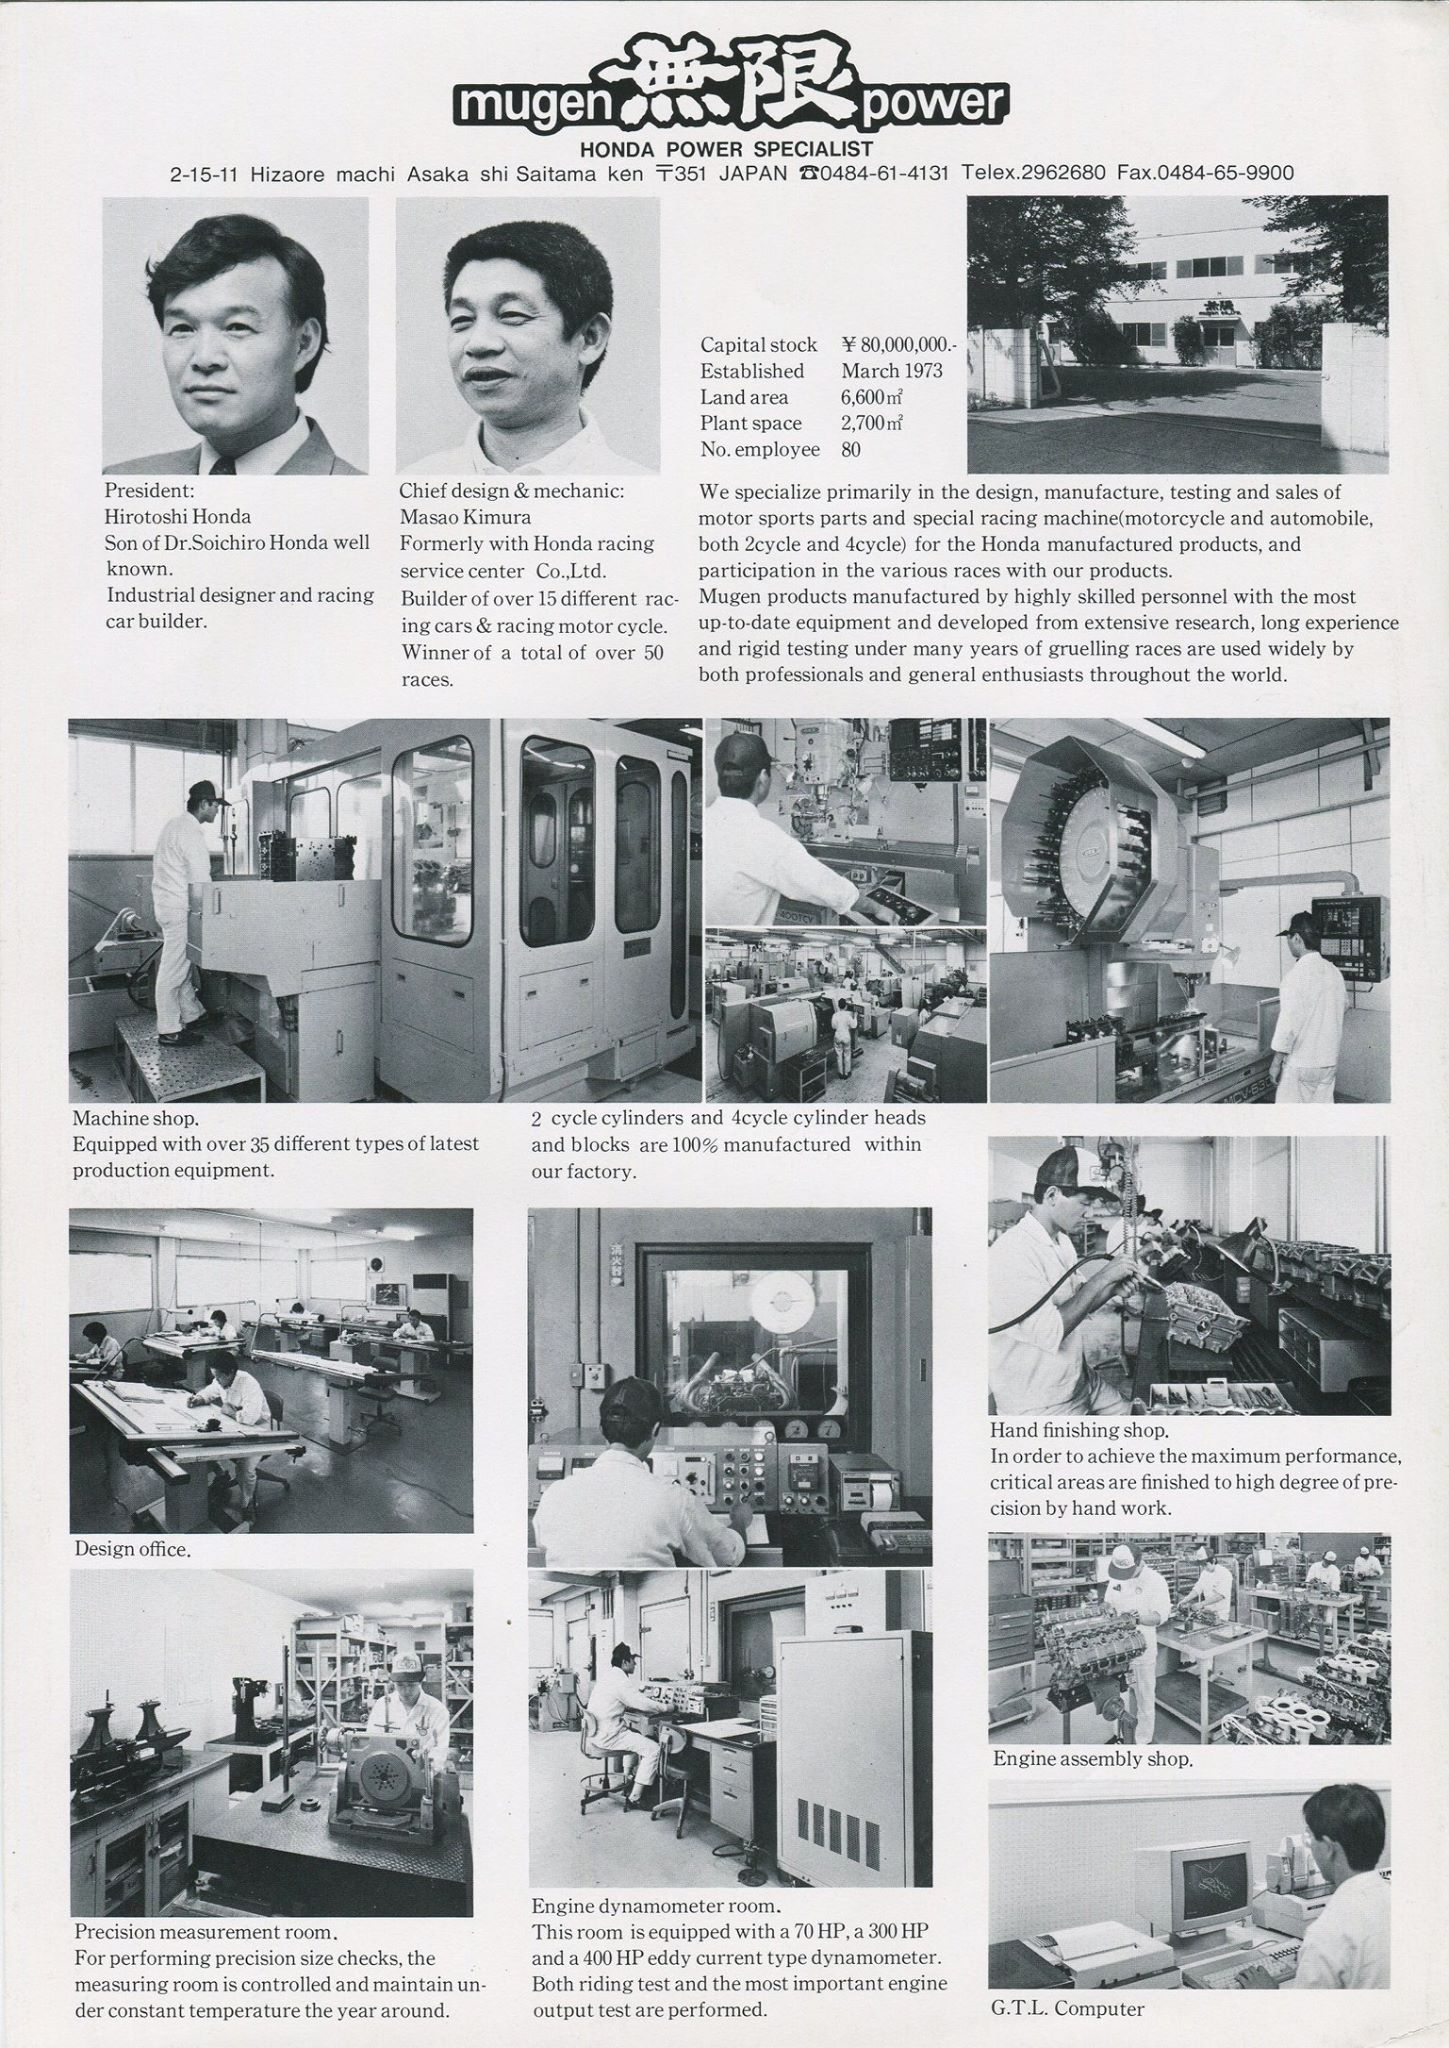
MUGEN POWER
HONDA POWER SPECIALIST
President:
Hirotoshi Honda
Son of Dr. Soichiro Honda well known. Industrial designer and racing car builder.
Chief design & mechanic:
Masao Kimura
Formerly with Honda racing service center Co., Ltd. Builder of over 15 different racing cars & racing motorcycles. Winner of a total of over 50 races.
Capital stock ¥ 80,000,000
Established March 1973
Land area 6,600m²
Plant space 2,700m²
No. employee 80
We specialize primarily in the design, manufacture, testing and sales of motor sports parts and special racing machine (motorcycle and automobile, both 2cycle and 4cycle) for the Honda manufactured products, and participation in the various races with our products.
Mugen products manufactured by highly skilled personnel with the most up-to-date equipment and developed from extensive research, long experience and rigid testing under many years of gruelling races are used widely by both professionals and general enthusiasts throughout the world.
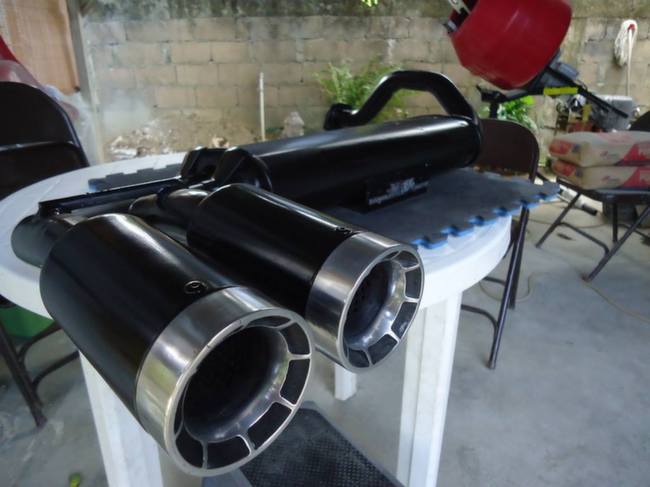
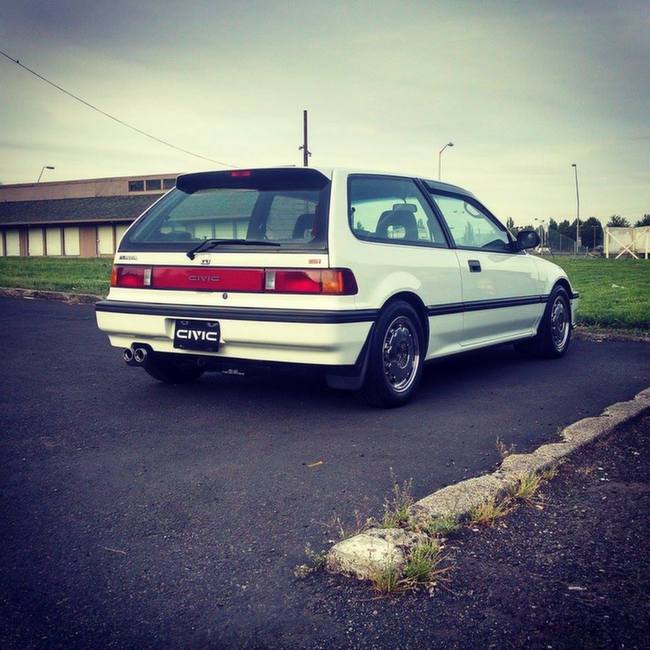
We always enjoy sharing the passion that goes into our customer builds. A typical product of that passion? Countless hours of wrenching. But the lesser-celebrated outpouring of skill, perserverance and resourcefulness? That comes in the form of the hunt for parts. In the case of Travis Weaver of the Pacific Northwest, a hunt for 20-year-old OEM and Mugen parts took him around the USA, then internationally. He became so good at it, he even made a living at it for a time.
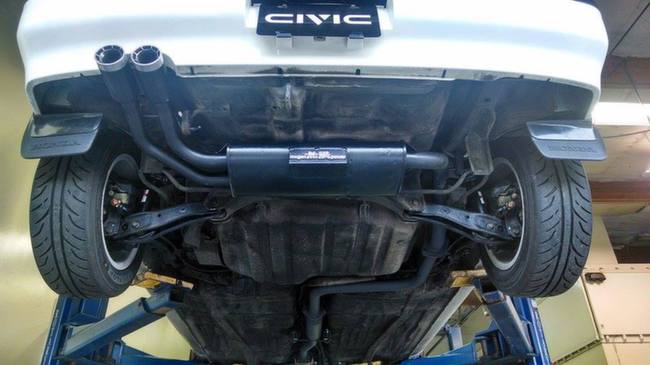
Travis recently shared a pic of his Mugen EF exhaust - which he said took him nine years to find. Nine years! That got our attention, and we contacted him for his story.
***
My older brother first got me into Honda's back in the late 1990's when he purchased a teal colored 1992 Civic VX. He ended up swapping in a JDM B16A engine with a GSR tranny back around late ‘98. We had a lot of fun at the local street races in our early teenage years. I eventually bought my first Civic as well in 1999. It was a 1990 Civic STD 4 speed. Back in the earlier days they were largely frowned upon due to their square, boxy look.
I eventually sold my first car and purchased a 1990 Civic Si in 2002. I fell in love with that car. From when I first purchased the car, I wanted to do a complete JDM EF9 conversion on it after seeing pictures of one in California. In the earlier days if you wanted to find parts you were limited to your local importer (which typically only sold engines), eBay, or do what I did and contact a wrecker overseas and import parts yourself. I found a company in Malaysia back in 2003 with a complete EF9 front clip. With a very risky bet, I sealed the deal and five long months later had my first JDM clip complete with B16A and EF9 conversion. I ended up painting the entire car Milano Red and was the first local person to do a JDM EF back in 2003.
I eventually landed a job working for the largest indoor Honda/Acura Auto wrecker/JDM engine importer in 2005. Soon after I became their Inventory Manager and JDM parts specialist -- which was a great experience but after a few years I got tired of killing Hondas and became more focused on preserving and restoring them.
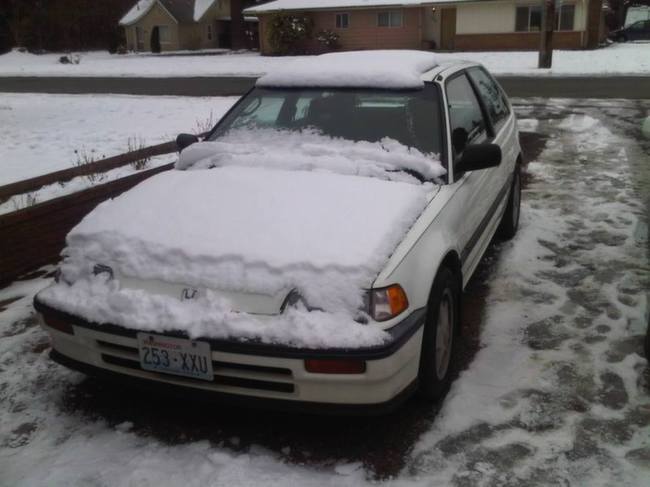
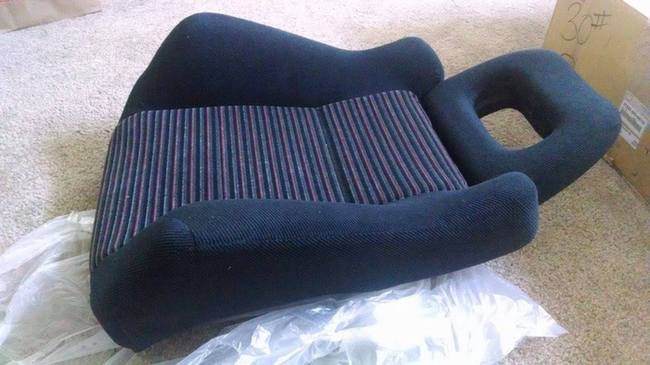
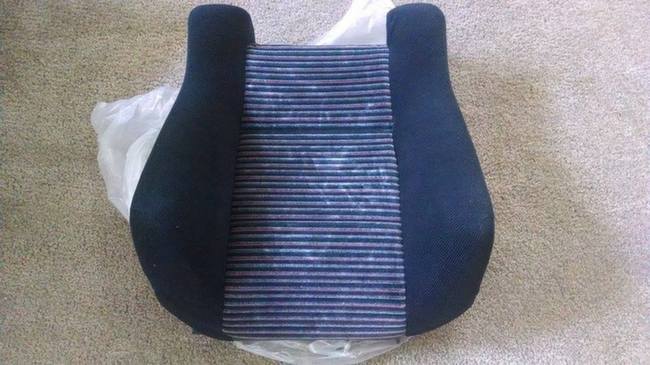
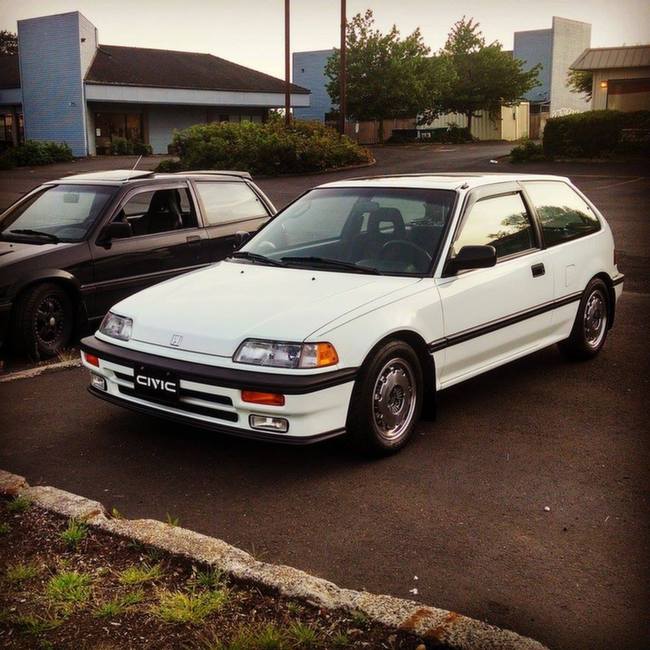
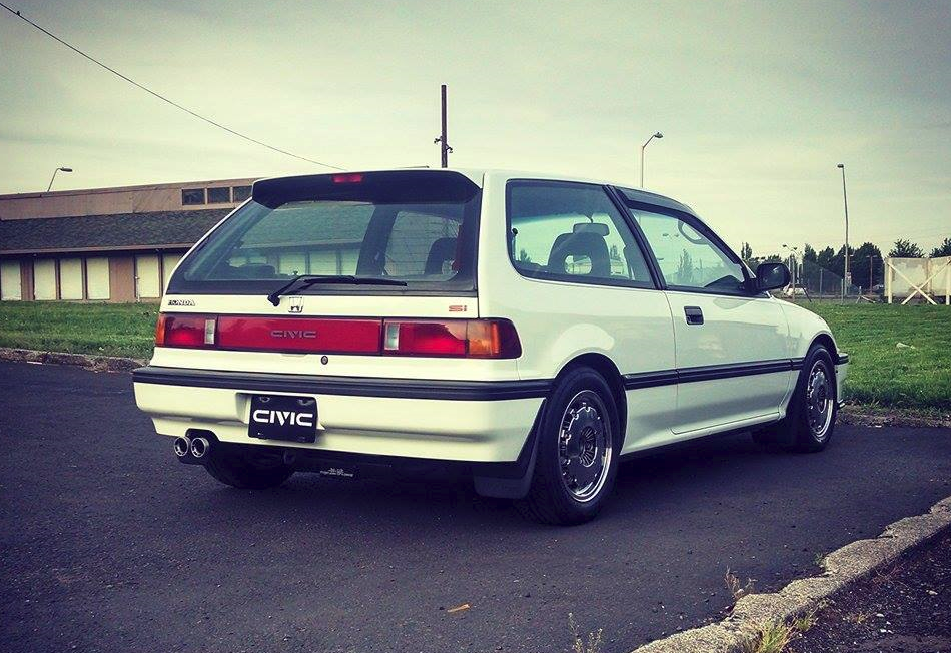
A few years later -- feeling the pressure of the economy and the unsure feeling of my own personal future -- I decided to sell my 1990 Si. It ended up going to a good home to a guy in East Coast Canada. I must say it was the biggest mistake that I made. I ended up driving a Mitsubishi 3000GT for a few months to focus on school but I got the itch again. I had so many regrets and so many things that I dreamed about doing to my old Si that I decided to start from scratch and do a full 1989 Civic Si USDM restoration. That way I can do things right the first time and go in a slightly different direction so it would not be like history repeating itself. Now I specifically chose the 1989 Civic Si because in the USA it was a one-year-only car, much like the 1997 Integra Type-R. I began to put out ads looking specifically for an ‘89 only.
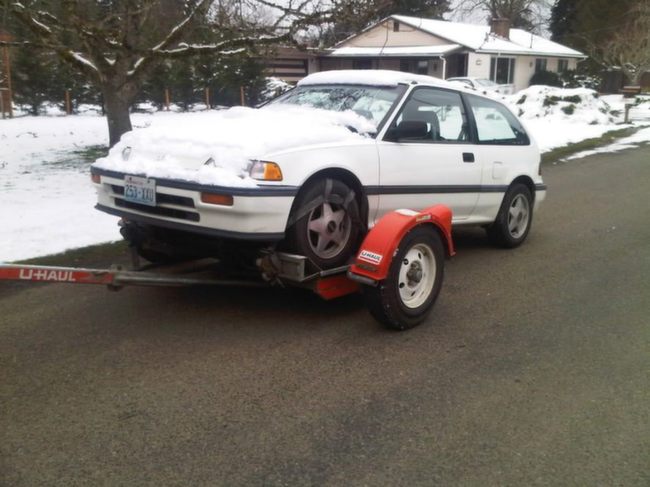
Eventually I found a good clean shell with perfect seats, straight body and in overall great shape. The only problem is the engine was bad. I rented a trailer and made the three hour drive in the snow to buy the car. Upon arriving the owner informed me it still ran but made a horrible noise from the timing belt area. I towed it back and had my mechanic Thomas Strom diagnose the problem. Turned out to be a bad water pump. With a new factory pump and timing belt, mixed with a valve adjustment, I gave this 1989 Civic Si a new chance at life with 187k miles on her. I sold my 3000GT and with further inspiration from Thomas I decided to make a goal, take my time and stick to it.
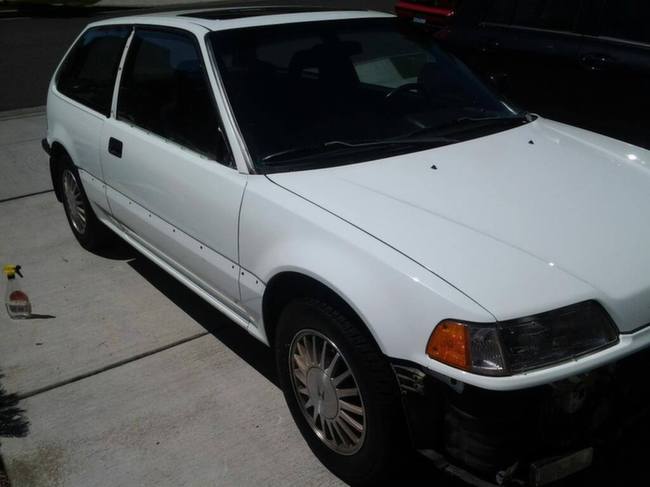
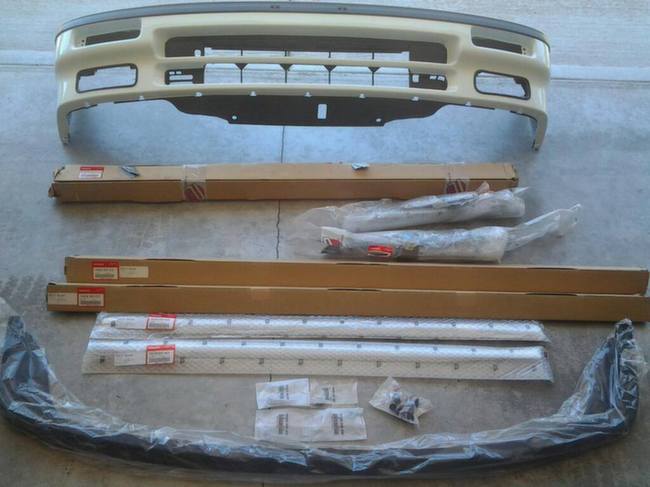
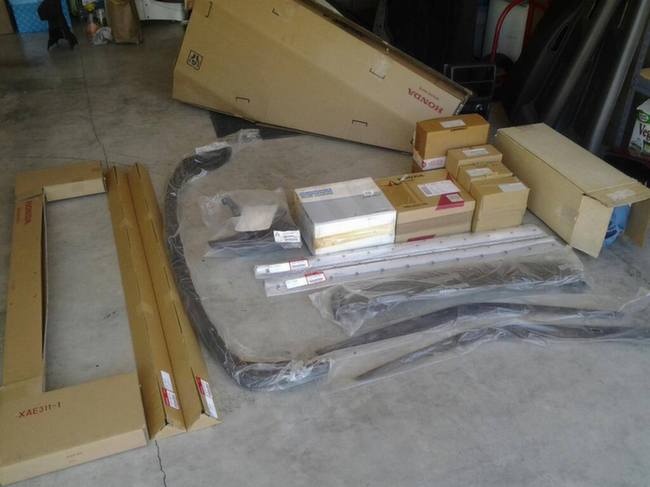
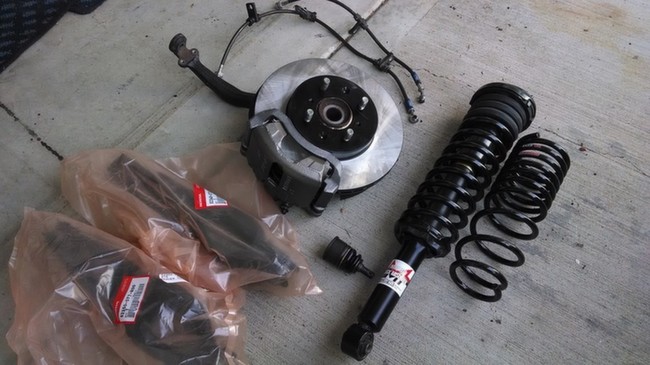
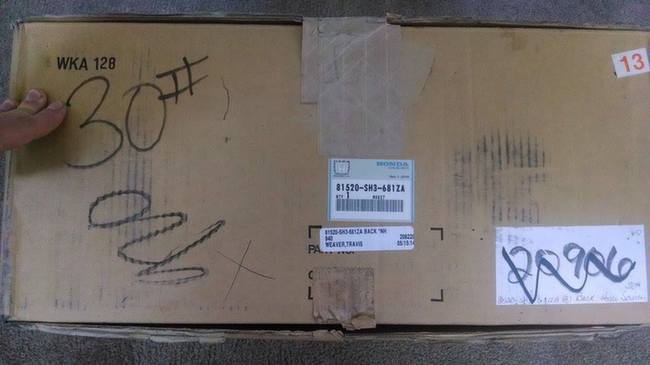
My goal was to do a complete factory restoration on the car. We began tracking down rare USA accessories along with new old stock (NOS) parts from Honda. Almost all of the parts were either discontinued or no longer available. I then started contacting specific dealers to see if they had old inventory that was never reentered into the system when Honda changed its part numbers from HondaCode to what we have today. After I exhausted all of my resources here in the States, I then turned to Google Translators. I began contacting dealers all over the world. I managed to source new rare parts from Malaysia, Germany, UK, New Zealand, Spain, Japan, and even Canada – despite the challenge of different part numbers and inventory systems with many of them.
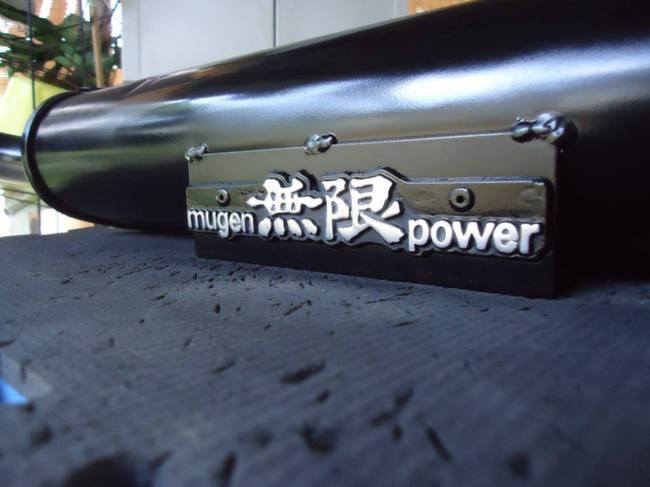
I used to have a Mugen addiction with my original 1990 Civic Si but finding parts for an EF were very hard and very expensive. I was able to source a real EF9 Mugen header along with some Mugen RNR's and a set of MR5 Final Versions. The one item I could not find was a Mugen EF exhaust. I managed to find two different ones that popped up for sale between 2006-2008 but was outbid both times on Yahoo Auctions. With my current restoration I told myself that I have to be true to both the year and the USDM theme that I am going for. It becomes a slippery slope once you diverge from your intended goal. All was fine until my good friend Moe from EFparts presented me with a USDM brochure from 1988 which showed the Mugen CF-48's as a factory option for the fourth gen. I knew that the pre 87's were offered with some Mugen goodies but this little piece of Honda literature gave me a valid excuse to go MUGEN WHORE again while still maintaining the factory look.
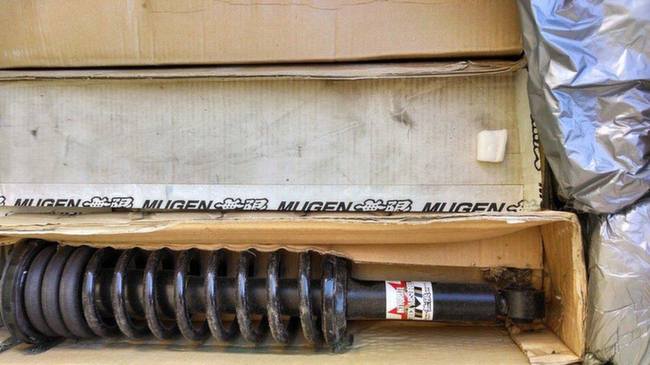
I managed to secure a set of crusty 14" CF-48's with aero discs and preceded to restore them. I have been keeping in touch with a few owners of the Mugen EF exhausts over the years in the event that they may want to part ways with it. Eventually I got a taker and finally brought home my current exhaust. Soon after I decided to give Scott Zellner a call at King Motorsports to discuss the Mugen spring rates offered with the sports suspension. After chatting with him for almost an hour he informed me he had two new sets of the old Mugen suspension still in stock. I could not believe that after all these years they were still around. I quickly purchased both new sets.
I could not be happier with how everything turned out for this build. I now have a true time machine that to me represents what Honda of North America was all about.
You can also follow the car's progress on Facebook. I created a page specifically for it here:
https://www.facebook.com/civic.si.944?tsid=0.7764118500053883&source=typeahead
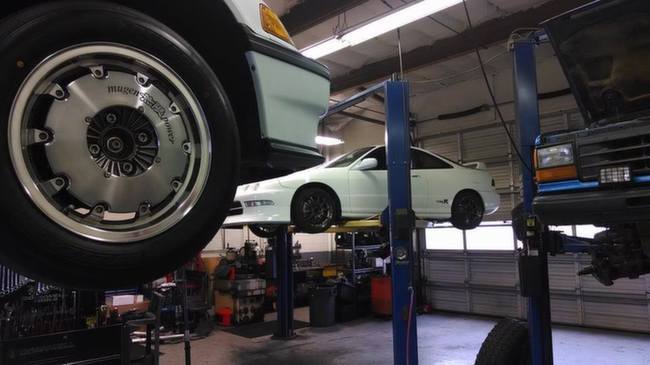
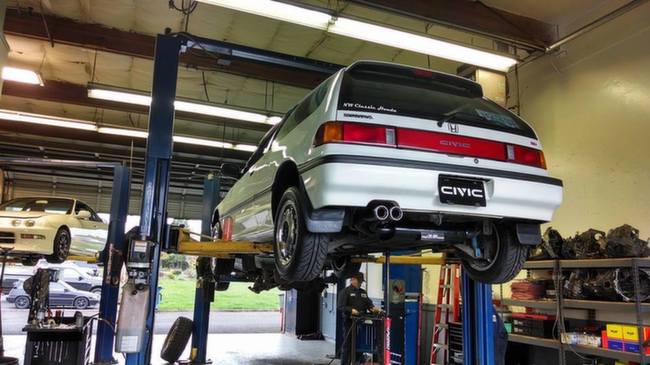
***
Here are pictures Travis shared with us from his build! Thanks Travis, we can't wait to see what you do with it next!